Exploring VPC Networking in AWS
This is a tutorial for a class I’m teaching right now.
Amazon’s documentation of Virtual Private Clouds (VPC) is excellent. It is in-depth, and covers many use cases. It’s too complicated for the class I’m teaching though.
This tutorial will cover the topic of creating Internet-accessible and non-Internet-accessible EC2 instances within the same VPC, by hand within the AWS Console. At the end we’ll have one Internet-accessible Linux box which will be able to talk to a second, non-Internet-accessible Linux box. The instances will be accessible on ports 22 and 4000 from anywhere.
The steps are:
- Create a VPC
- Create private and public subnets within the VPC
- Create an Internet Gateway
- Create a routing table for the public subnet
- Create a security group
- Create one instance in each subnet
Then we’ll test them and destroy them!
Create a VPC
The first step is to create our VPC. From the VPC screen in the AWS Console click “Create VPC”. We need to specify a name and an IPv4 Classless Inter-Domain Routing (CIDR) block. Many choices are possible here - but to keep it simple use name “tutorial”, and CIDR block 10.100.105.0/24. The name simply gets set as the value for a tag with key “Name”. The CIDR block will need to be split into at least two subnets later. For that we’ll use 10.100.105.0/26 as the public subnet, and 10.100.105.64/26 as the private.
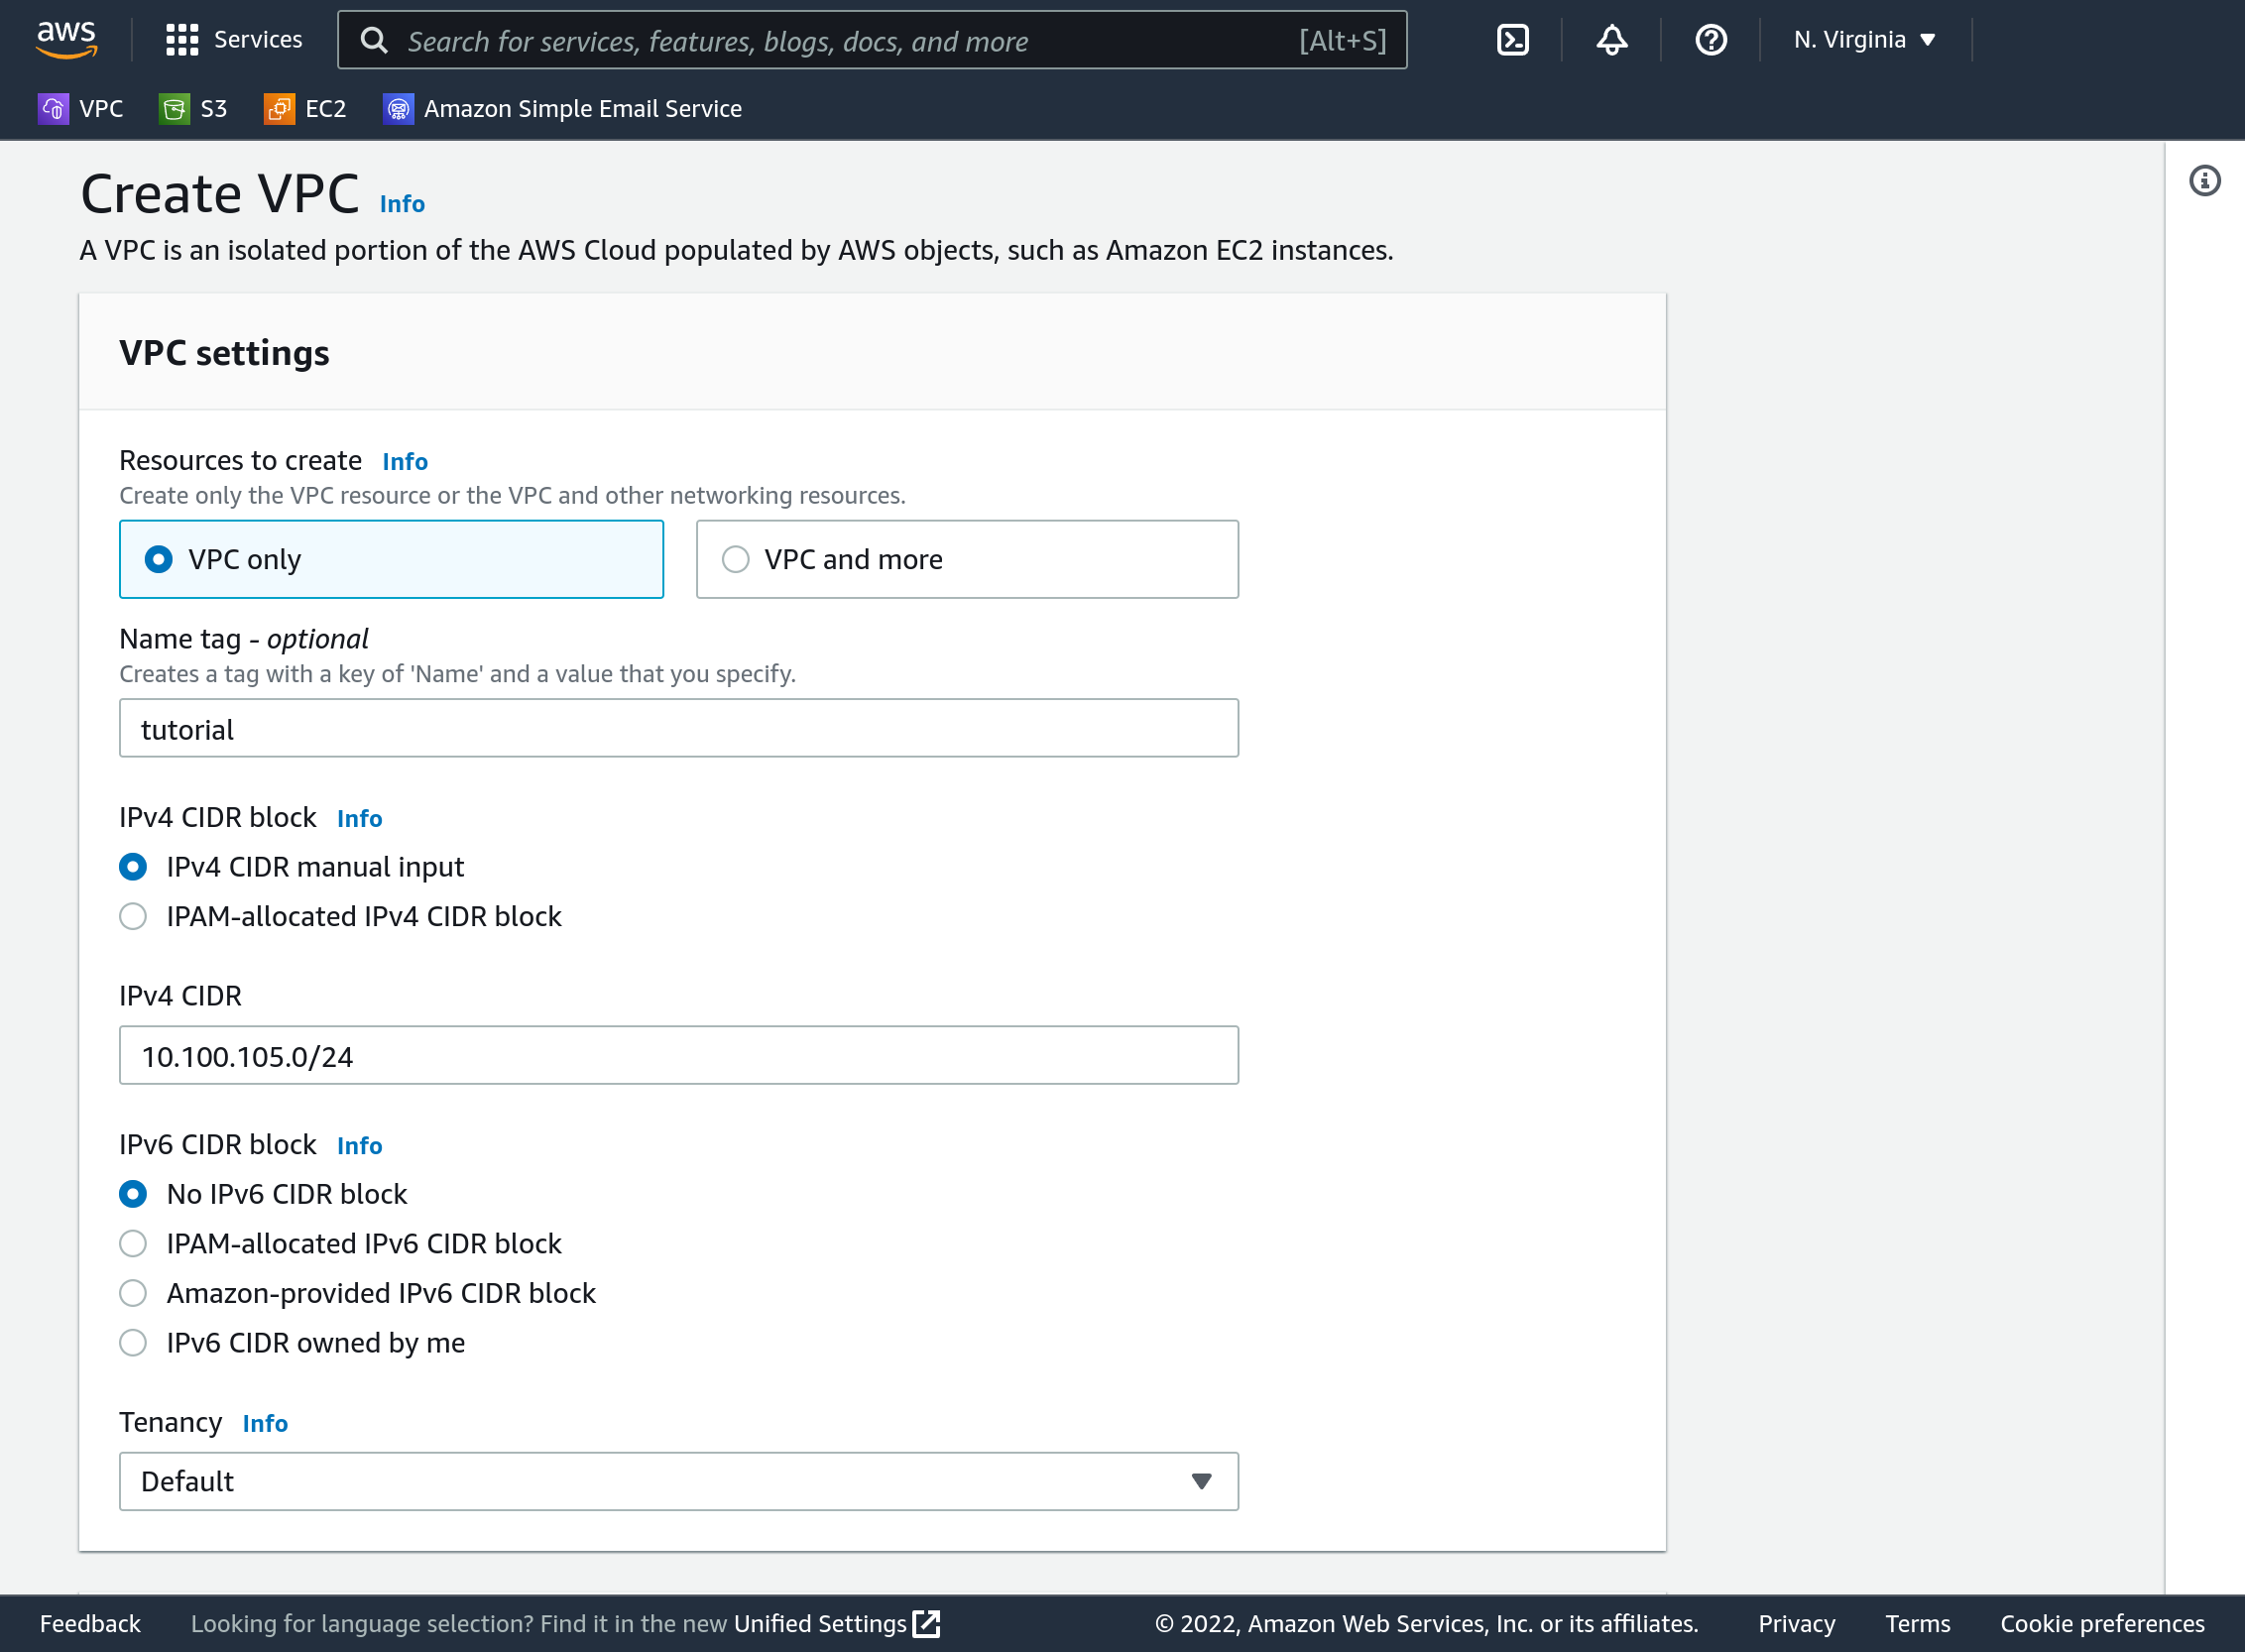
Click “Create VPC” down towards the bottom.
Where did our public and private subnet addresses come from? Well, if you remember how CIDR works, the piece after the / is the number of bits that make up the “network” part of the address. So, in our full VPC CIDR block 10.100.105. is the portion that makes up the network address, and there are 256 possible ways to complete that for hosts/components. That seems like plenty. There must be at least two subnets at the end, so I chose to make four subnets by dividing those 256 addresses into four parts of 64. Four subnets can come from an additional two network bits, so the two subnets need to have 26 bits of network address, and start at 0, 64, 128, and 196.
A VPC basically acts like a private network for a set of services including EC2 instances. By default, services can all speak to each other on the private network.
Create private and public subnets within the VPC
On the Console’s sidebar select “Subnets”. Click “Create Subnet”. Select your VPC (it will say “tutorial” next to its name). For the first subnet enter a name of “tutorial_public”, and specify a CIDR block of 10.100.105.0/26. Click “Add new subnet” near the bottom left, and enter a name of “tutorial_private” and CIDR 10.100.105.64/26.
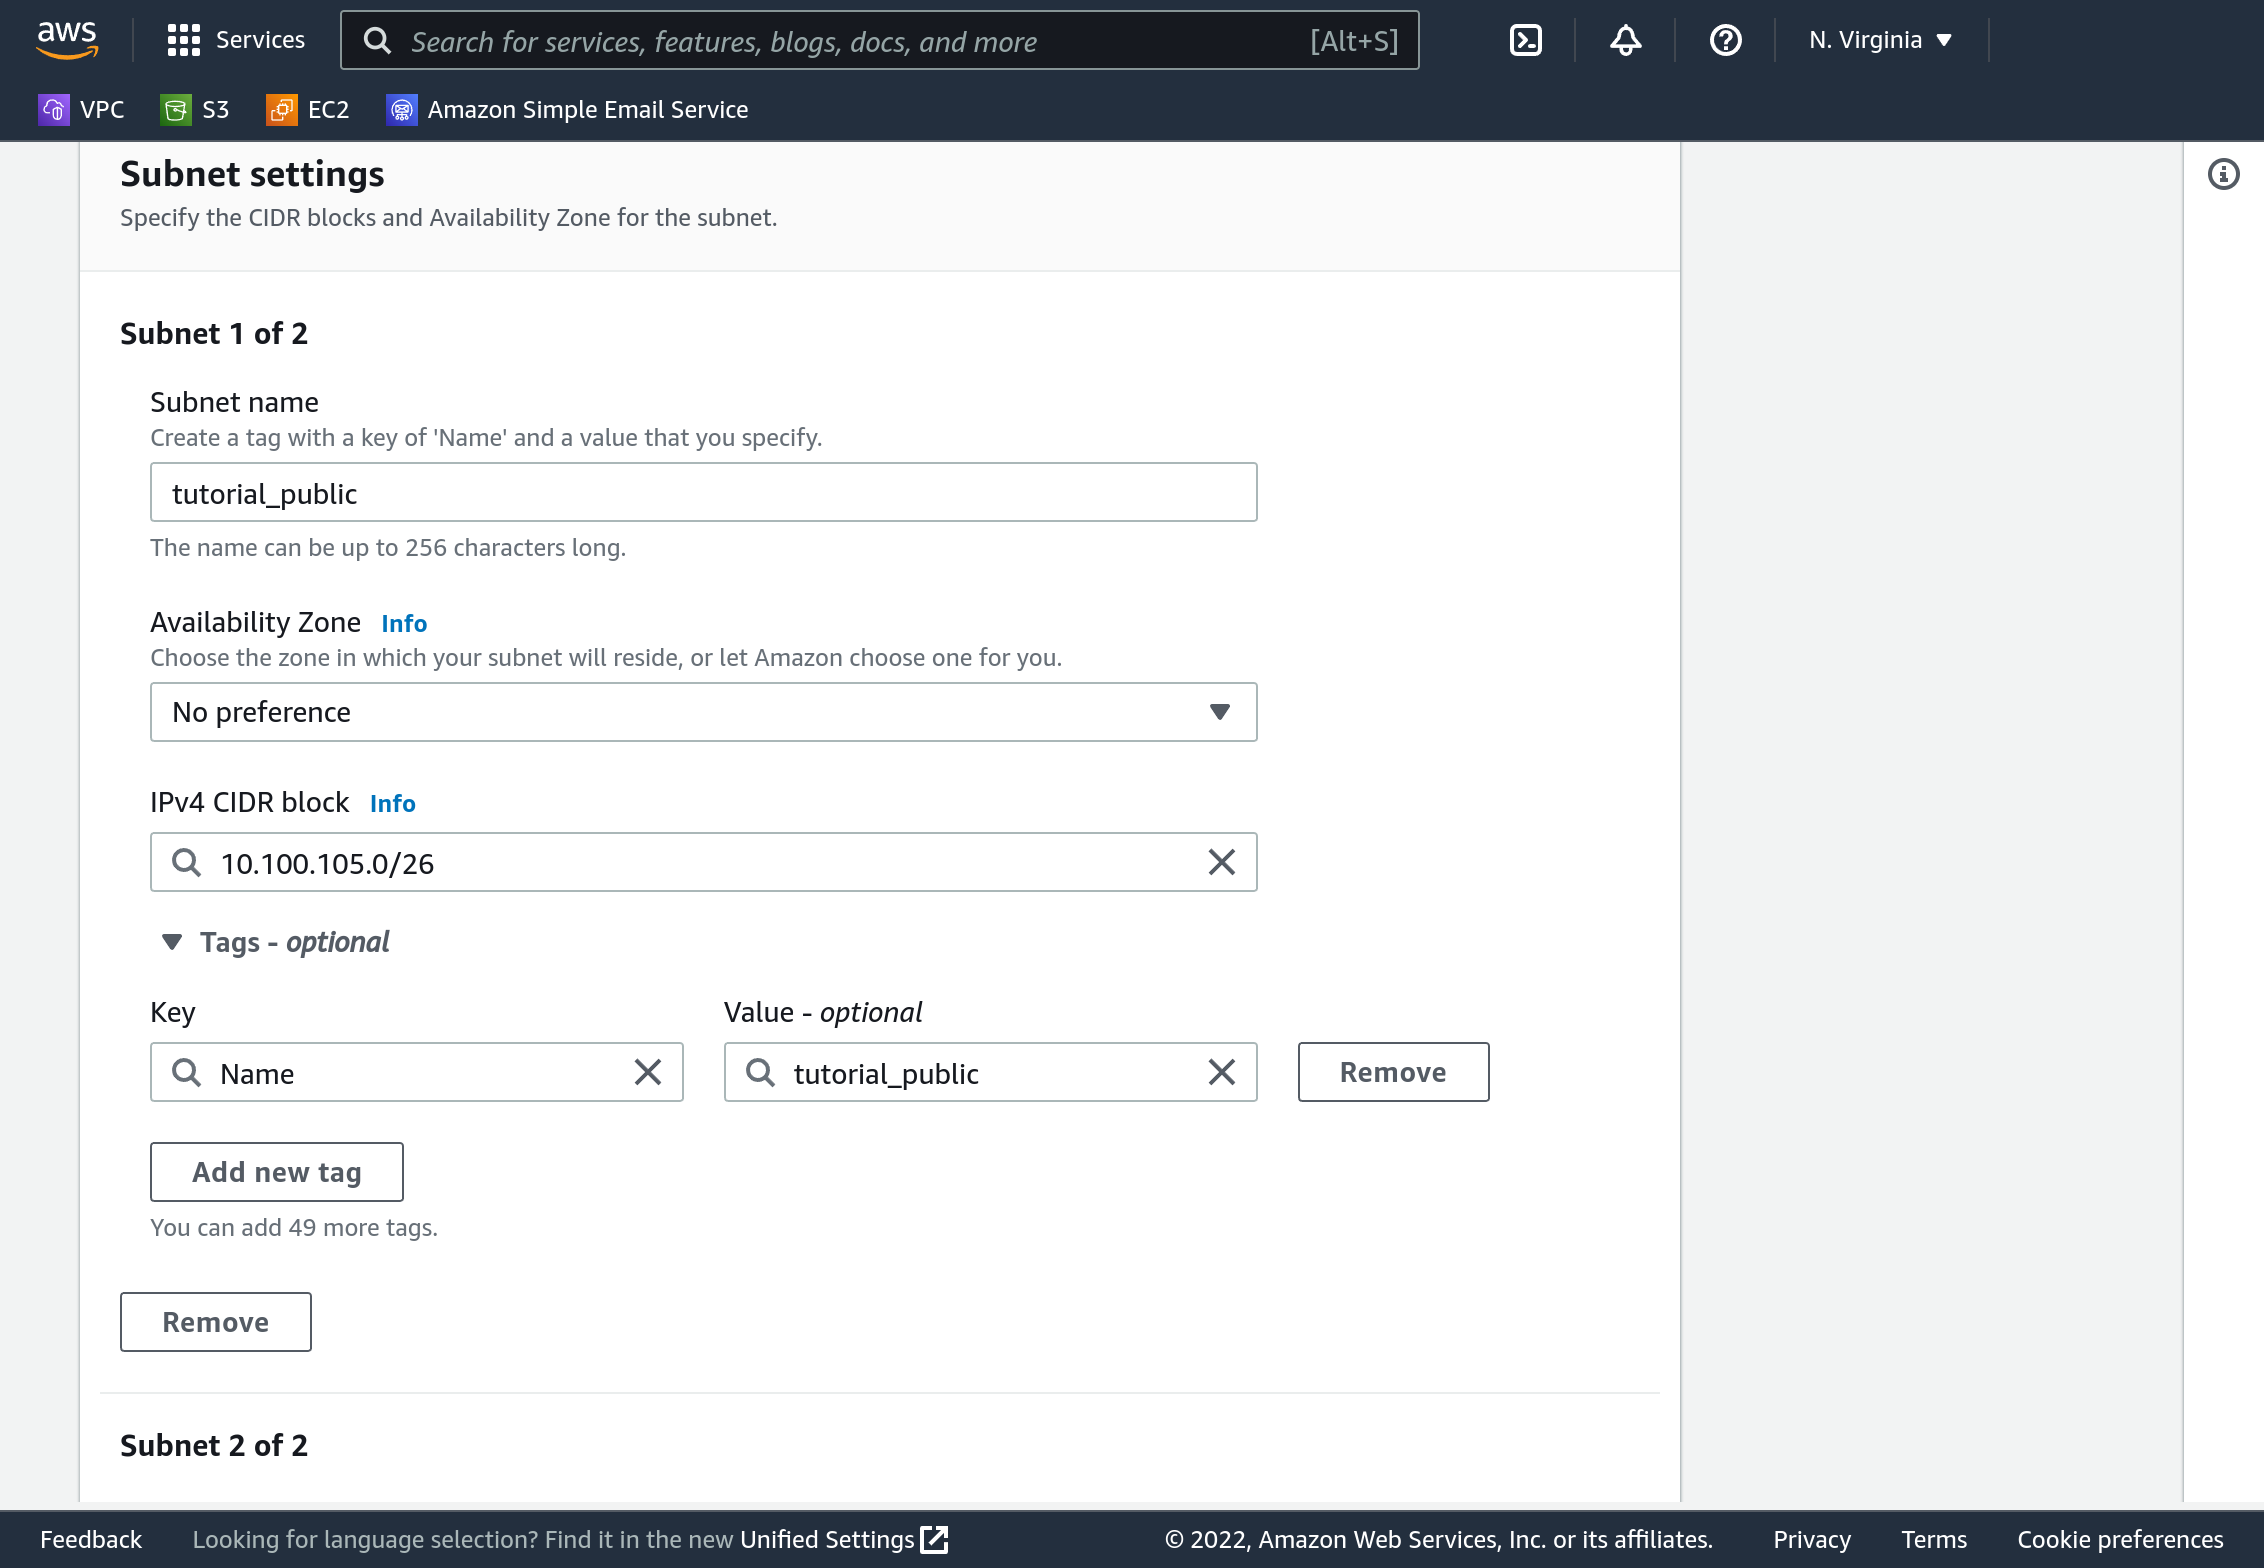
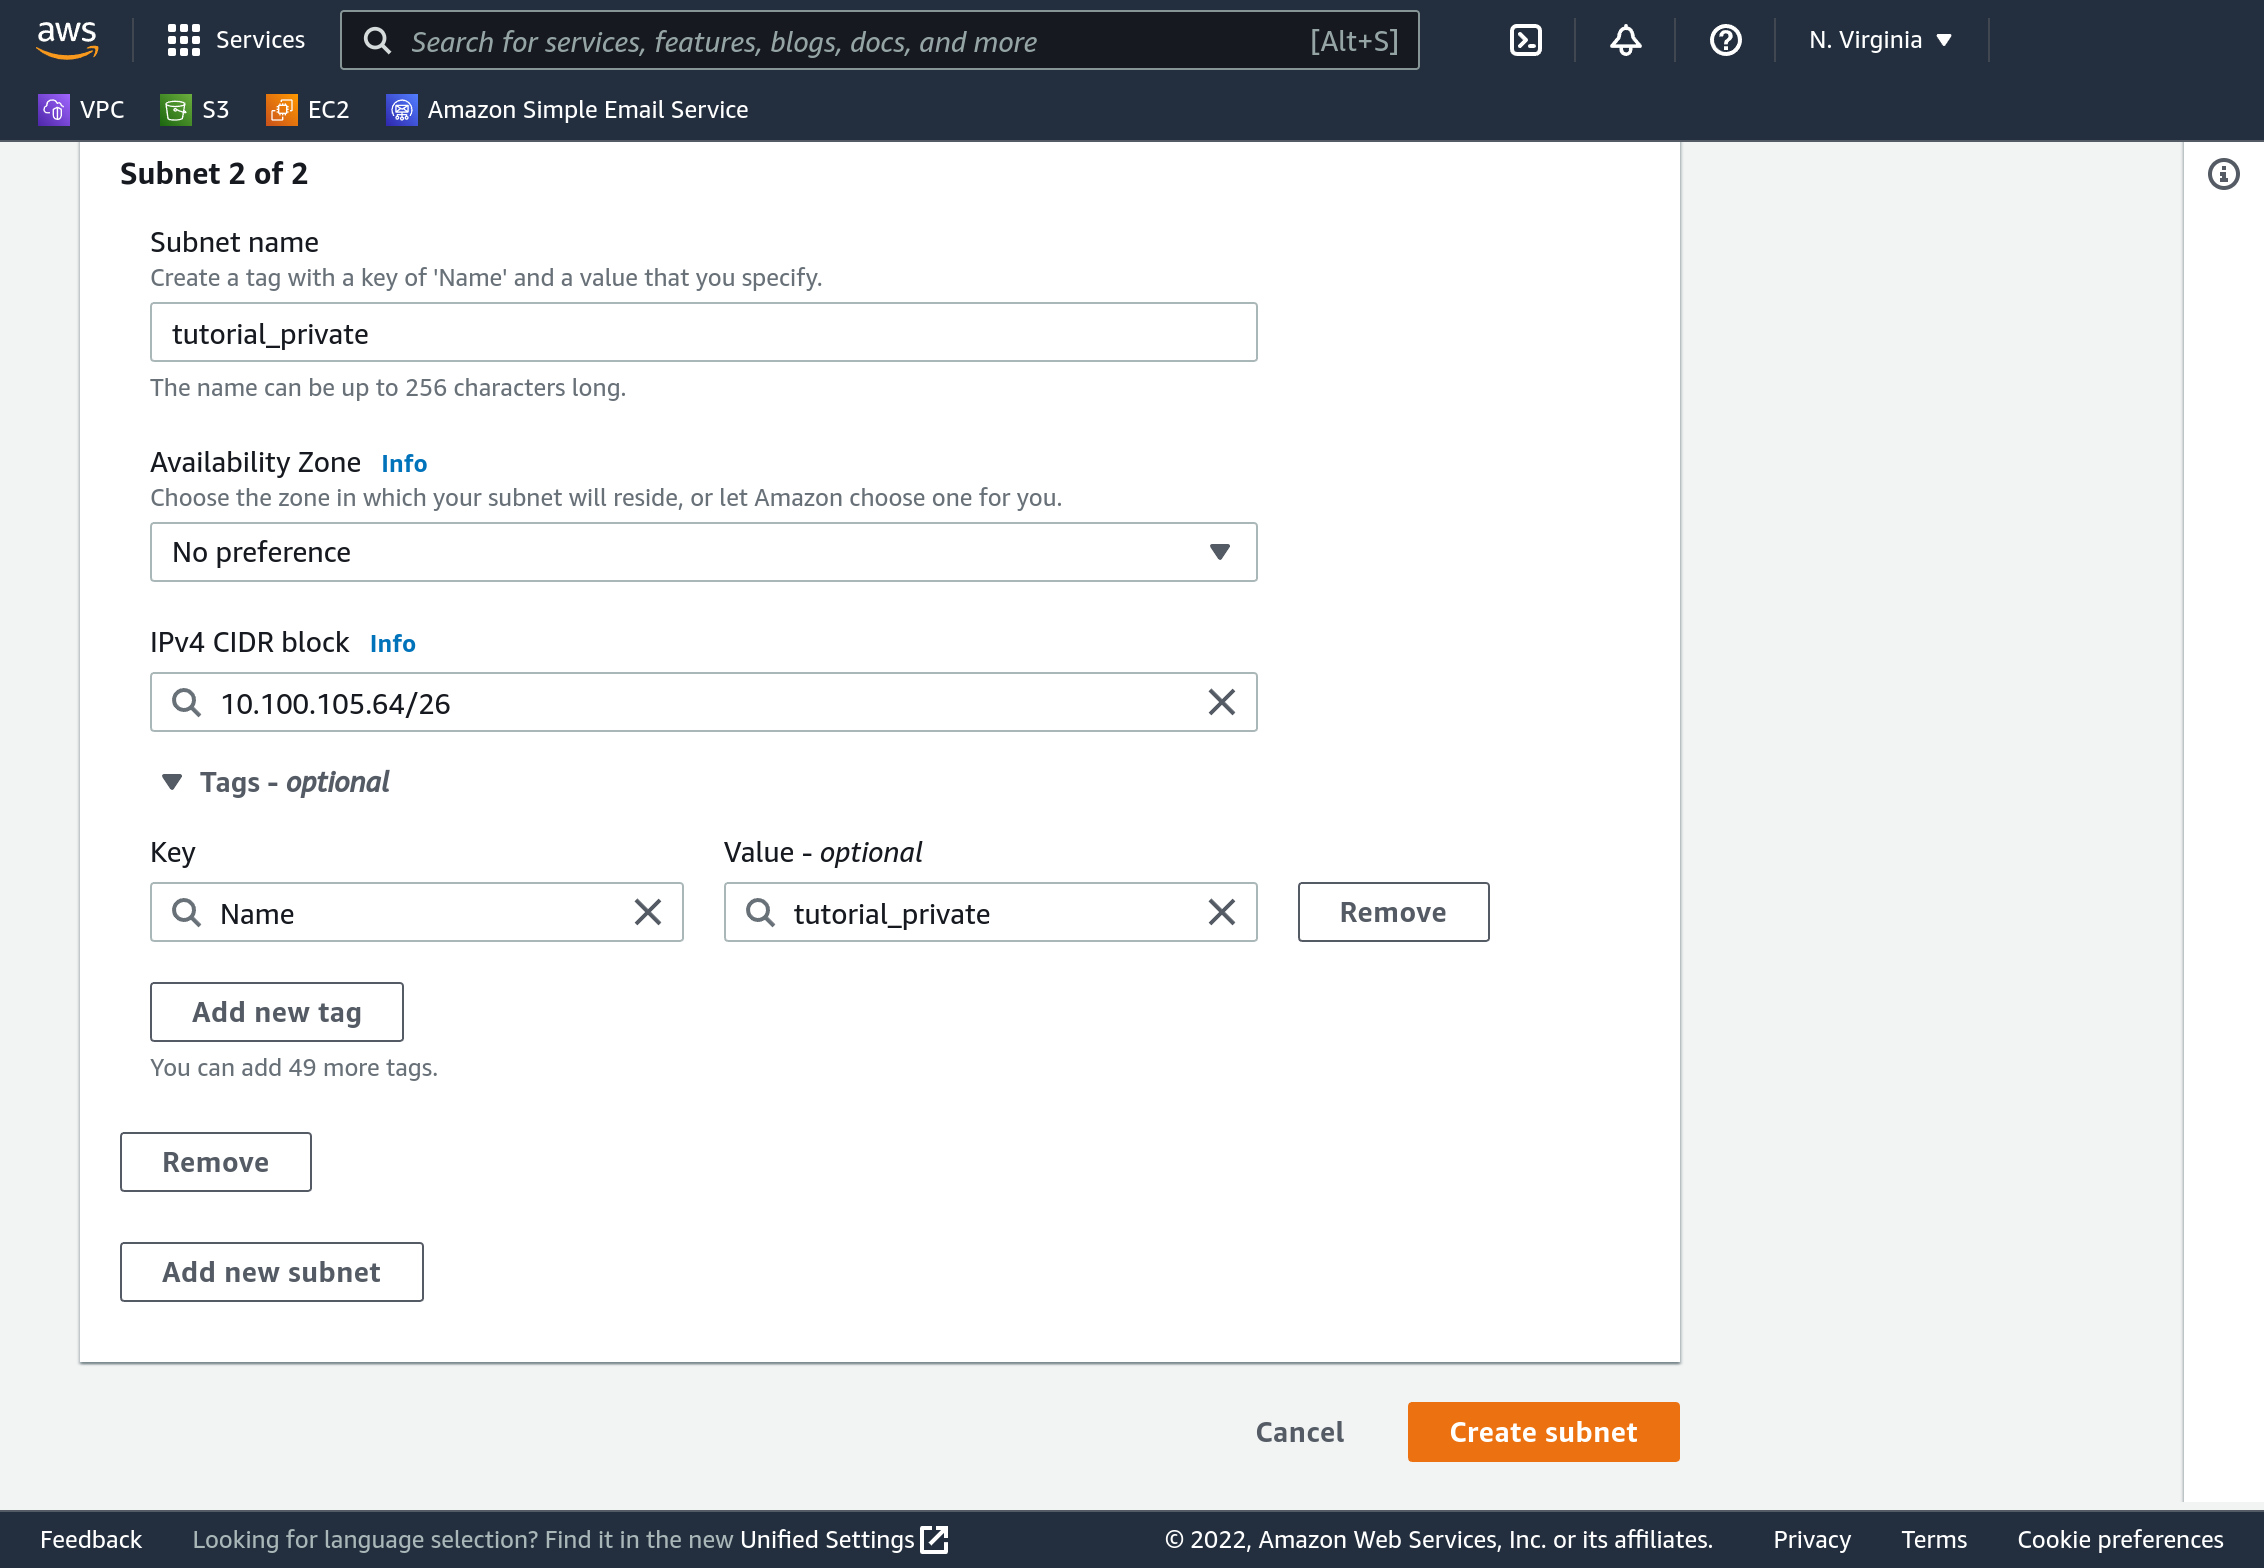
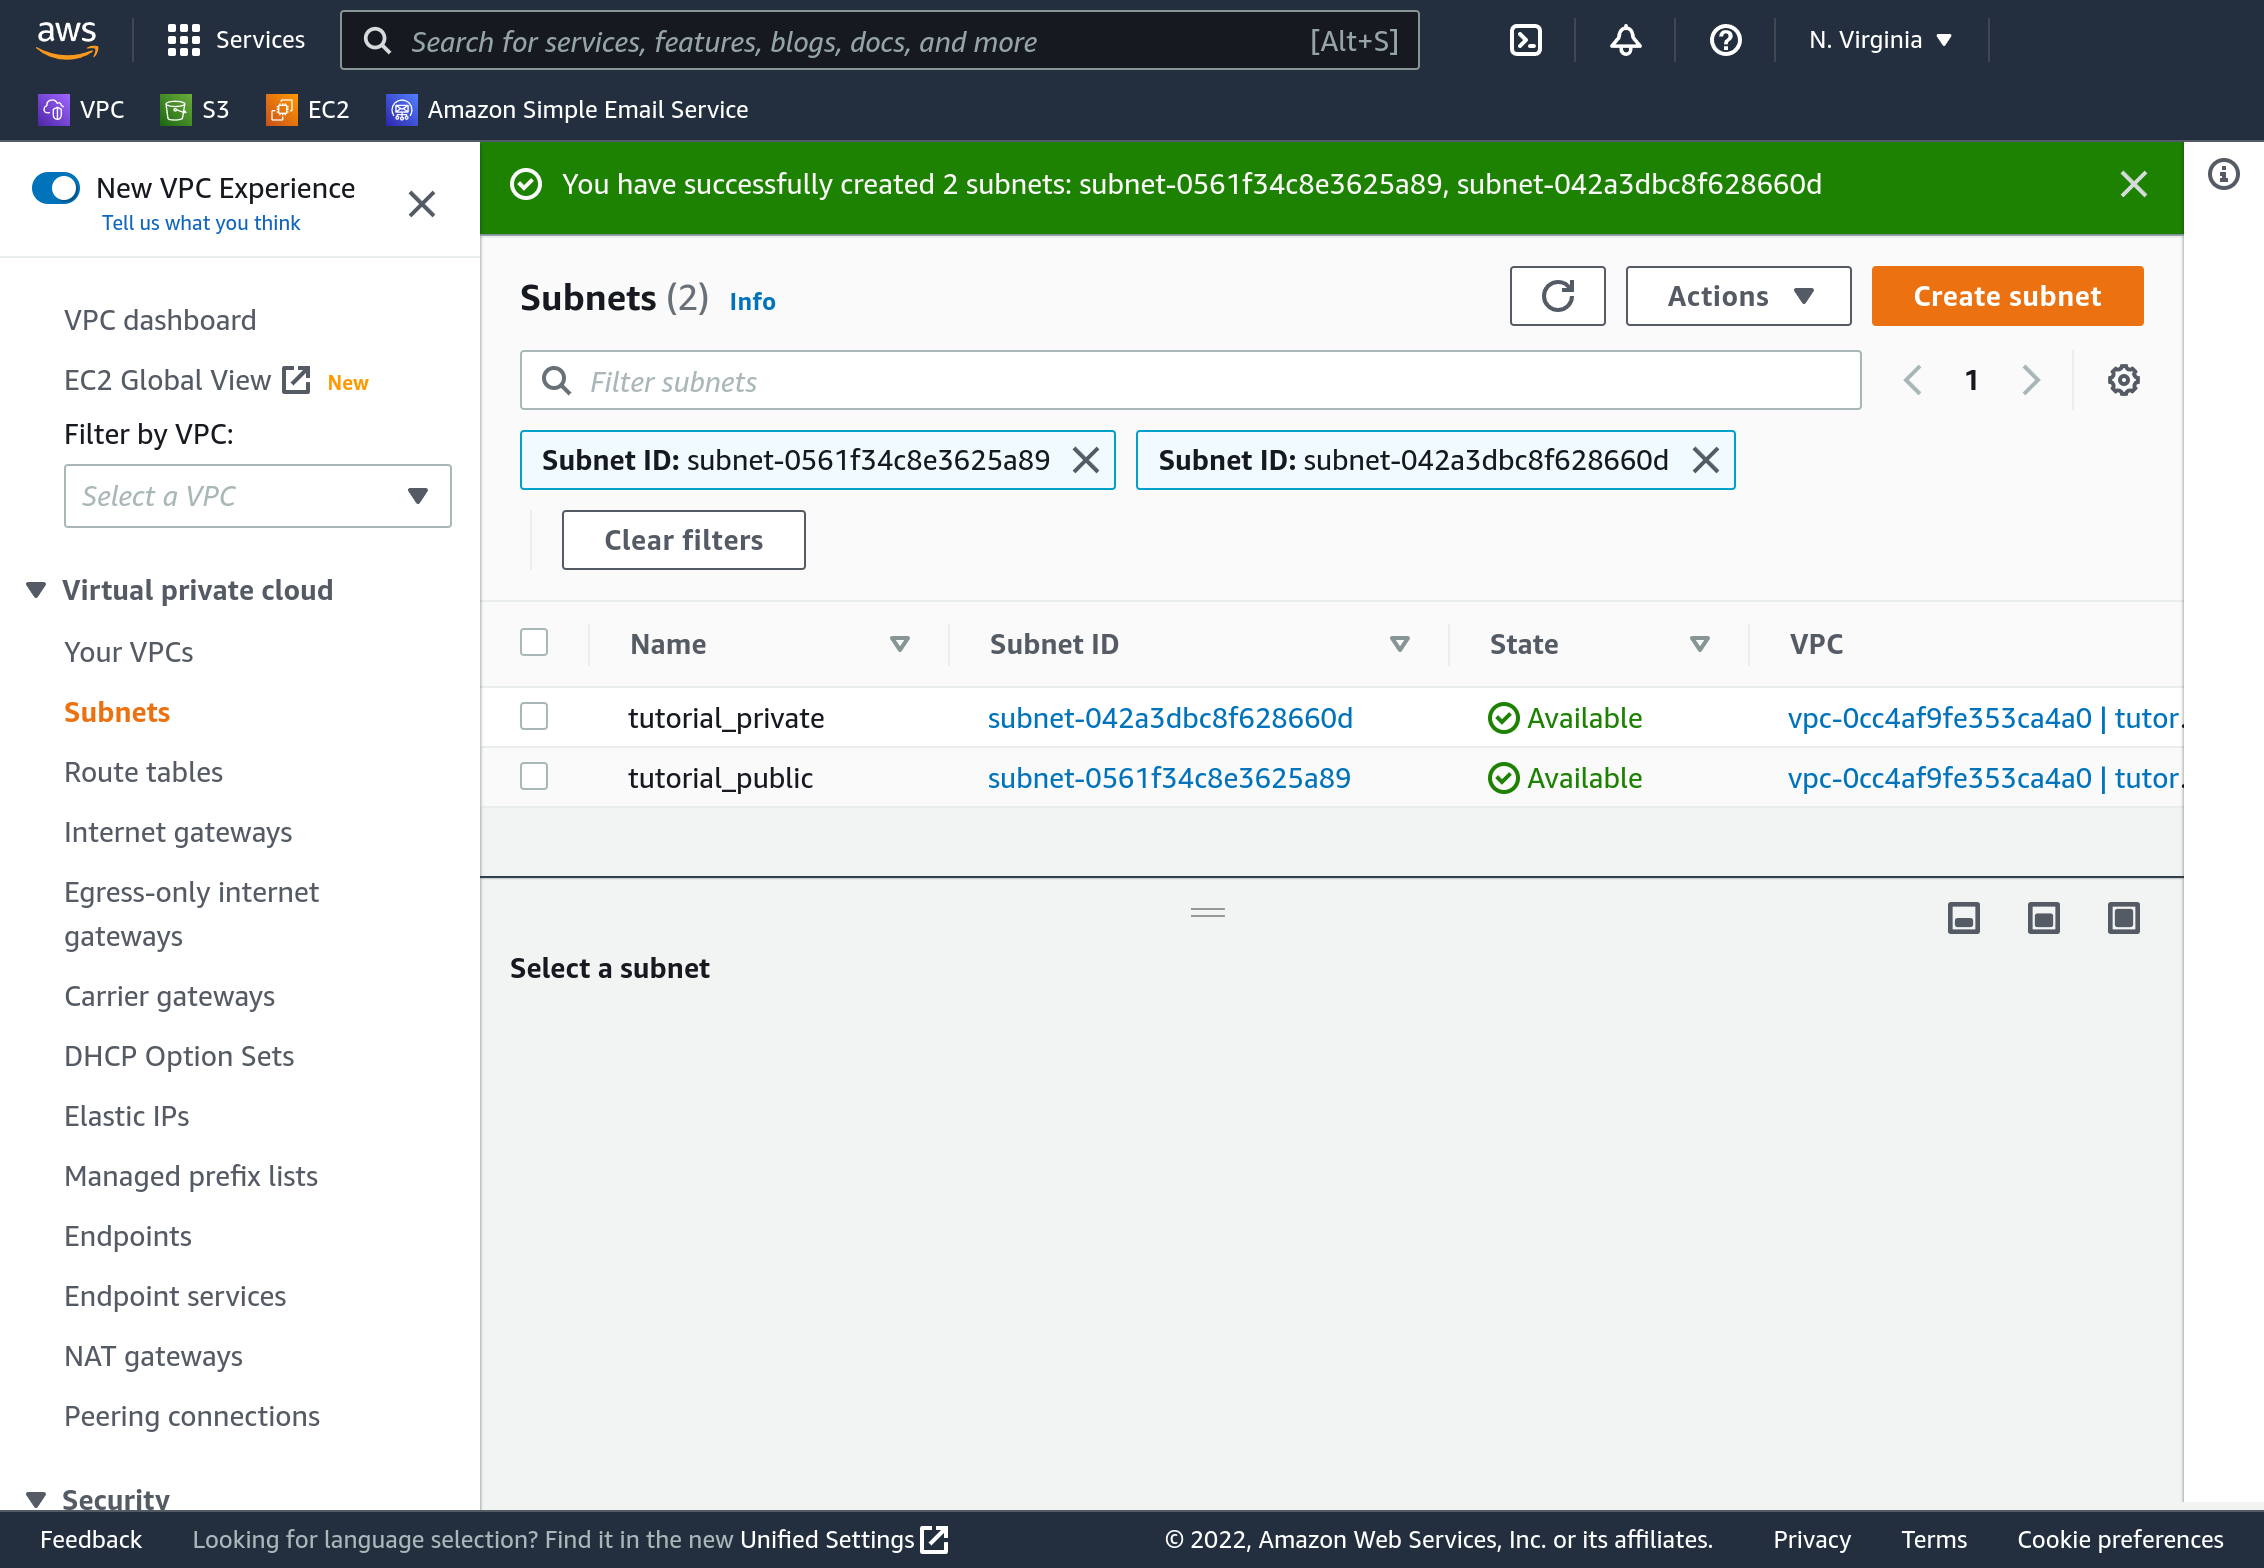
Click “Create Subnet”. Your completed subnets should be visible in the dashboard.
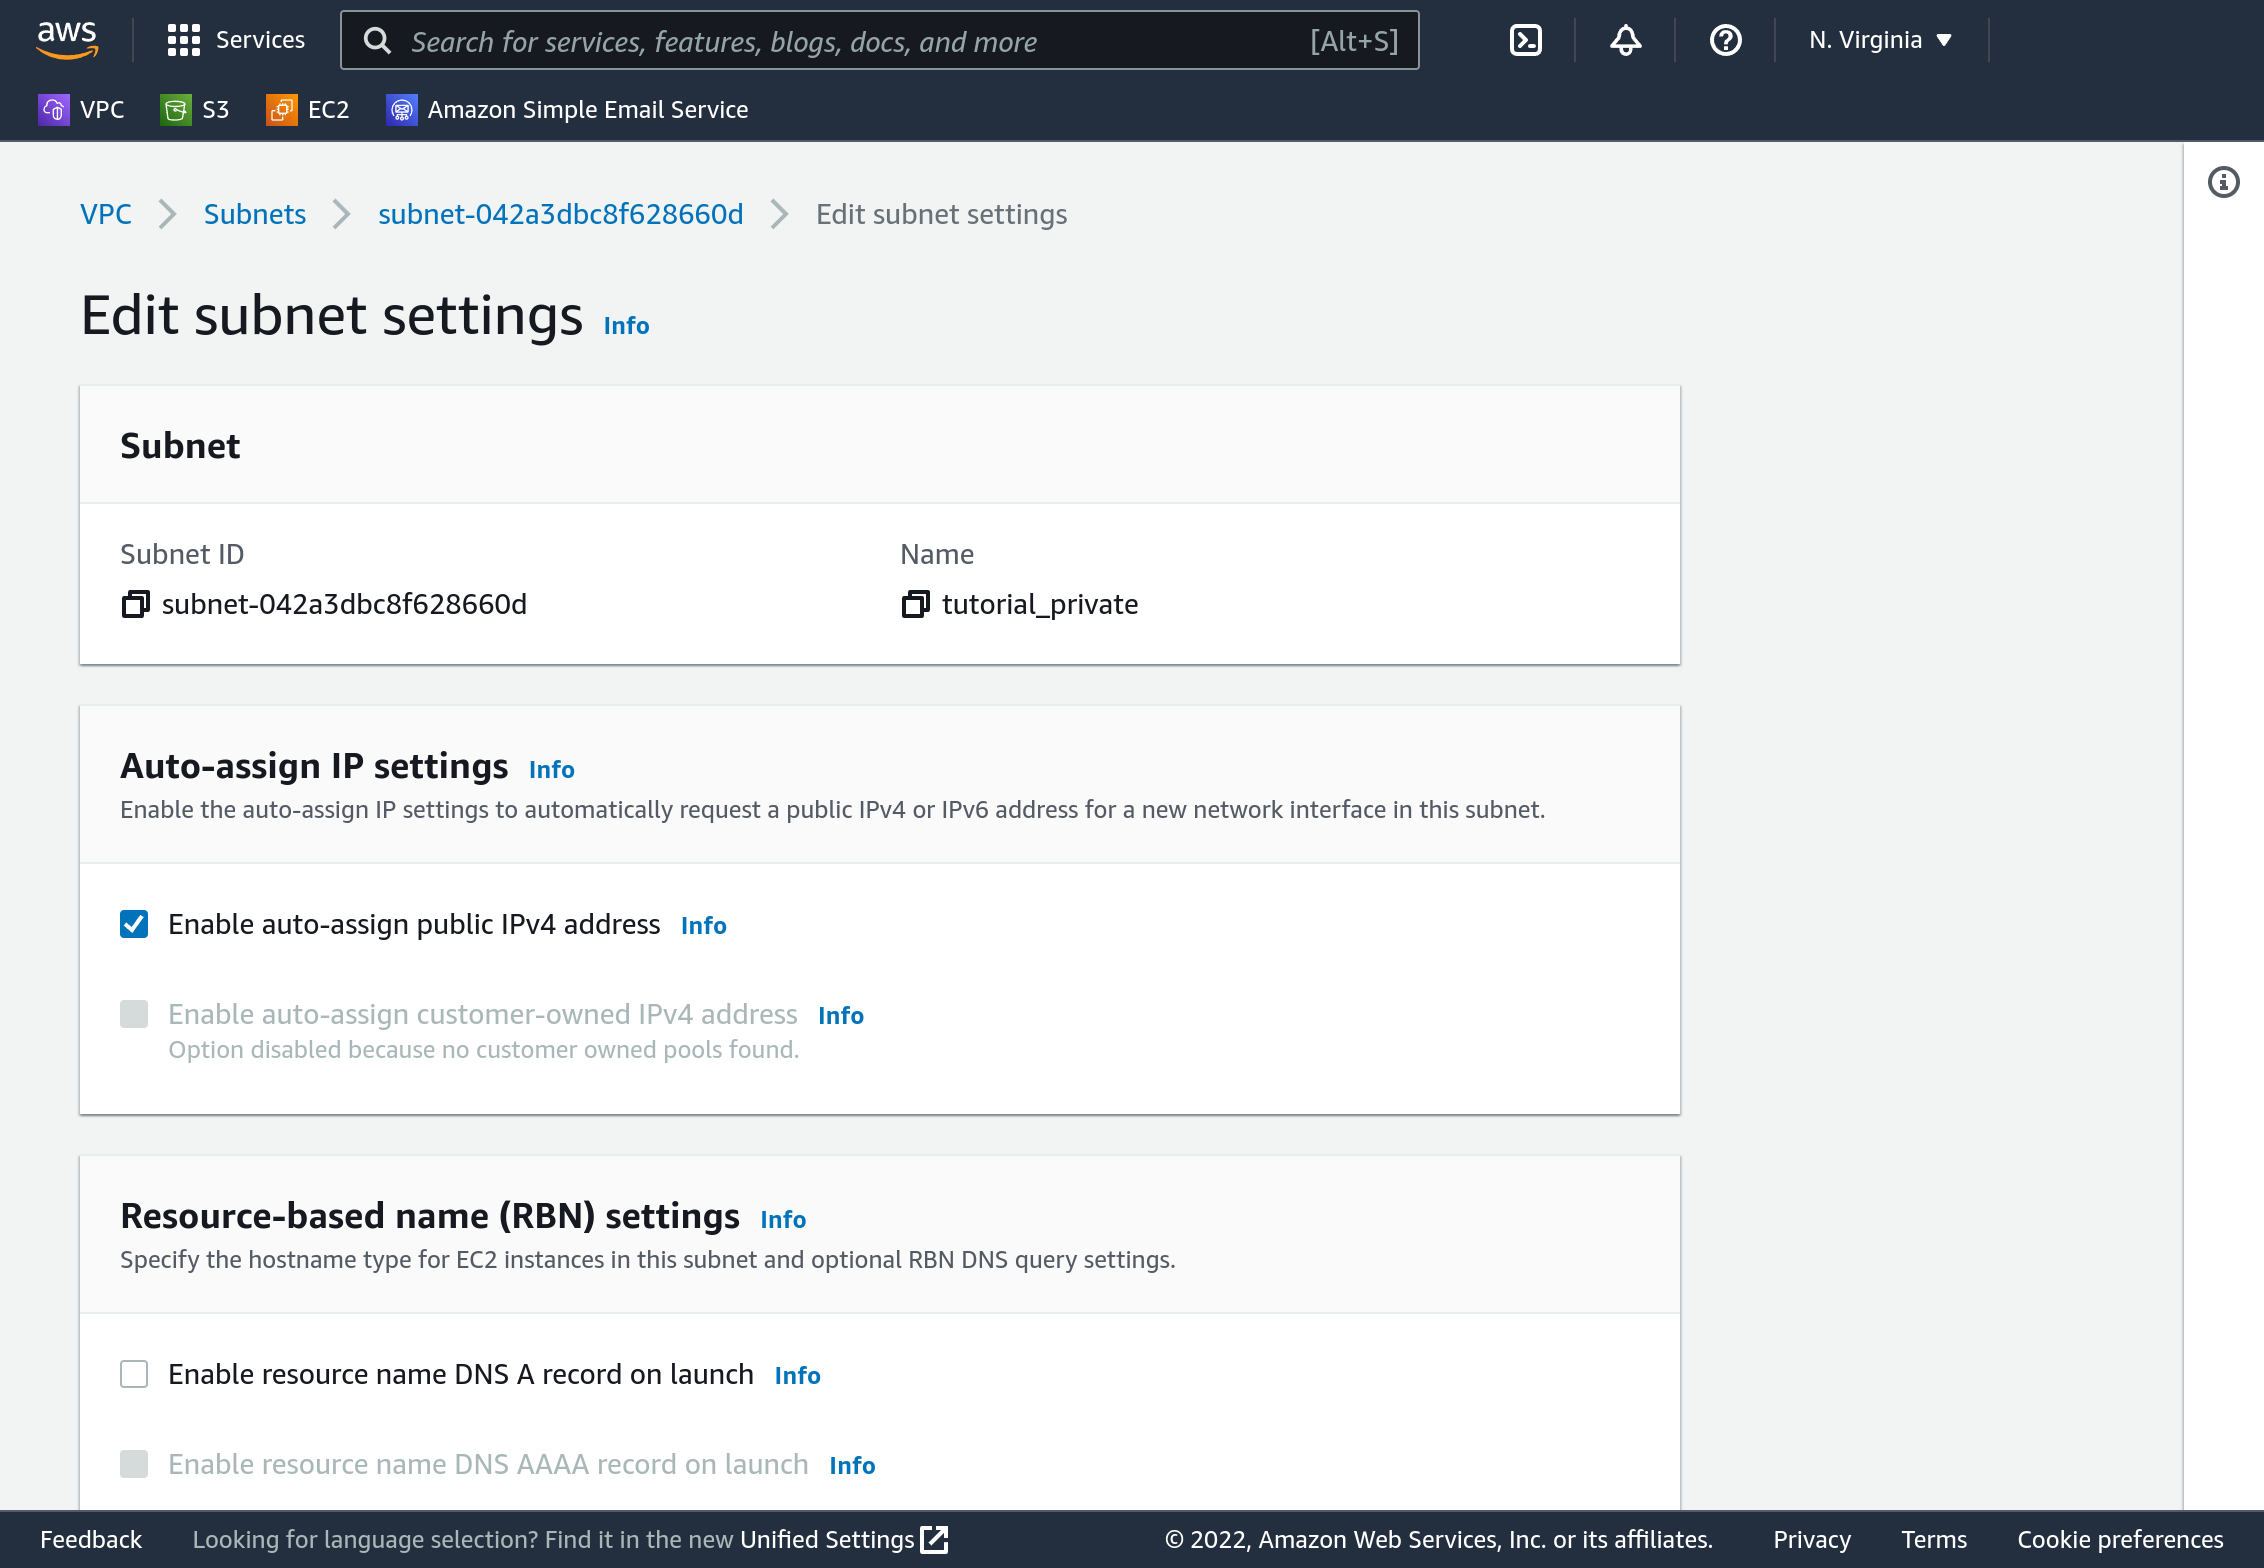
Select one of the subnets, and click “Actions”, then “Edit subnet settings”. Check the “Enable auto-assign public IPv4 address” box. Save it.
Do the same for the other subnet.
Create an Internet Gateway (IGW)
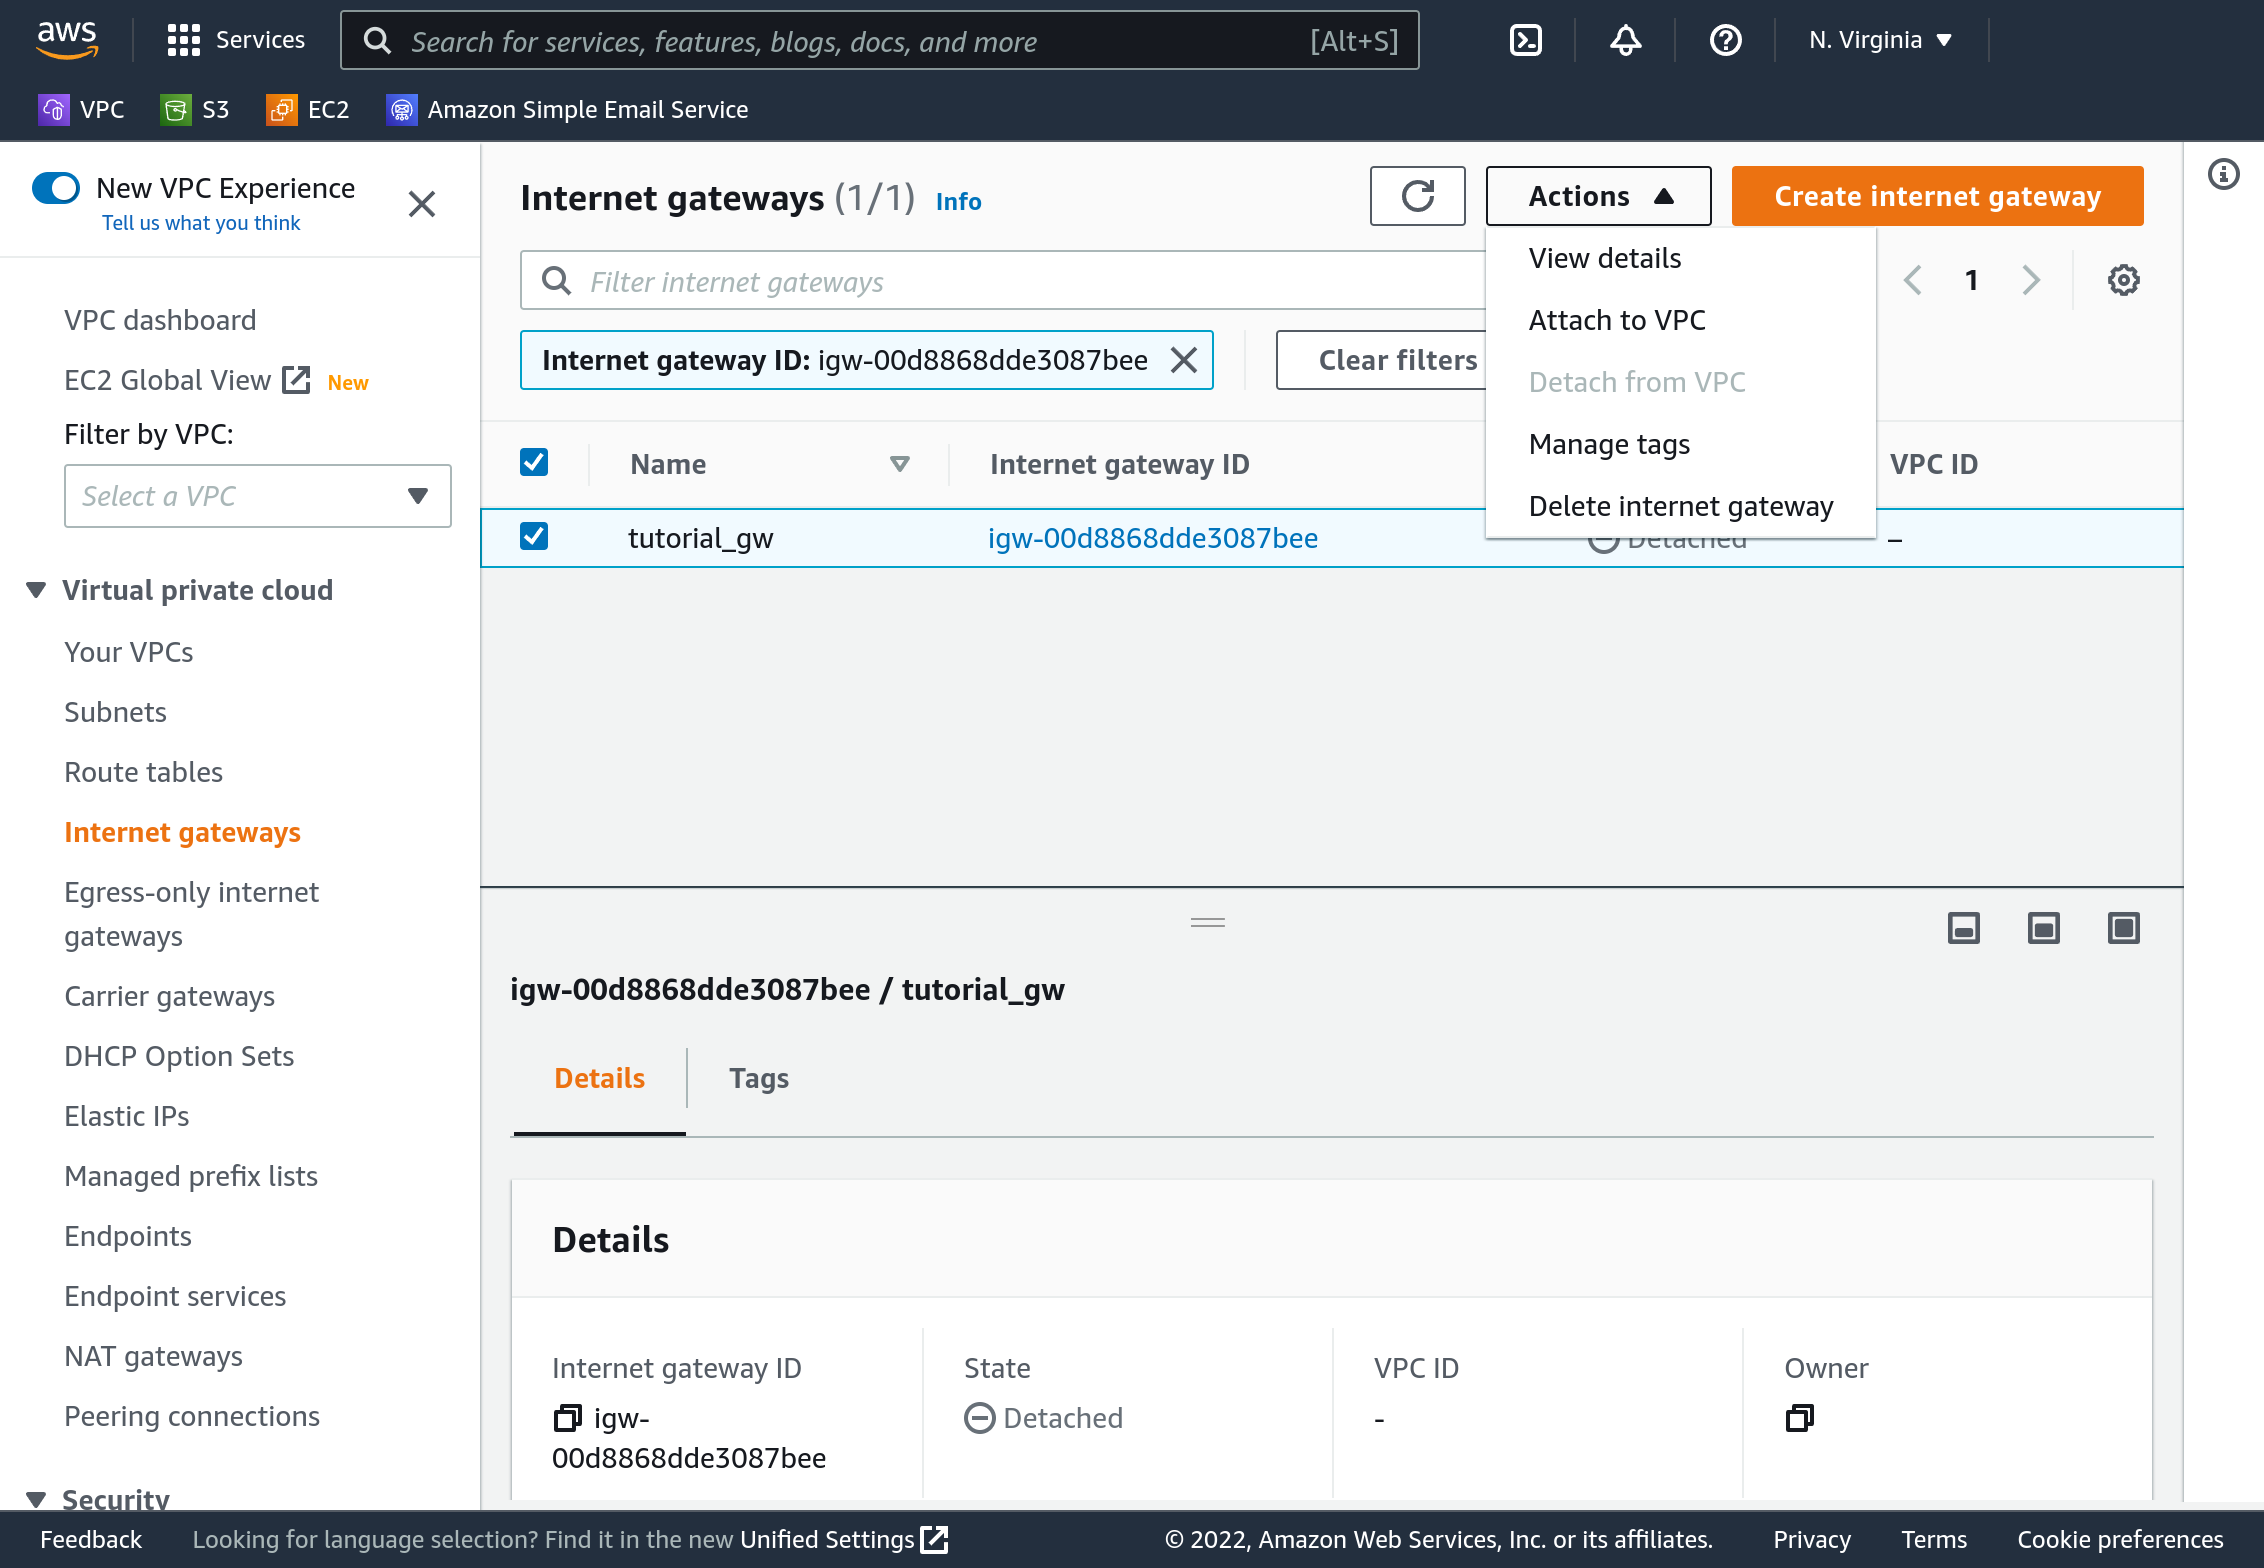
On the Console’s sidebar select “Internet gateways”. Click “Create internet gateway”. Specify the name “tutorial_gw”. Click “Create internet gateway”. An Internet gateway is the basic tool with which components within a VPC can contact the Internet.
Associate the IGW with your VPC by selecting your new IGW within the IGW dashboard. Then click the “Actions” dropdown in the top right and select “Attach to VPC”. Select your new VPC in the “Available VPCs” block.
Create a routing table for the public subnet
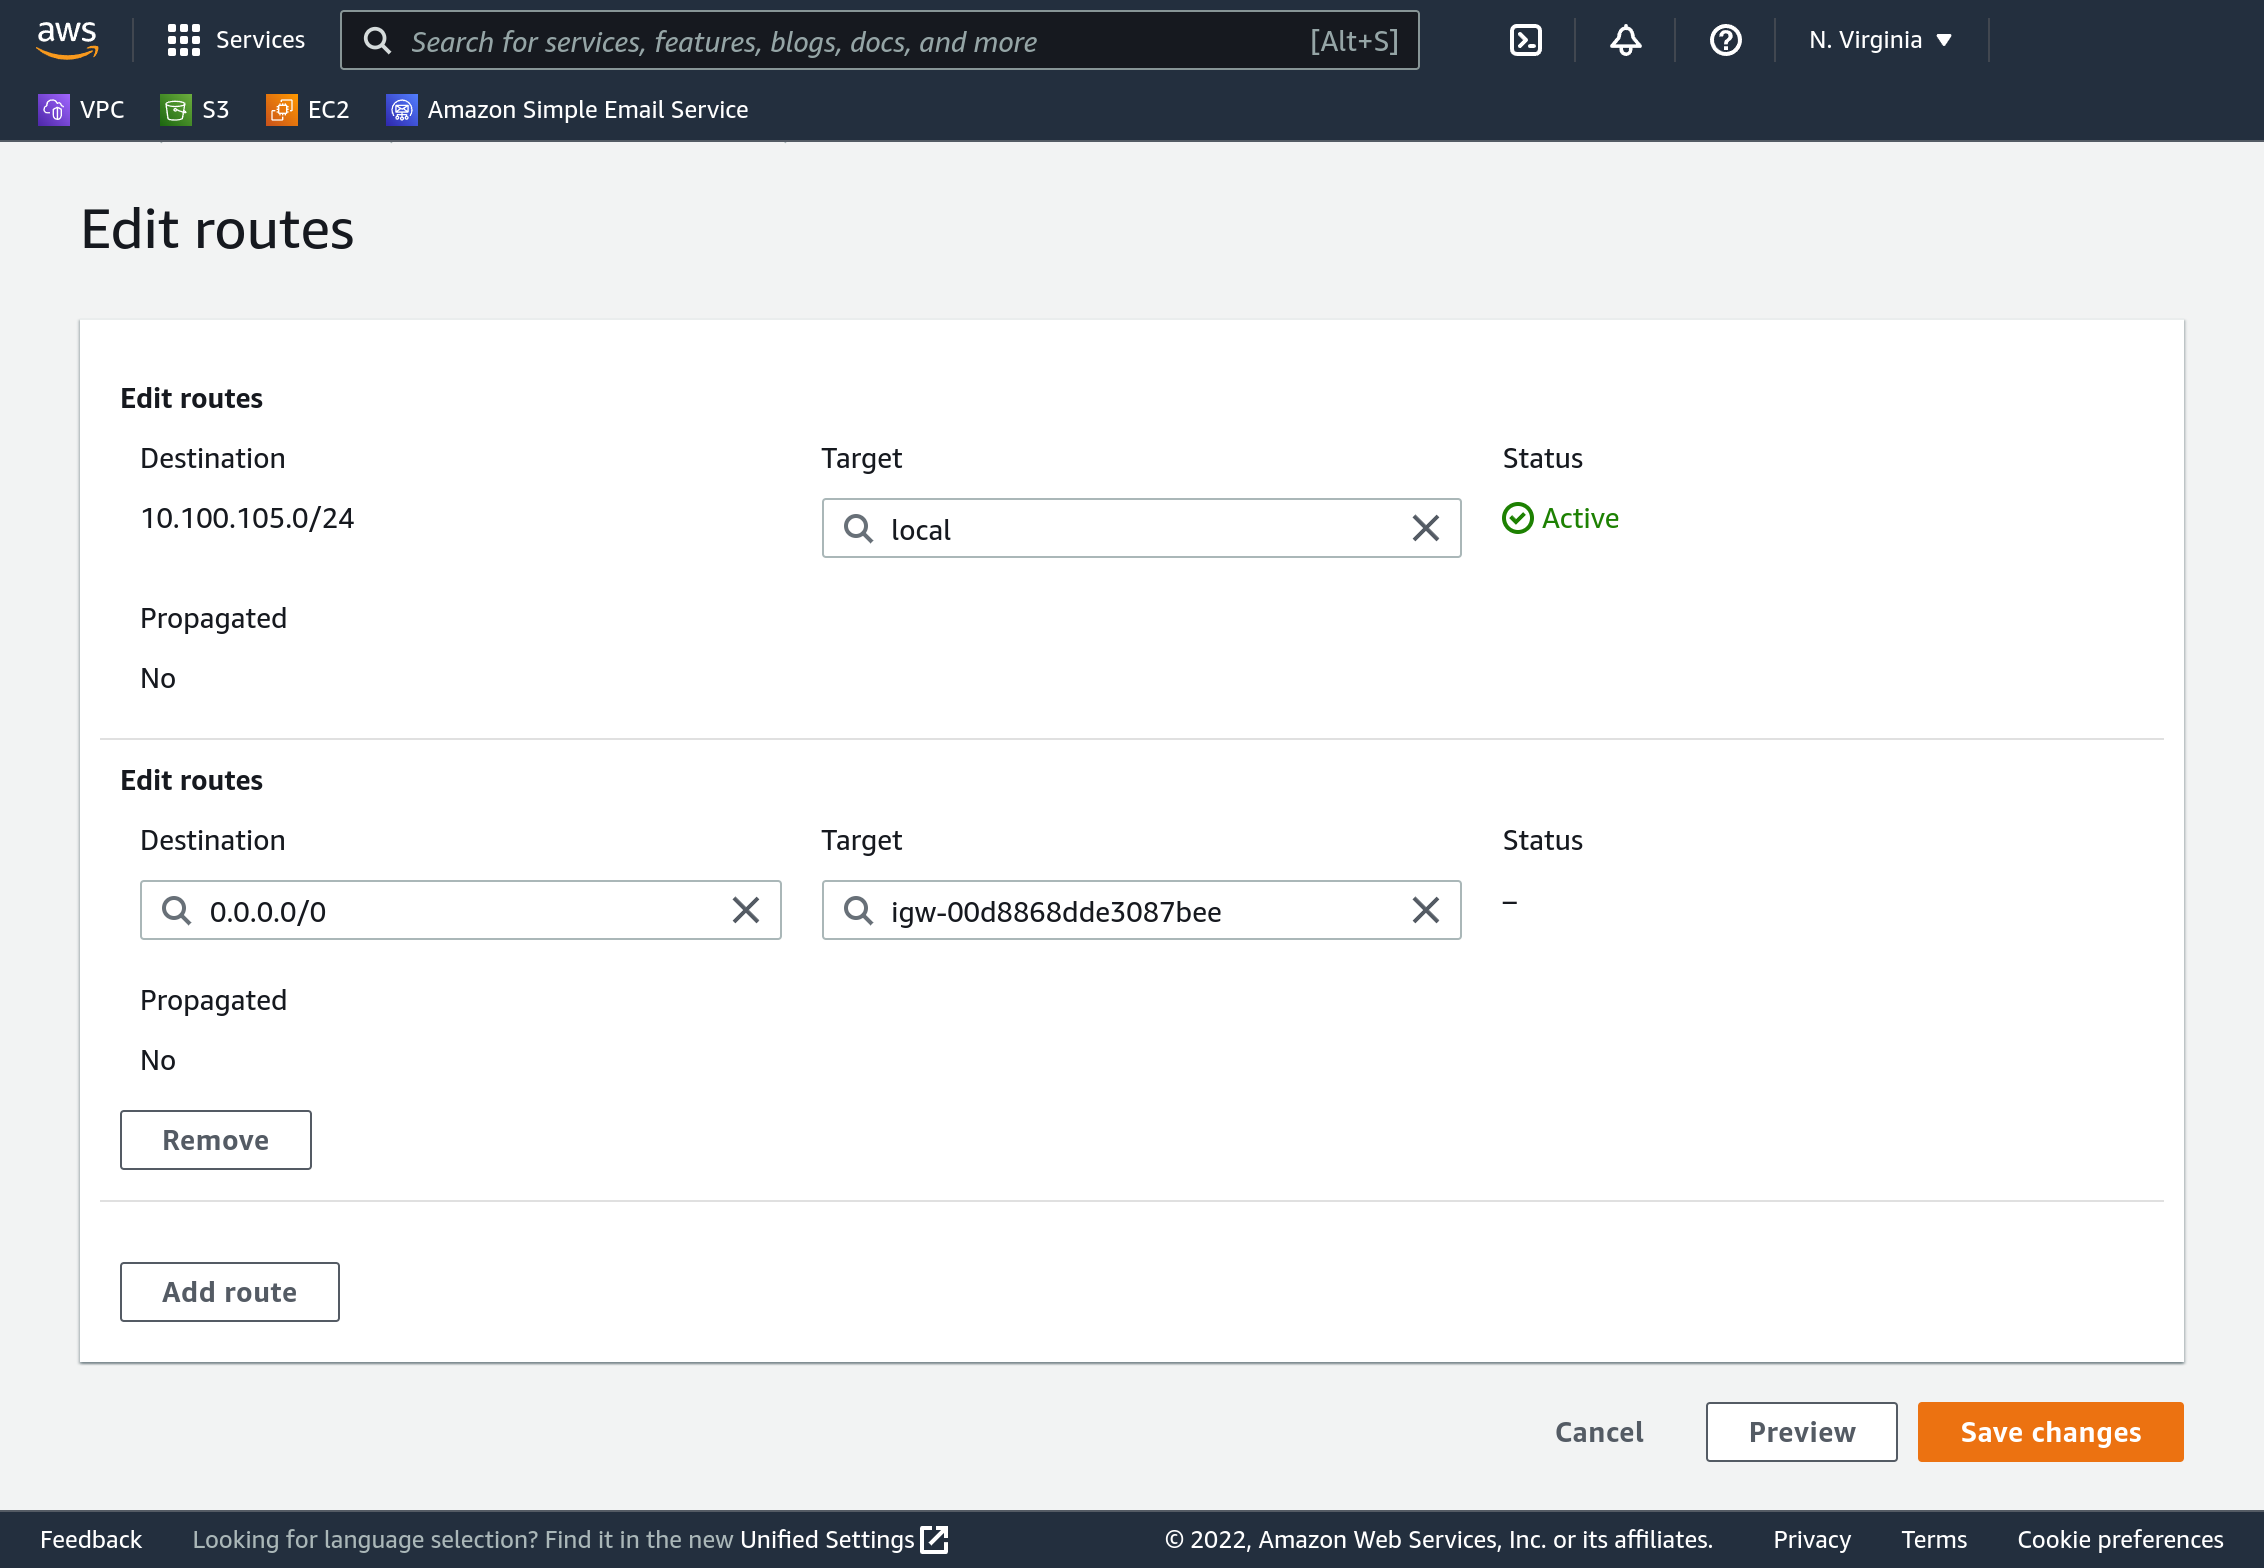
On the Console’s sidebar select “Route tables”. Click “Create route table”. Specify name “tutorial_public”, select your tutorial VPC, then click “Create route table”.
Route tables get associated with subnets, so we need to associate this route table with our public subnet. With the tutorial selected, click “Actions” in the top right, then “Edit subnet associations”. Select only our public subnet, then click “Save associations”.
We will not associate our private subnet with any route table. AWS will use a default route table for it - one that doesn’t know how to reach the Internet.

Now that our routing table is associate we need to tell it how to get to the Internet. With the routing table selected, click “Actions” then “Edit routes”. Click “Add route” on the next screen. For “destination” enter 0.0.0.0/0. For “target” select “Internet Gateway”, and it will show you a list of unassociated IGWs. Yours should be the only one on the list - select it. Then press “Save changes”.
Create a security group
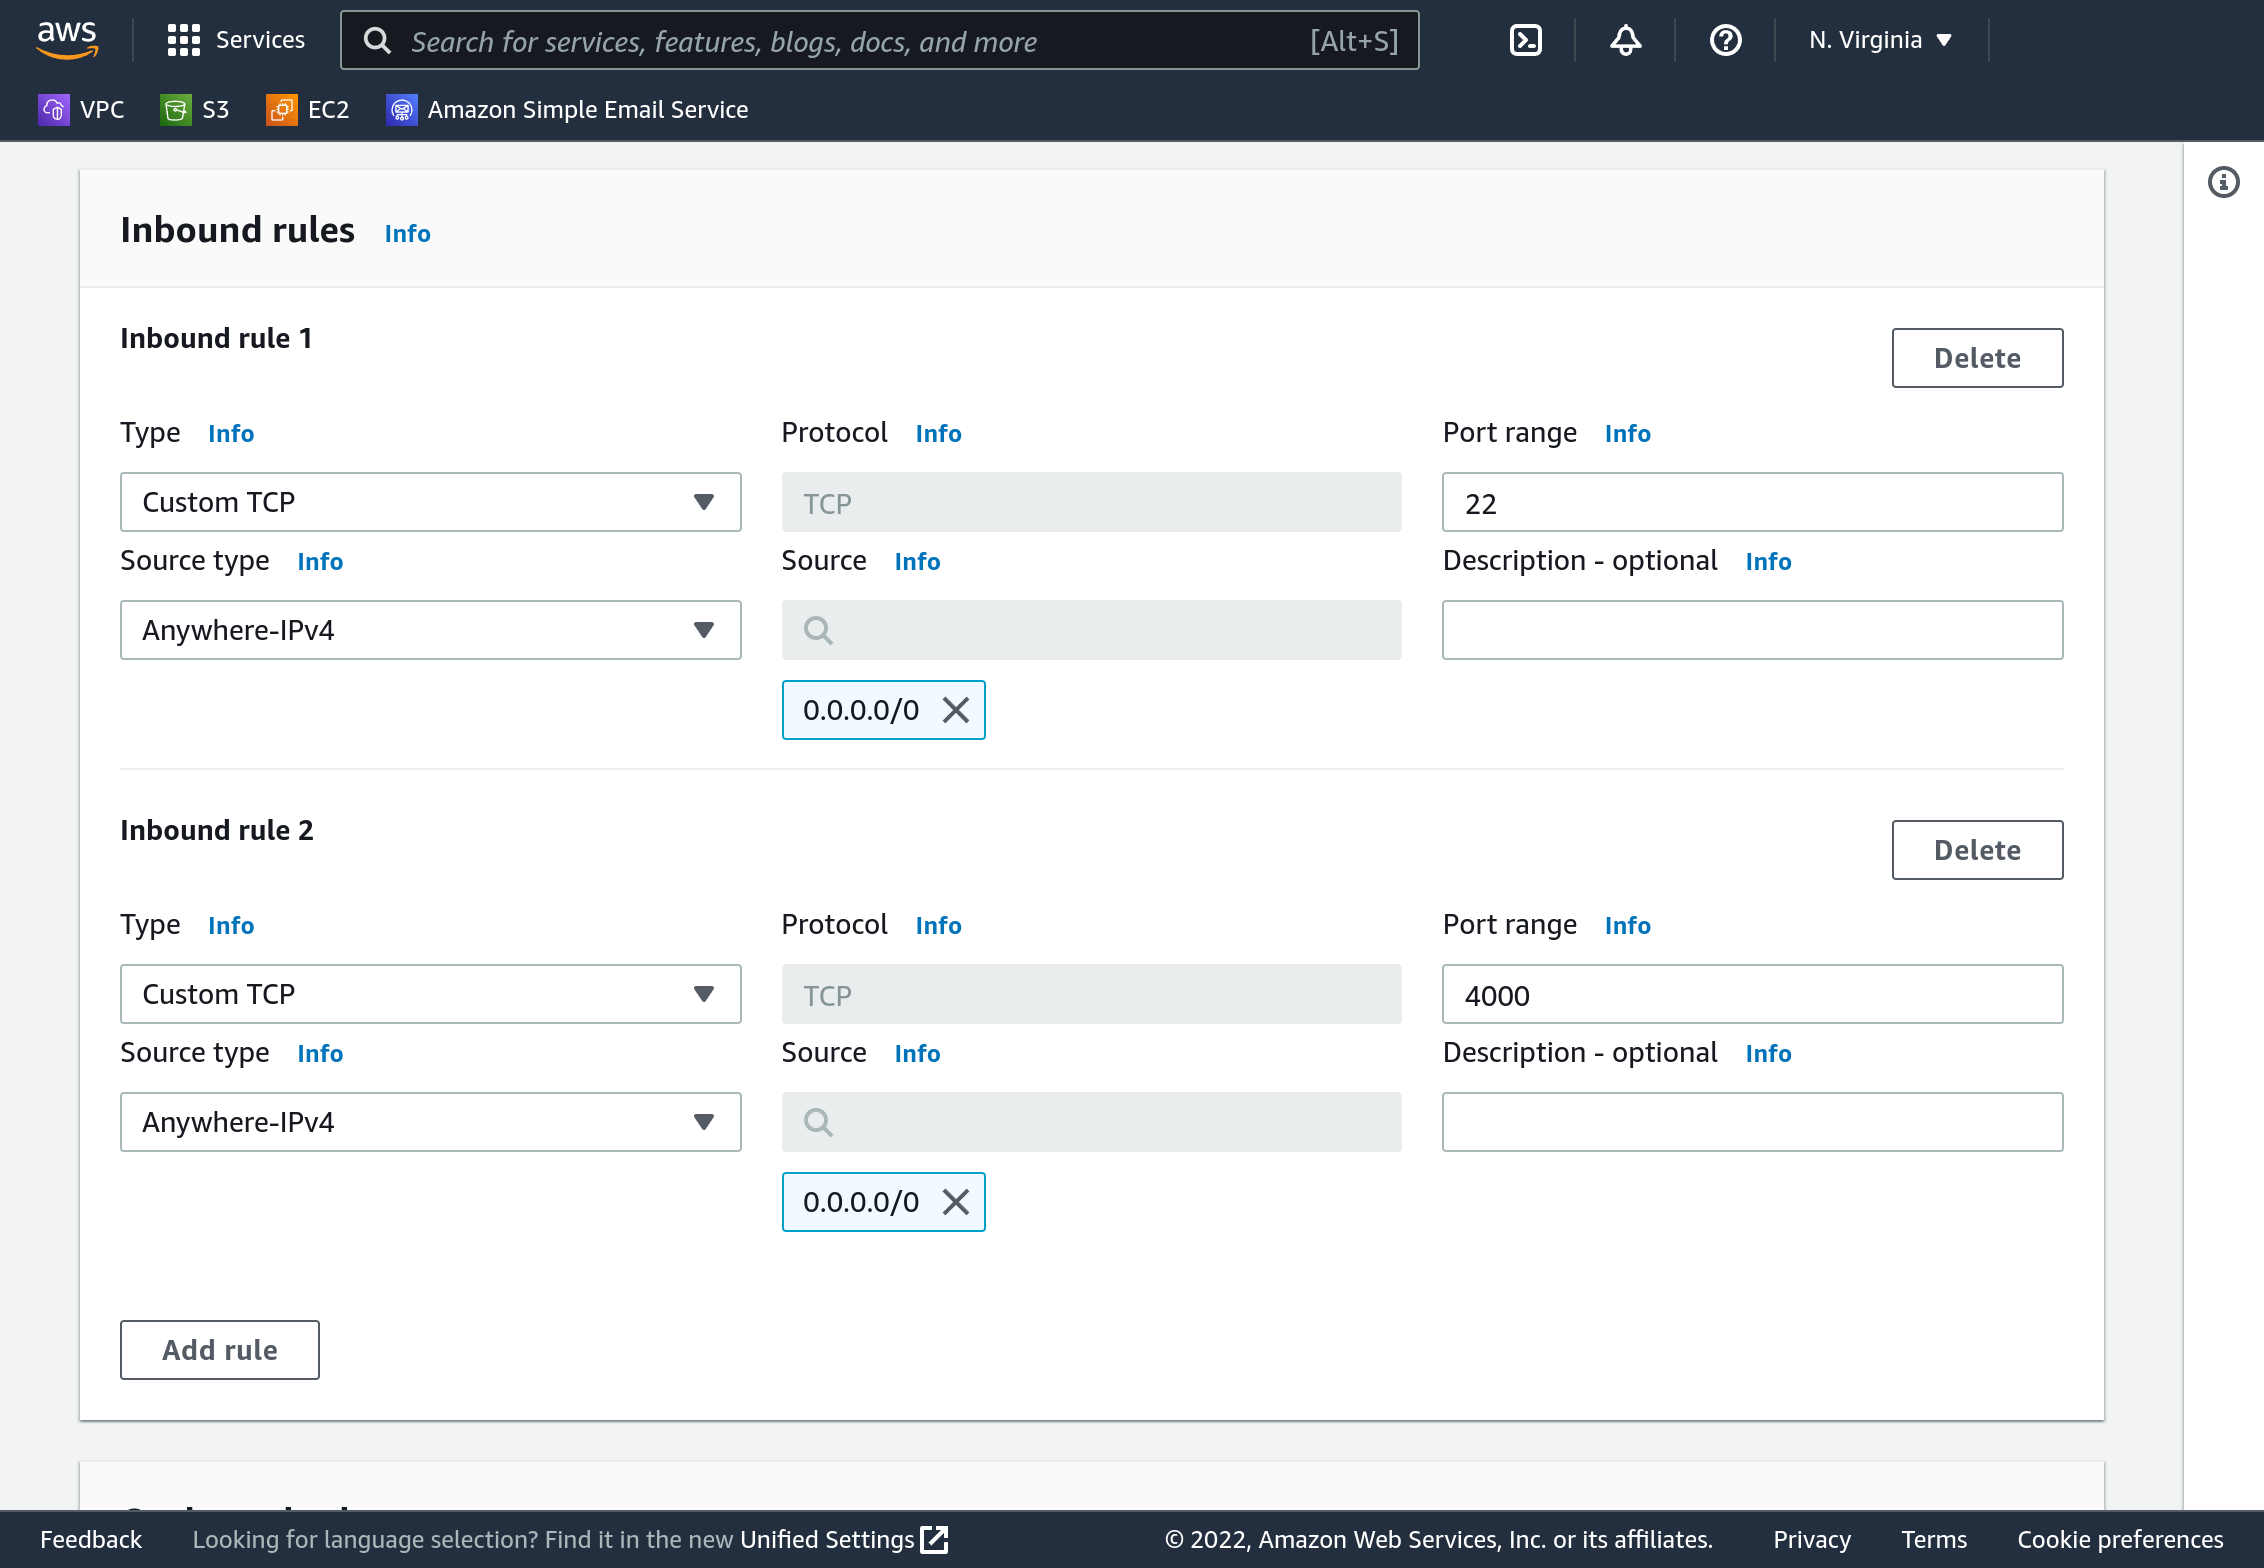
On the Console’s sidebar select “Security groups”. It’s about halfway down the list, under “Security”. Now we’ll specify that, by default, instances should only be permitted to communicate on ports 22 and 4000. Click “Create security group”. Name the group “tutorial_sg”, and add description “Allow SSH and 4000”. Select your VPC - it will likely not be the default option.
By default all outbound traffic (from your computer to others) is permitted. By default no inbound traffic is permitted. Under “Inbound rules” click “Add rule”. Use “Type” “Custom TCP”, “Port range” “22”, “Source type” “Anywhere-IPv4”. Add another rule with the same settings but port “4000”.
Do not change outbound rules. Click “Create security group”.
Create one instance in each subnet
Now back on the EC2 dashboard you should create one Linux instance in the public subnet, and one in the private subnet.
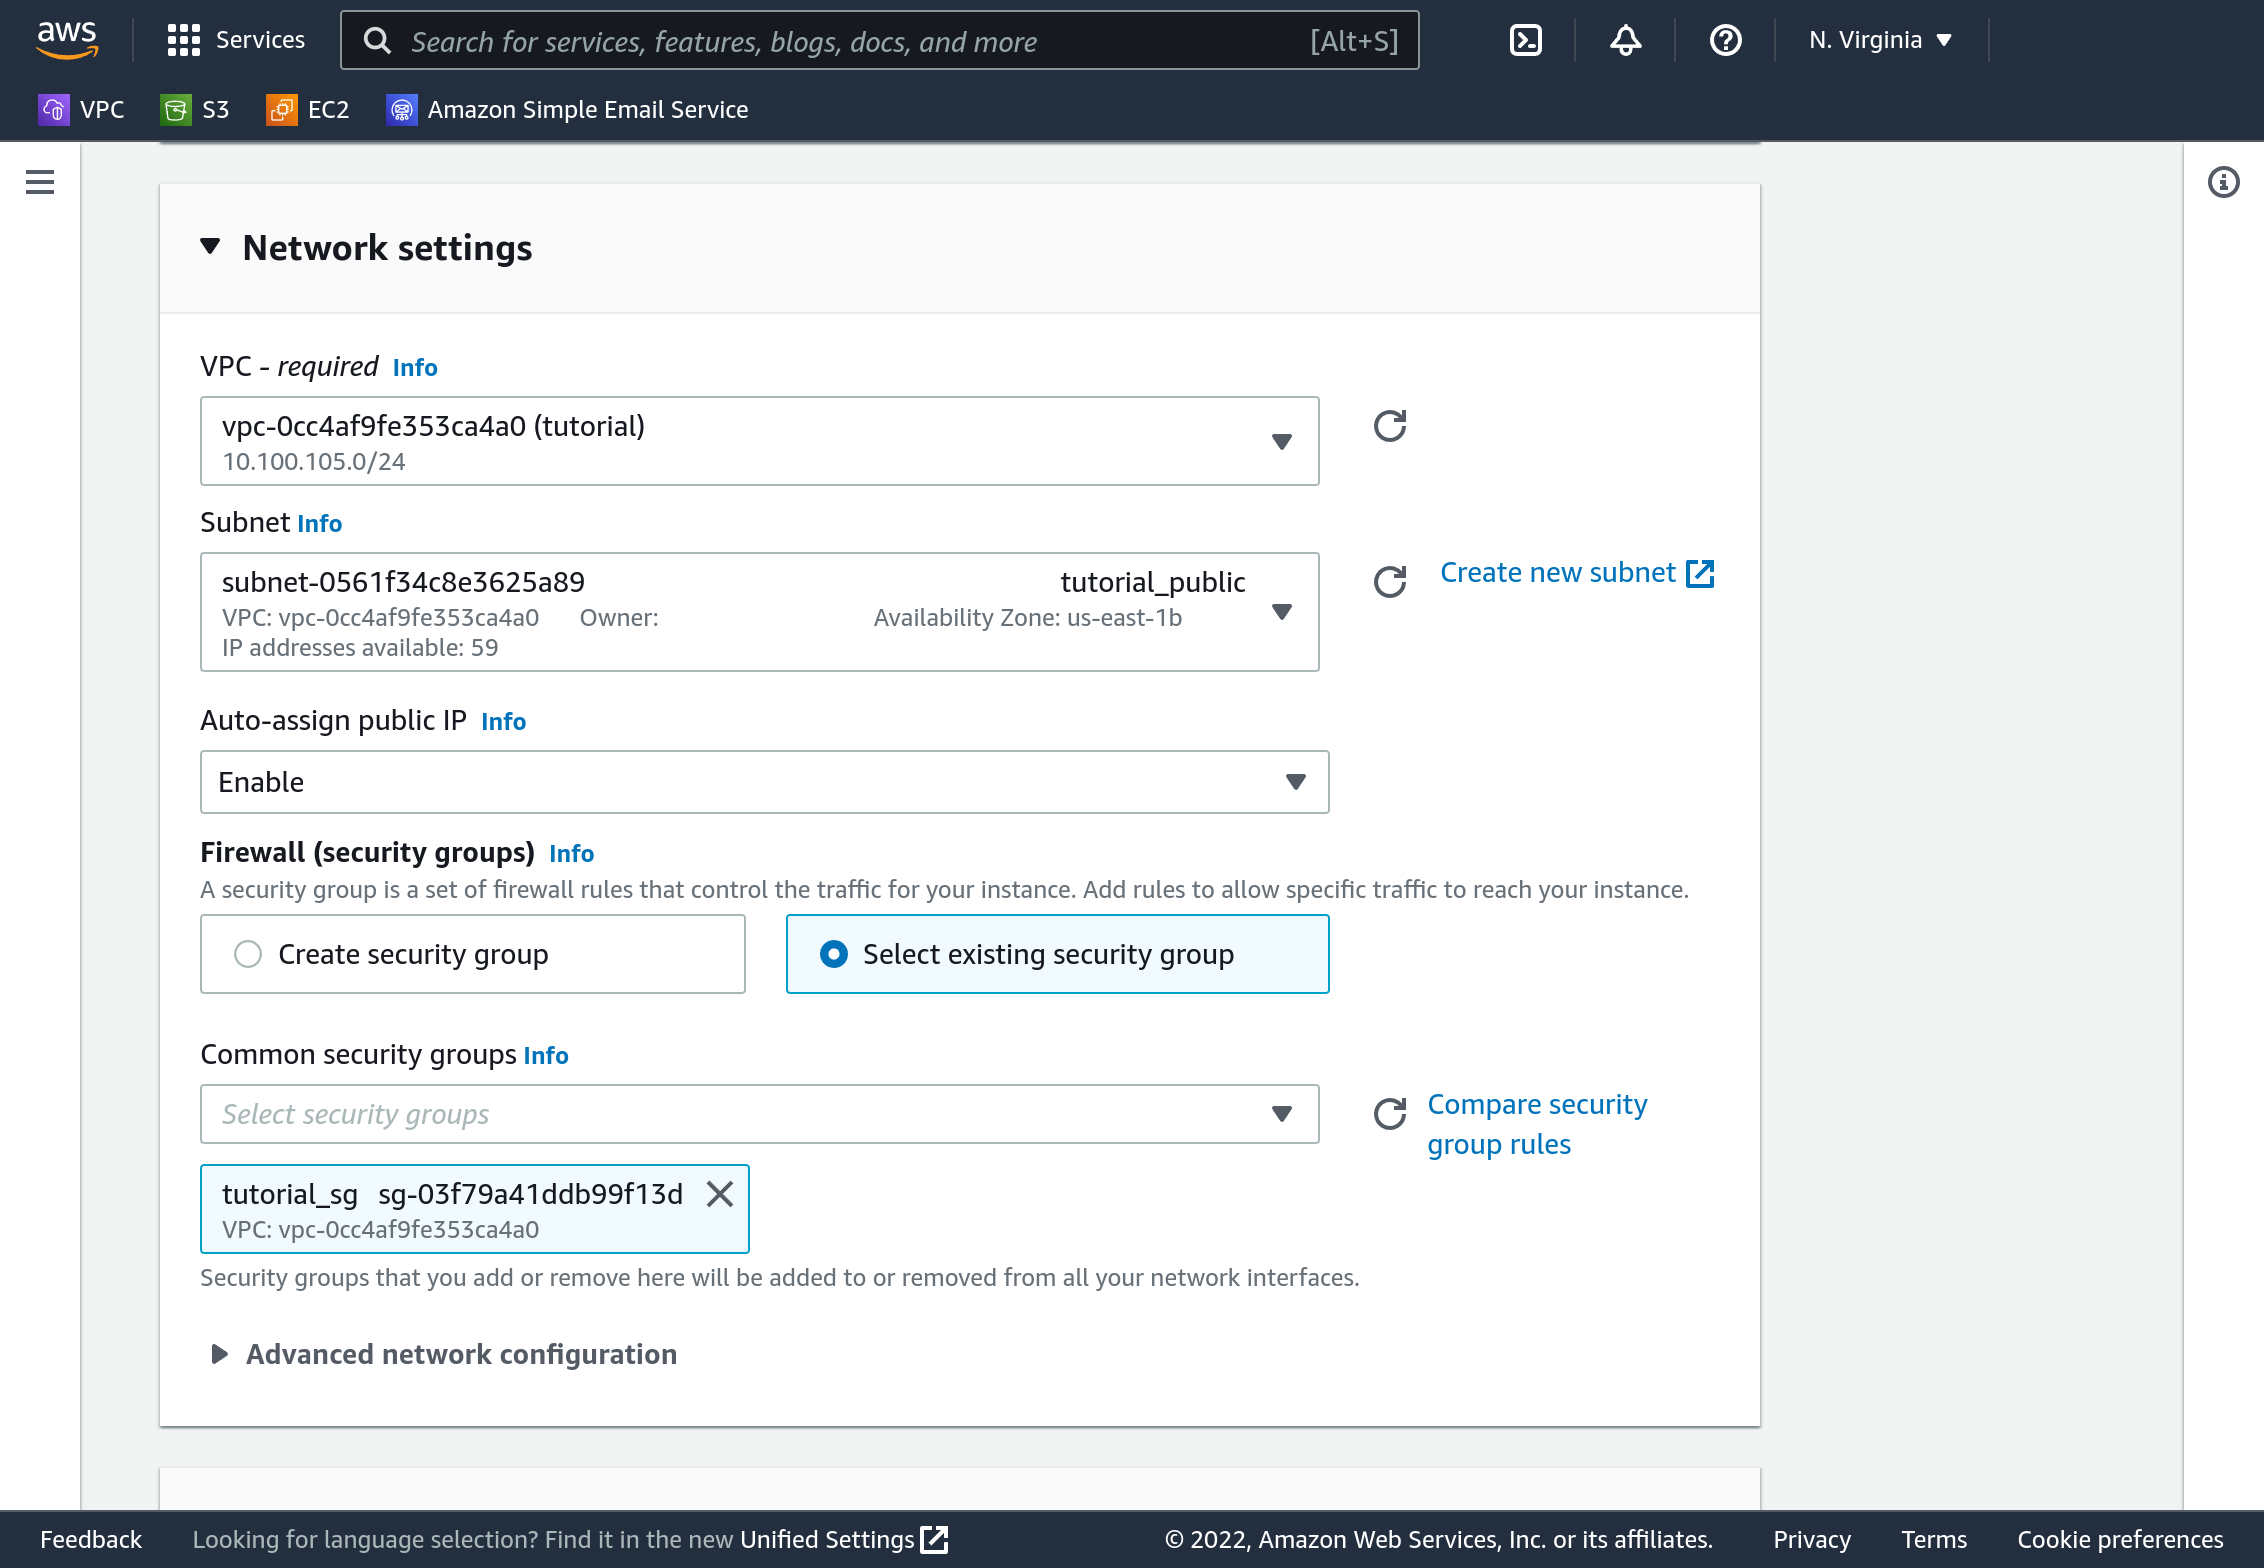
Under network settings you will have to make several changes. Select your VPC, select the appropriate subnet, under “auto-assign public IP” select “Enable” if it is not already selected. Under “Firewall (security groups)” click “Select existing security group” and pick your “tutorial_sg”.
Make sure you give them names that make them easy to distinguish…
Testing instances
Once those instances finish standing up, test them! The public one should respond to traffic at port 22 and 4000 at its public interfaces. The private one should not respond at all to its public interface. The public and private ones should both respond on ports 22 and 4000 on their private interfaces (but you’ll only be able to reach those from a computer within the VPC…). The public one should be able to curl google.com, while the private one should not.
To do good TCP testing you may want to download netcat, but you won’t be able to from the private one because it cannot get to the Internet. Here are some tricks:
sudo yum install nc- install netcatnc -v -l 4000- listen on TCP port 4000 with netcatnc -v IP_ADDR 4000- connect to TCP port 4000python3 -m http.server 4000- listen on TCP port 4000 with python3’s HTTP server
Deleting your resources
Once you’ve demonstrated to yourself that the private instance is private, and the public is public, it’s time to destroy your resources.
First, terminate your EC2 instances. Wait to verify that they are terminated before moving on (you cannot destroy your VPC until they are terminated).
Then, go to your VPC list. Select your VPC, click “Actions”, then “Delete VPC”. This will also delete your IGW, subnets, routing table, and security group.
That’s it!