AWS Lambda Function URL Hello World
The ability to create a URL to AWS Lambda functions has existed for a long time - but has never been as easy as it is today. In April AWS announced Lambda Function URLs, and now adding a world-usable non-authenticated URL can happen in the Lambda function creation wizard.
With great power comes great foot-gun though… When the whole world can easily access your Lambda function URL, without authenticating, the whole world can run up your AWS bill easily.
Delete your Lambda function when you’re done with this tutorial
This blog post is a tutorial for creating a simple Hello World application using this new Lambda feature. I’m teaching some folks in my unit how to use AWS, and while there are many Lambda Hello World tutorials out there I didn’t find one that was quite right. This tutorial will go through almost the simplest setup possible, deploying Python code at a URL, then will iterate on the initial code to demonstrate some basic computation.
Prerequisites:
- A properly-secured AWS account
Goal:
- Deploy an extremely simple AWS Lambda function to a function URL
- Write Python code that returns HTML that displays properly in a browser
- Modify that code to perform a simple calculation with URL-based inputs
Create a Lambda Function
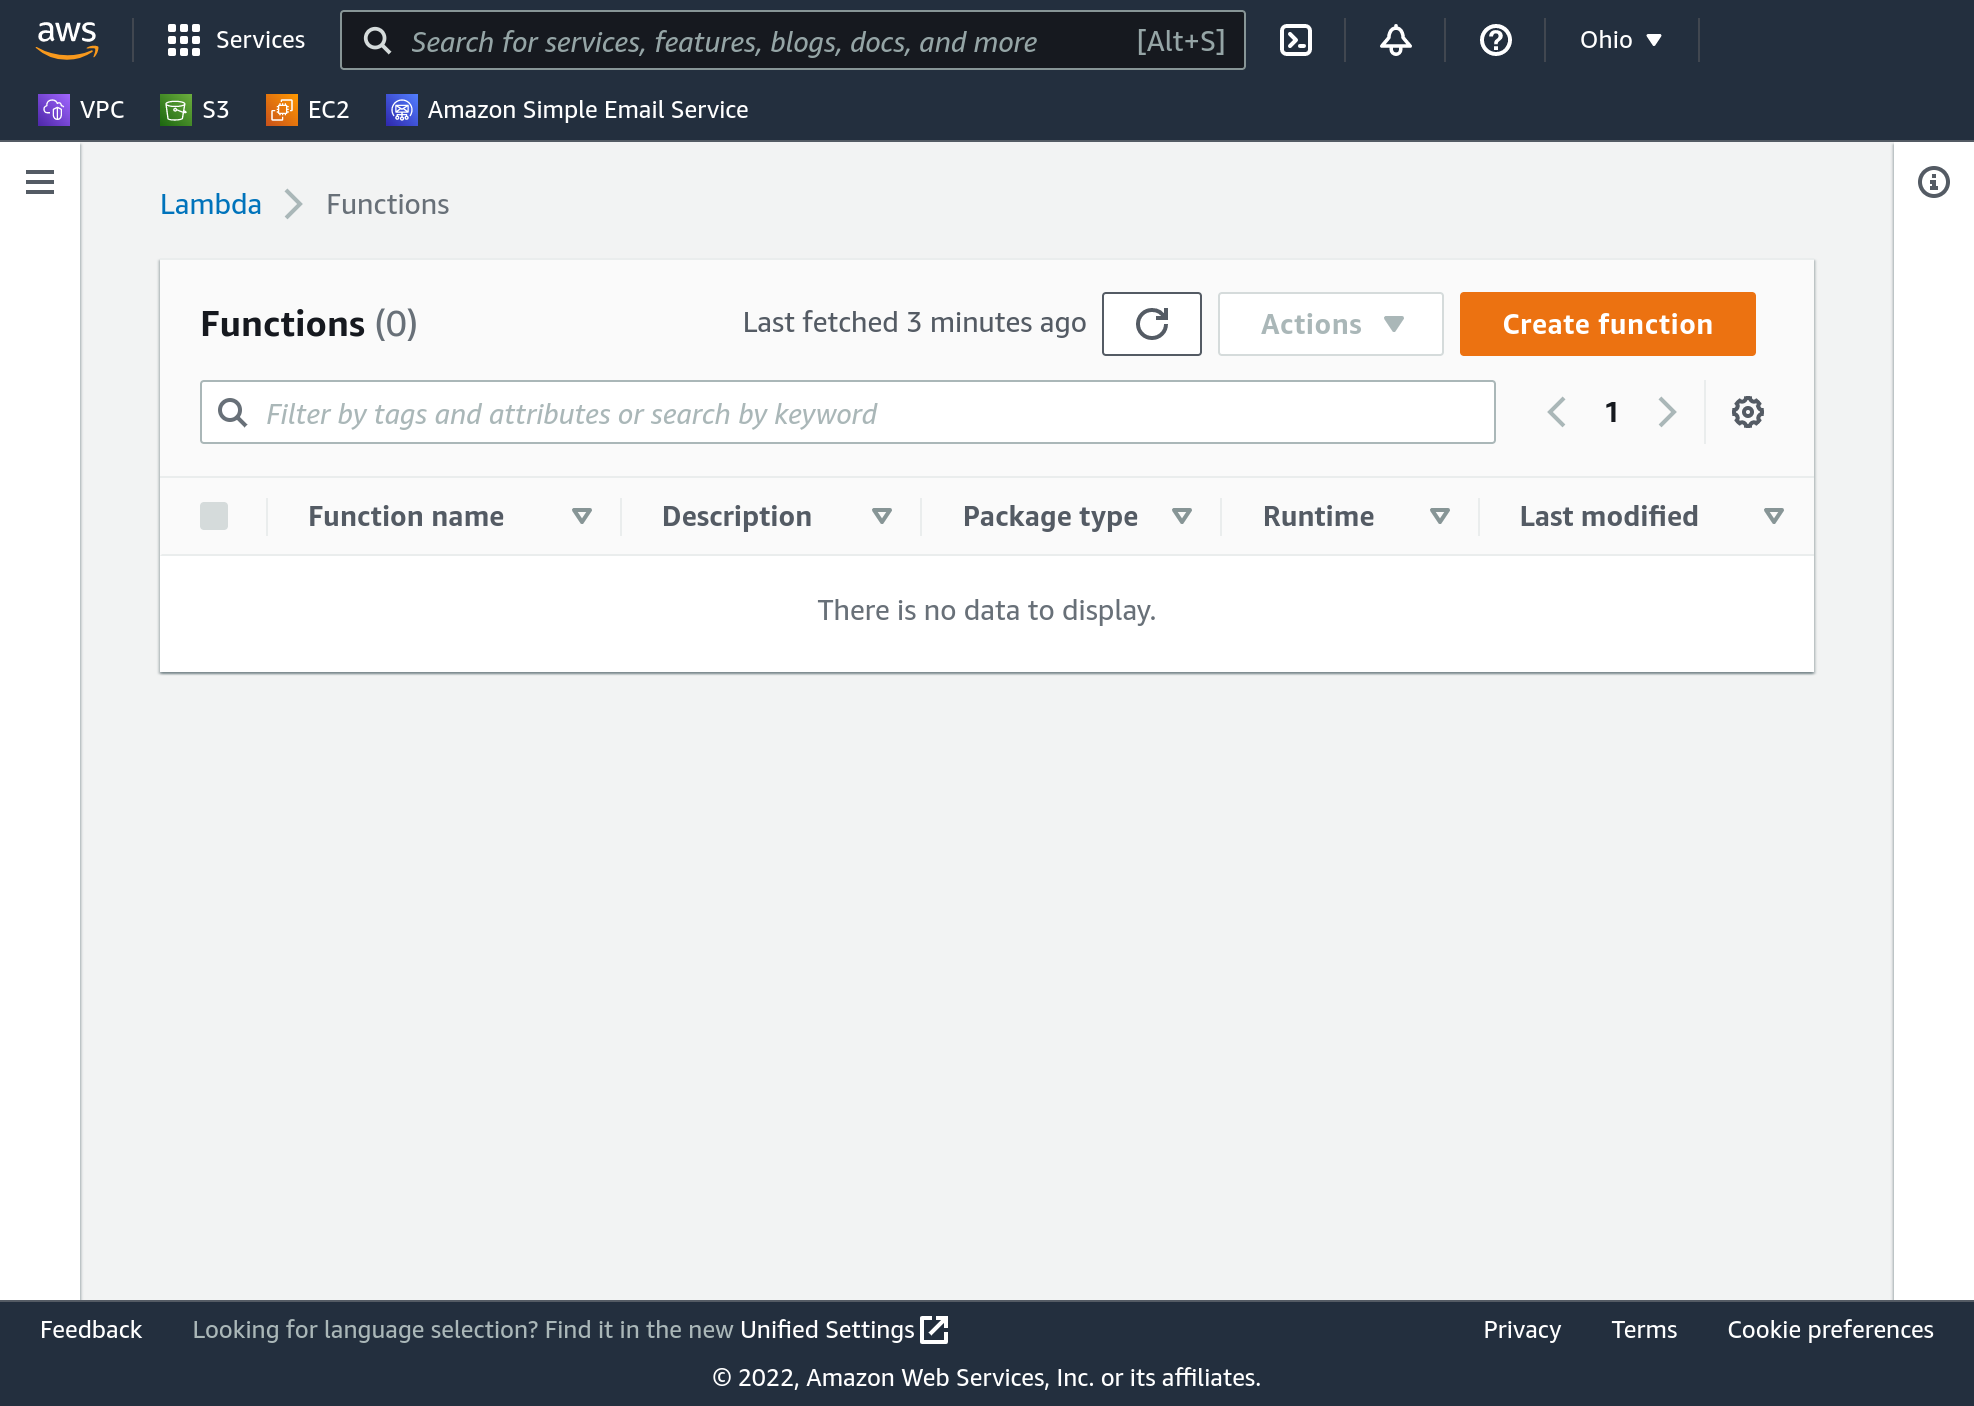
Within the AWS Console, select the Lambda service, then click “Functions” from the navigation menu. This page will list all of your Lambda functions in your current region. If this is the first time you’re creating a Lambda function, you shouldn’t see any. Verify your region in the top right of the page. When creating resources by hand, as we are now, it’s important to be able to find them again and that’s easiest when you use your regular region.
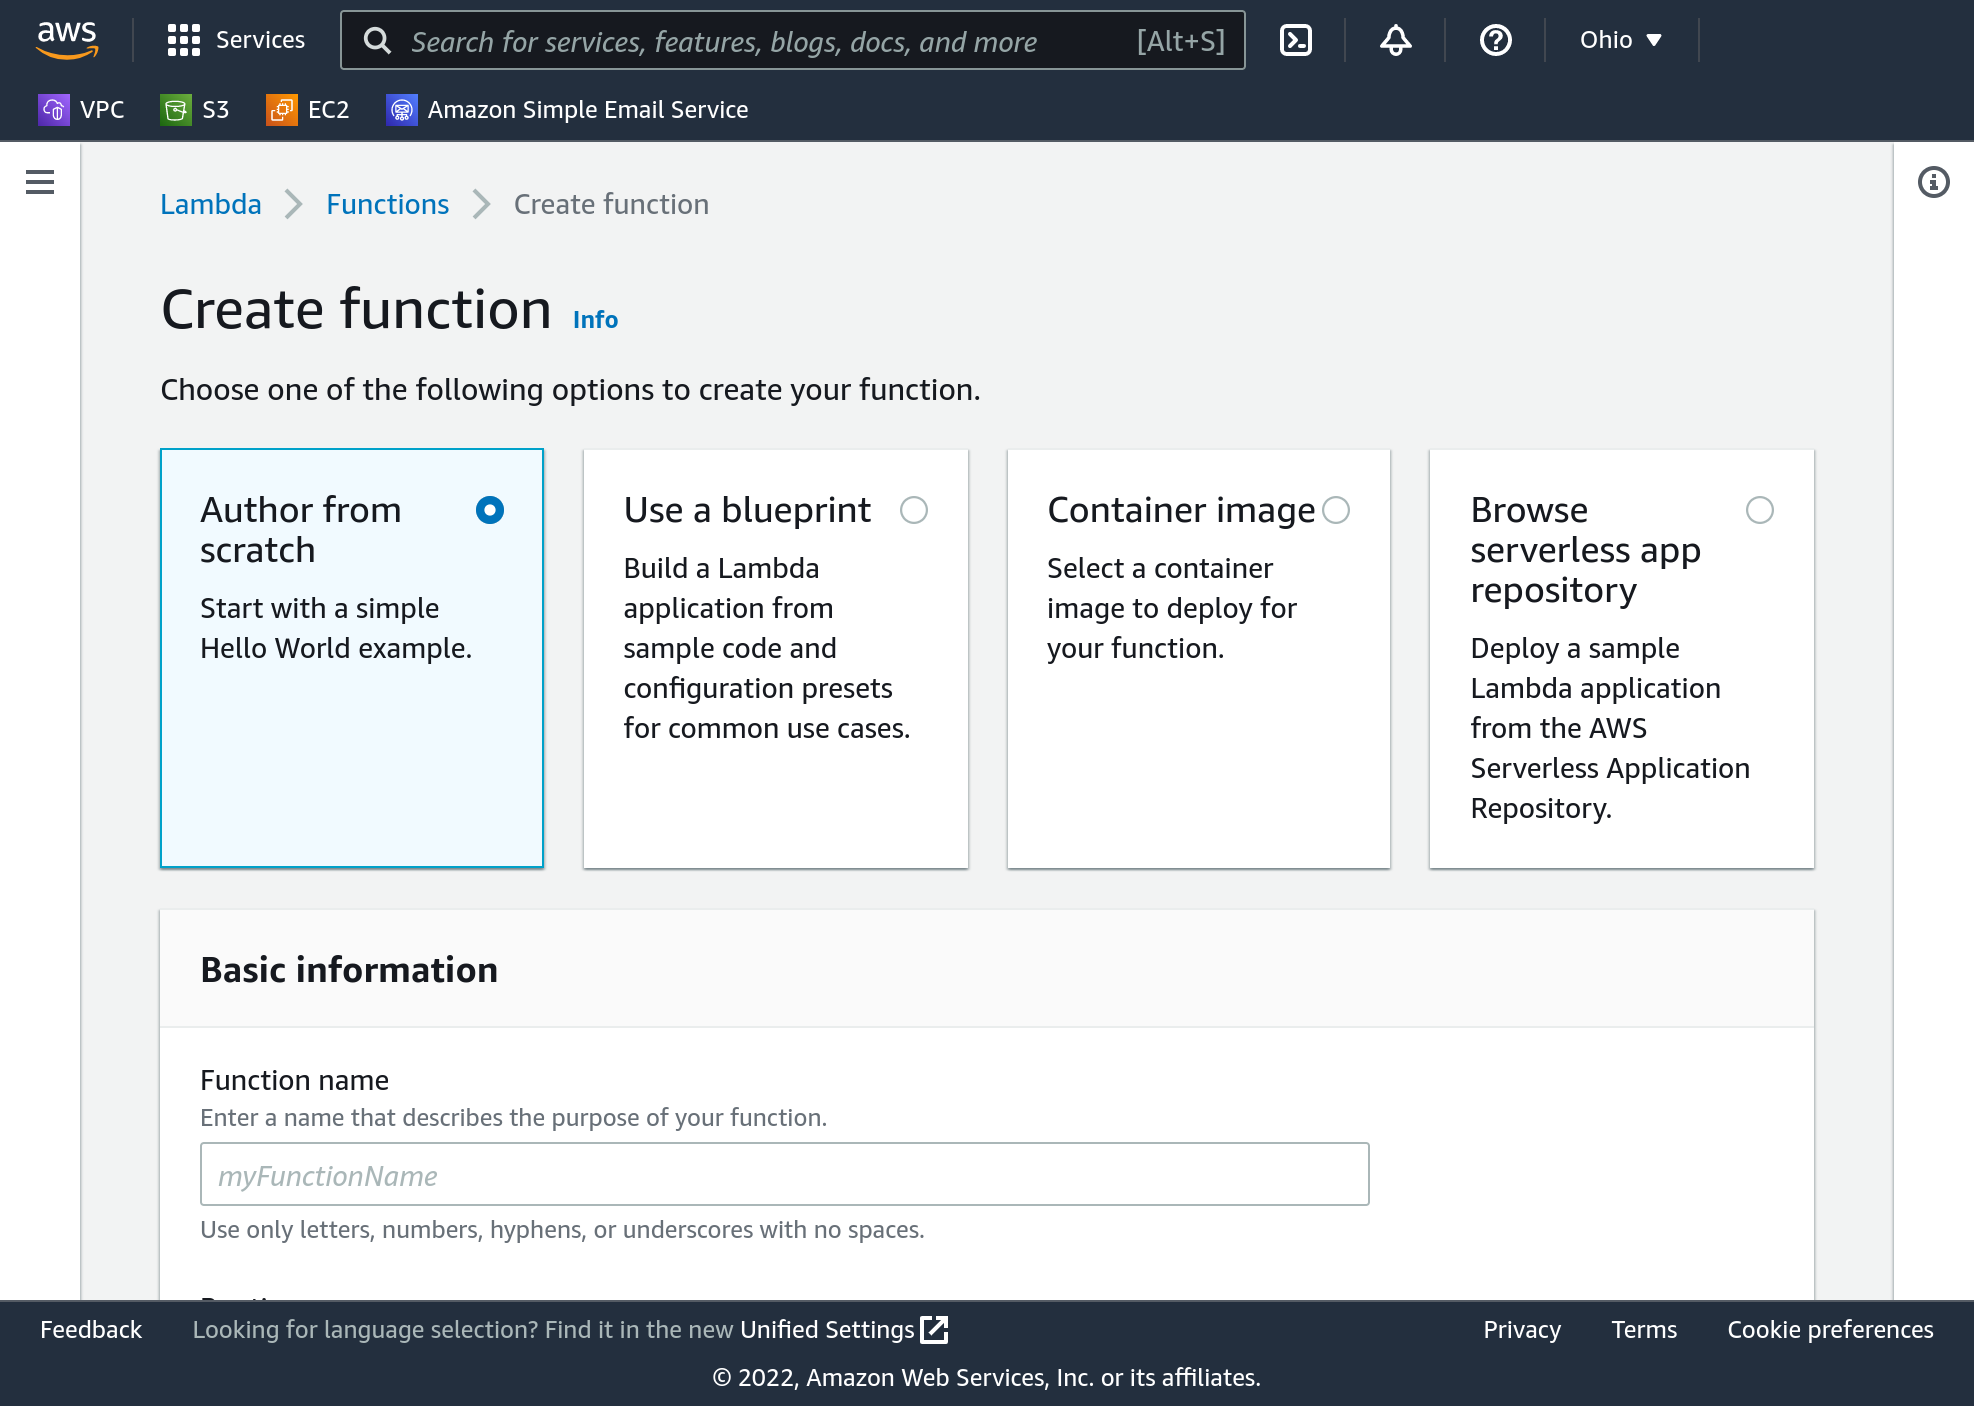
Select “Create Function” then “Author from Scratch”. The create function screen also provides one other extremely simple way to create a basic function - the blueprints option. With the new function URLs feature though, creating one this one from scratch will also be simple.
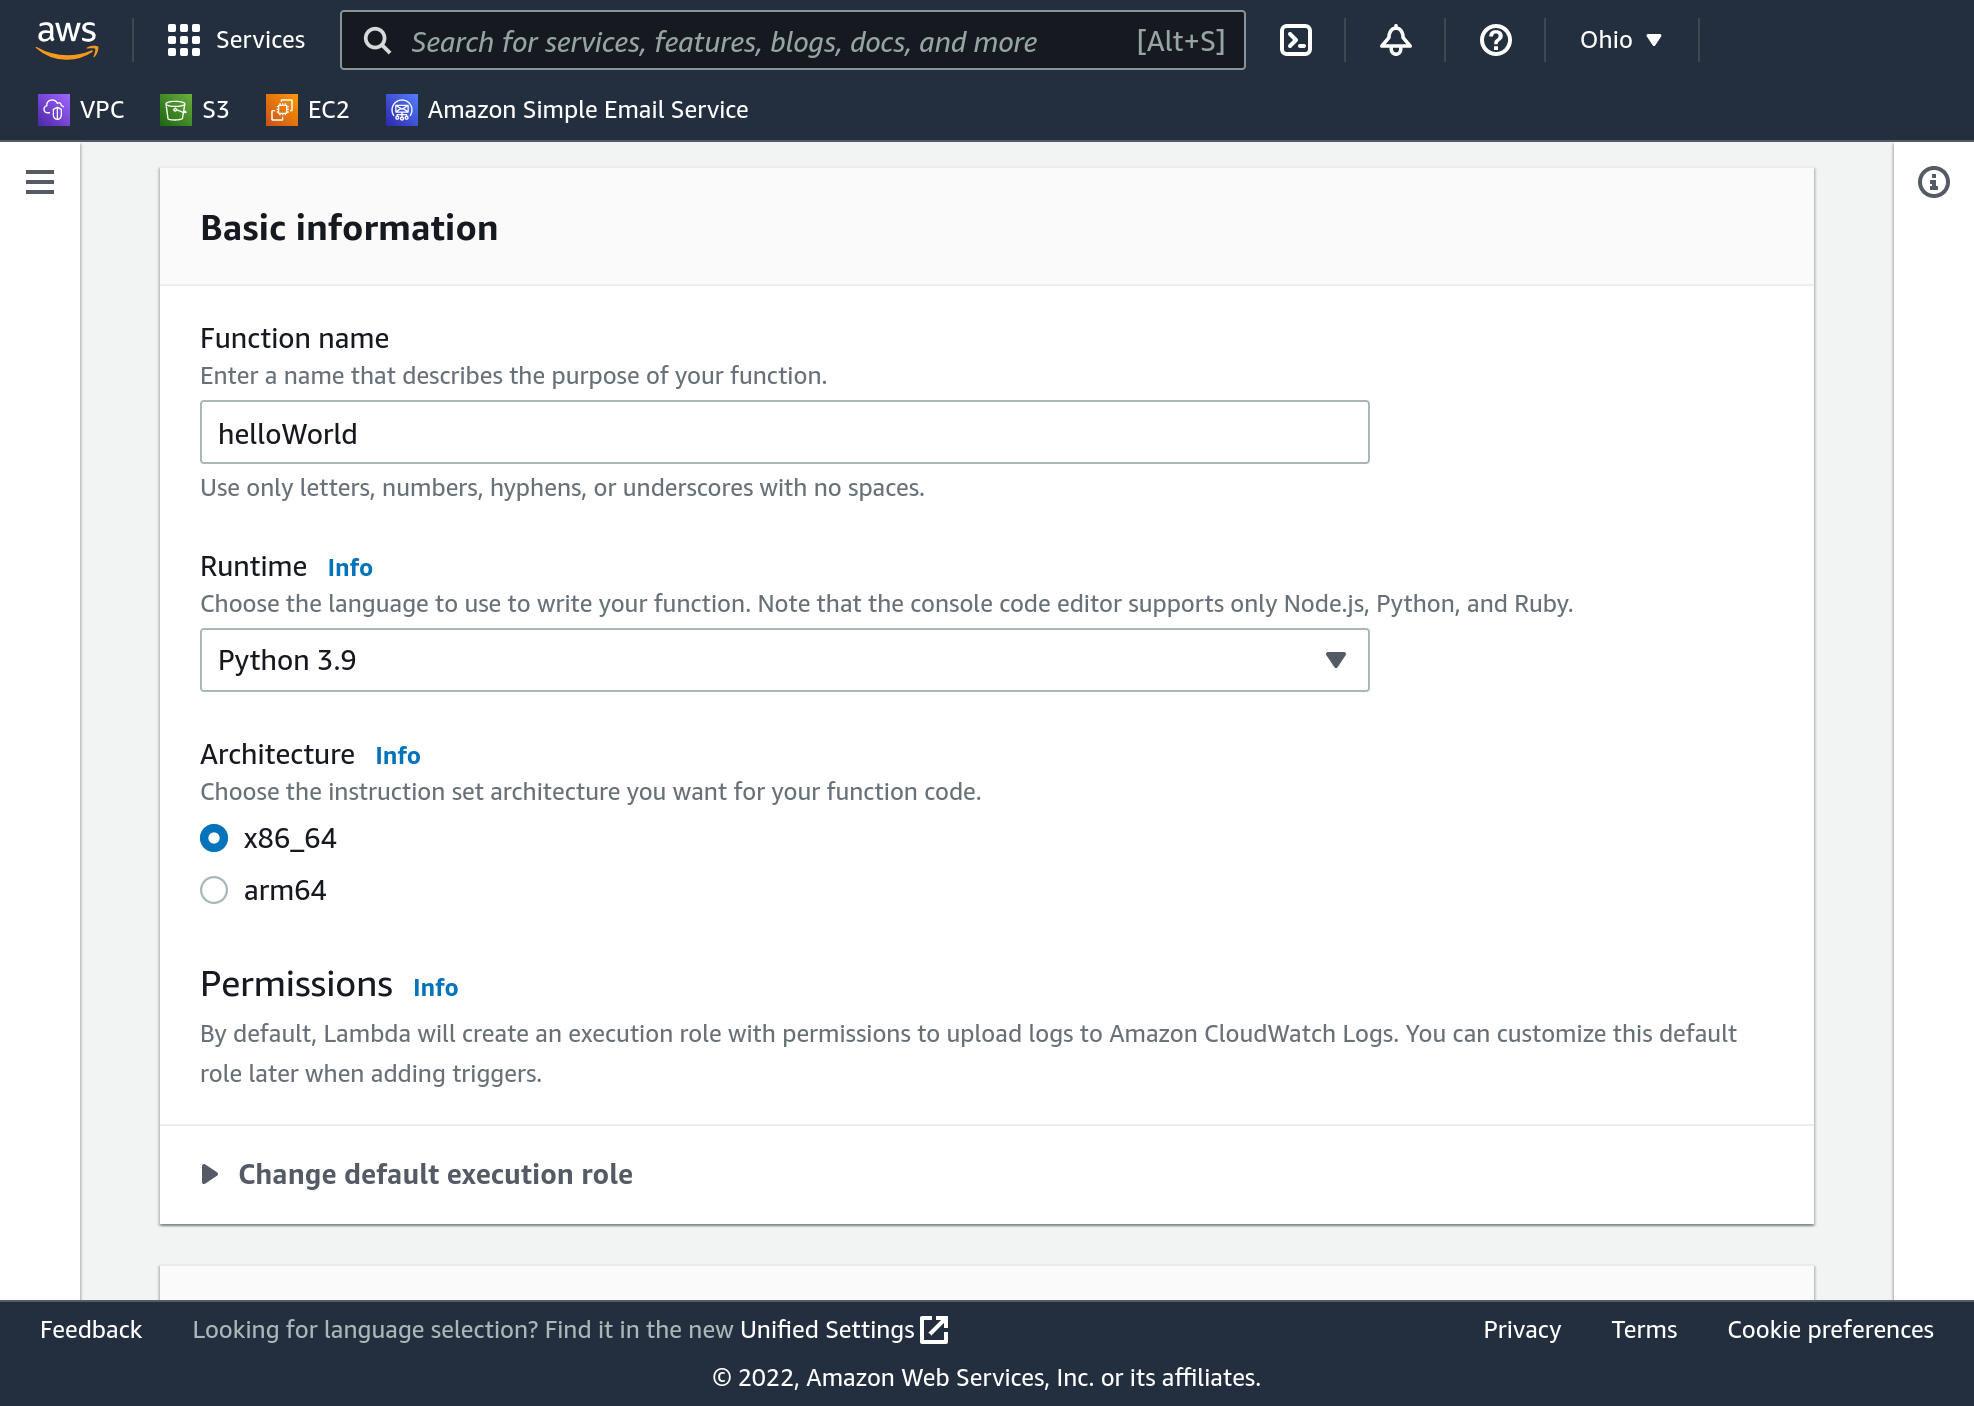
Provide a function name - for this one just write helloWorld - and select Python as your “Runtime”. Both x86_64 and arm64 should work equally well for this example, since we’ll only use mainline Python.
Leave the permissions set to their default, “Create a new role with basic Lambda permissions”. This permission set will create a good default IAM role. When we delete this Lambda function later, we will have to go back and delete this role too.
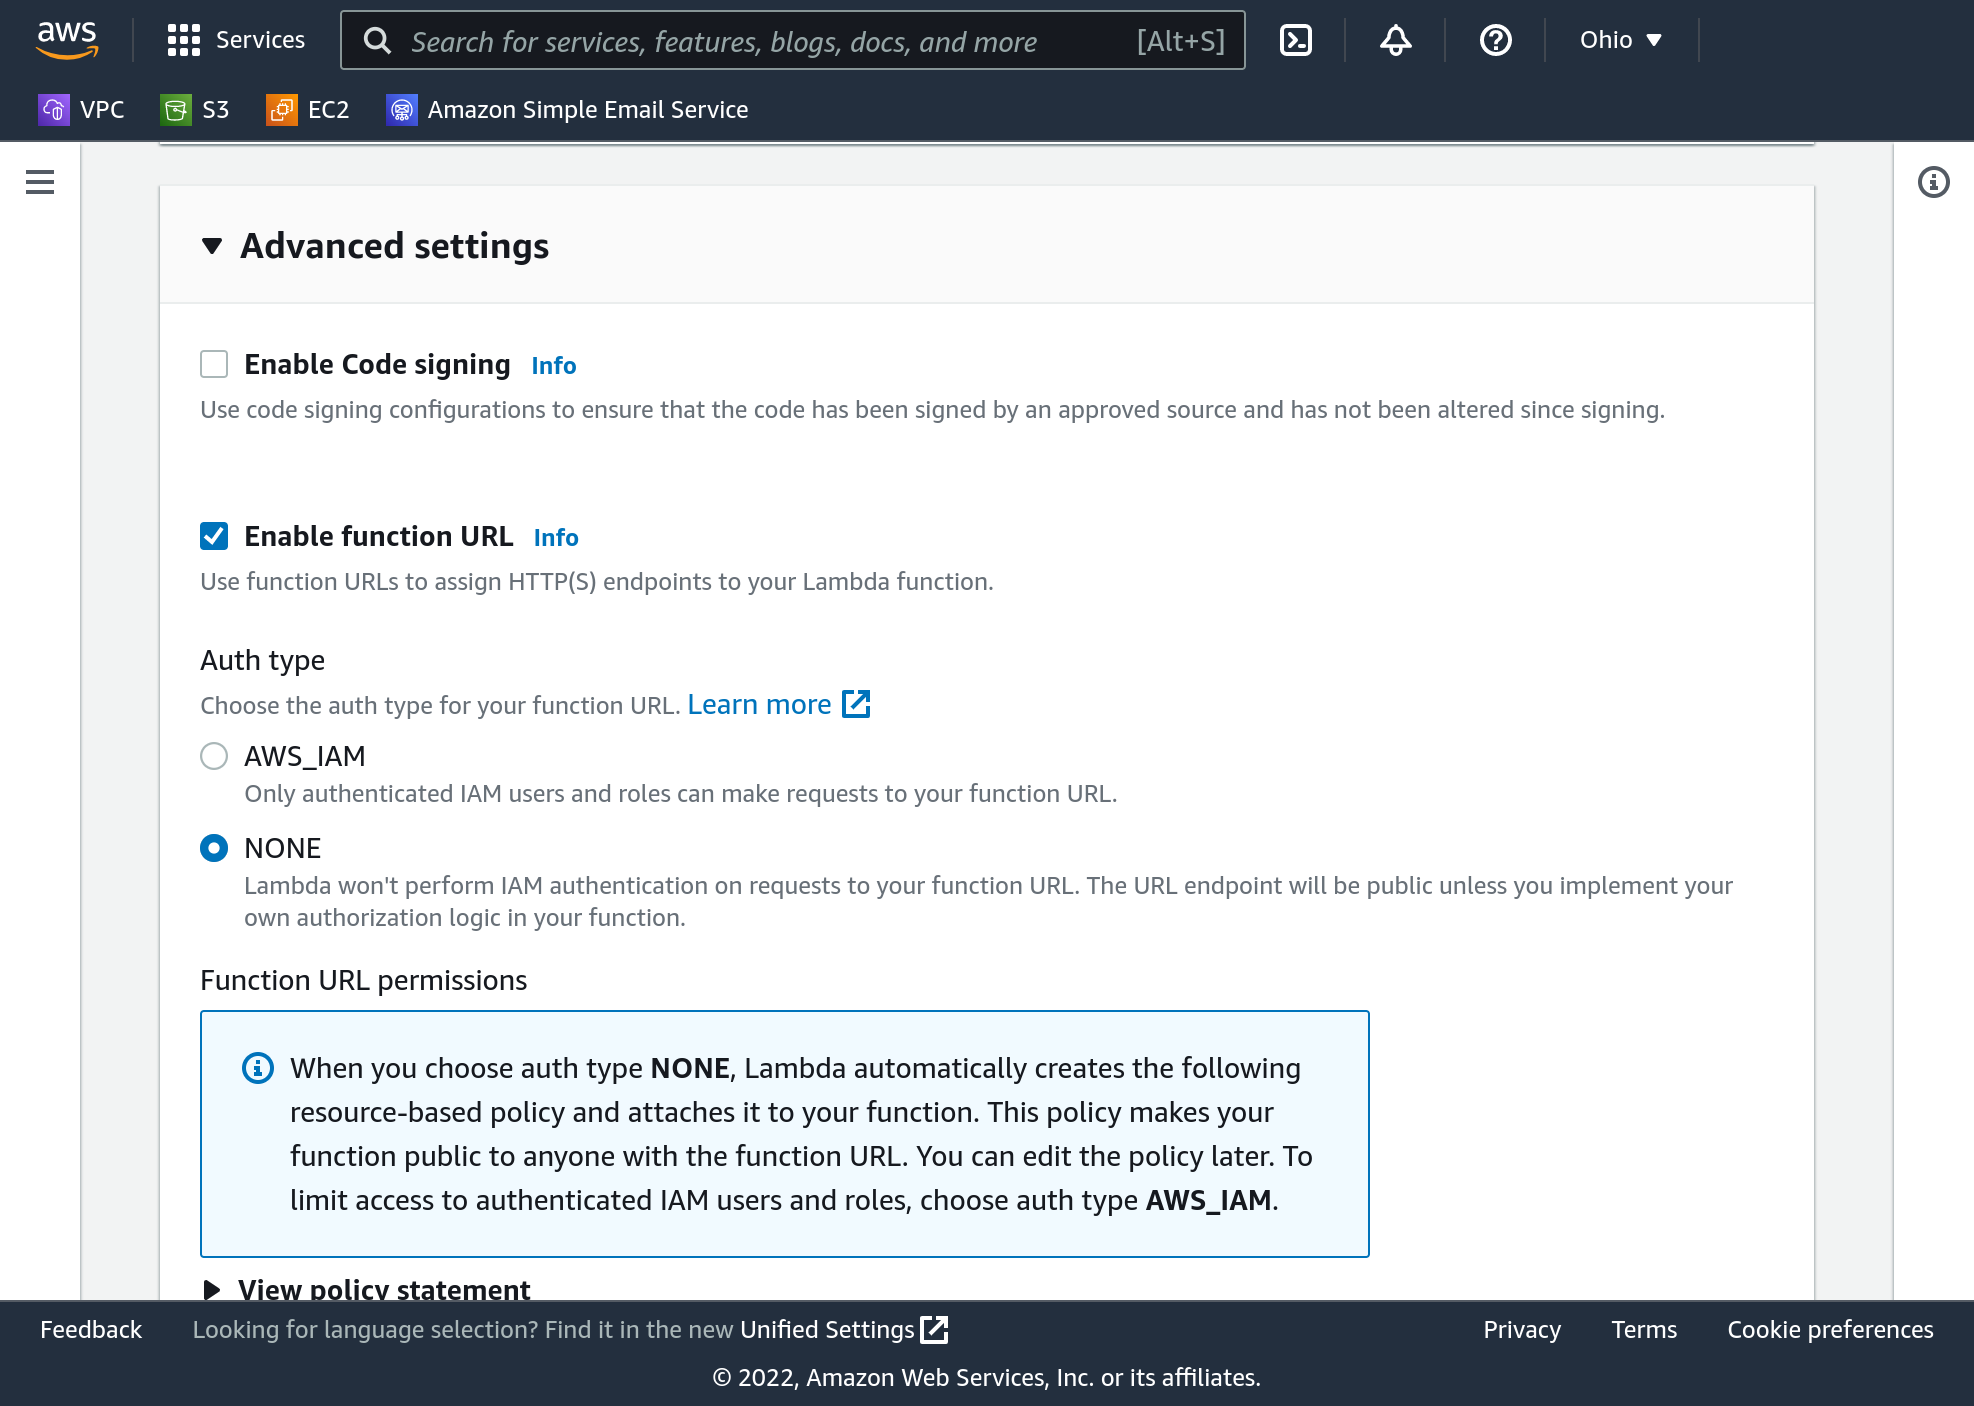
Expand the “Advanced settings” panel and check “Enable function URL”, with Auth type “NONE”. Auth type determines how AWS will determine whether a user may execute your Lambda function. Selecting “NONE” includes no security around your function, and anybody may execute it.
- Auth type “NONE” makes it extremely easy to test and play with Lambda
- Auth type “NONE” makes it extremely easy for an attacker to abuse your Lambda function and cost you a bunch of money
Auth type “NONE” is a double-edged sword. For the purpose of this tutorial we will delete our Lambda function shortly after we’re done with it, so that should reduce risk here. Additionally, a function URL is not extremely easy to discover. If you publish the URL on the Internet anywhere or tell a friend, it becomes much easier to discover…
Deleting the function quickly is a good mitigation here, but Auth type “NONE” is not something you should try to use in a more permanent deployment unless you put in your own authentication scheme.
Advanced settings will also allow you to apply a tag to your function, but won’t cause the IAM role to get tagged. If you’re using tags across your infrastructure for cost explorer you may choose to add a tag here. Advanced settings also has a CORS option which will implement a protocol via which modern browsers can use your function from within other websites. And it has an option to connect the function to a VPC, so it can interact with services in that VPC. None of these options are required in this example.
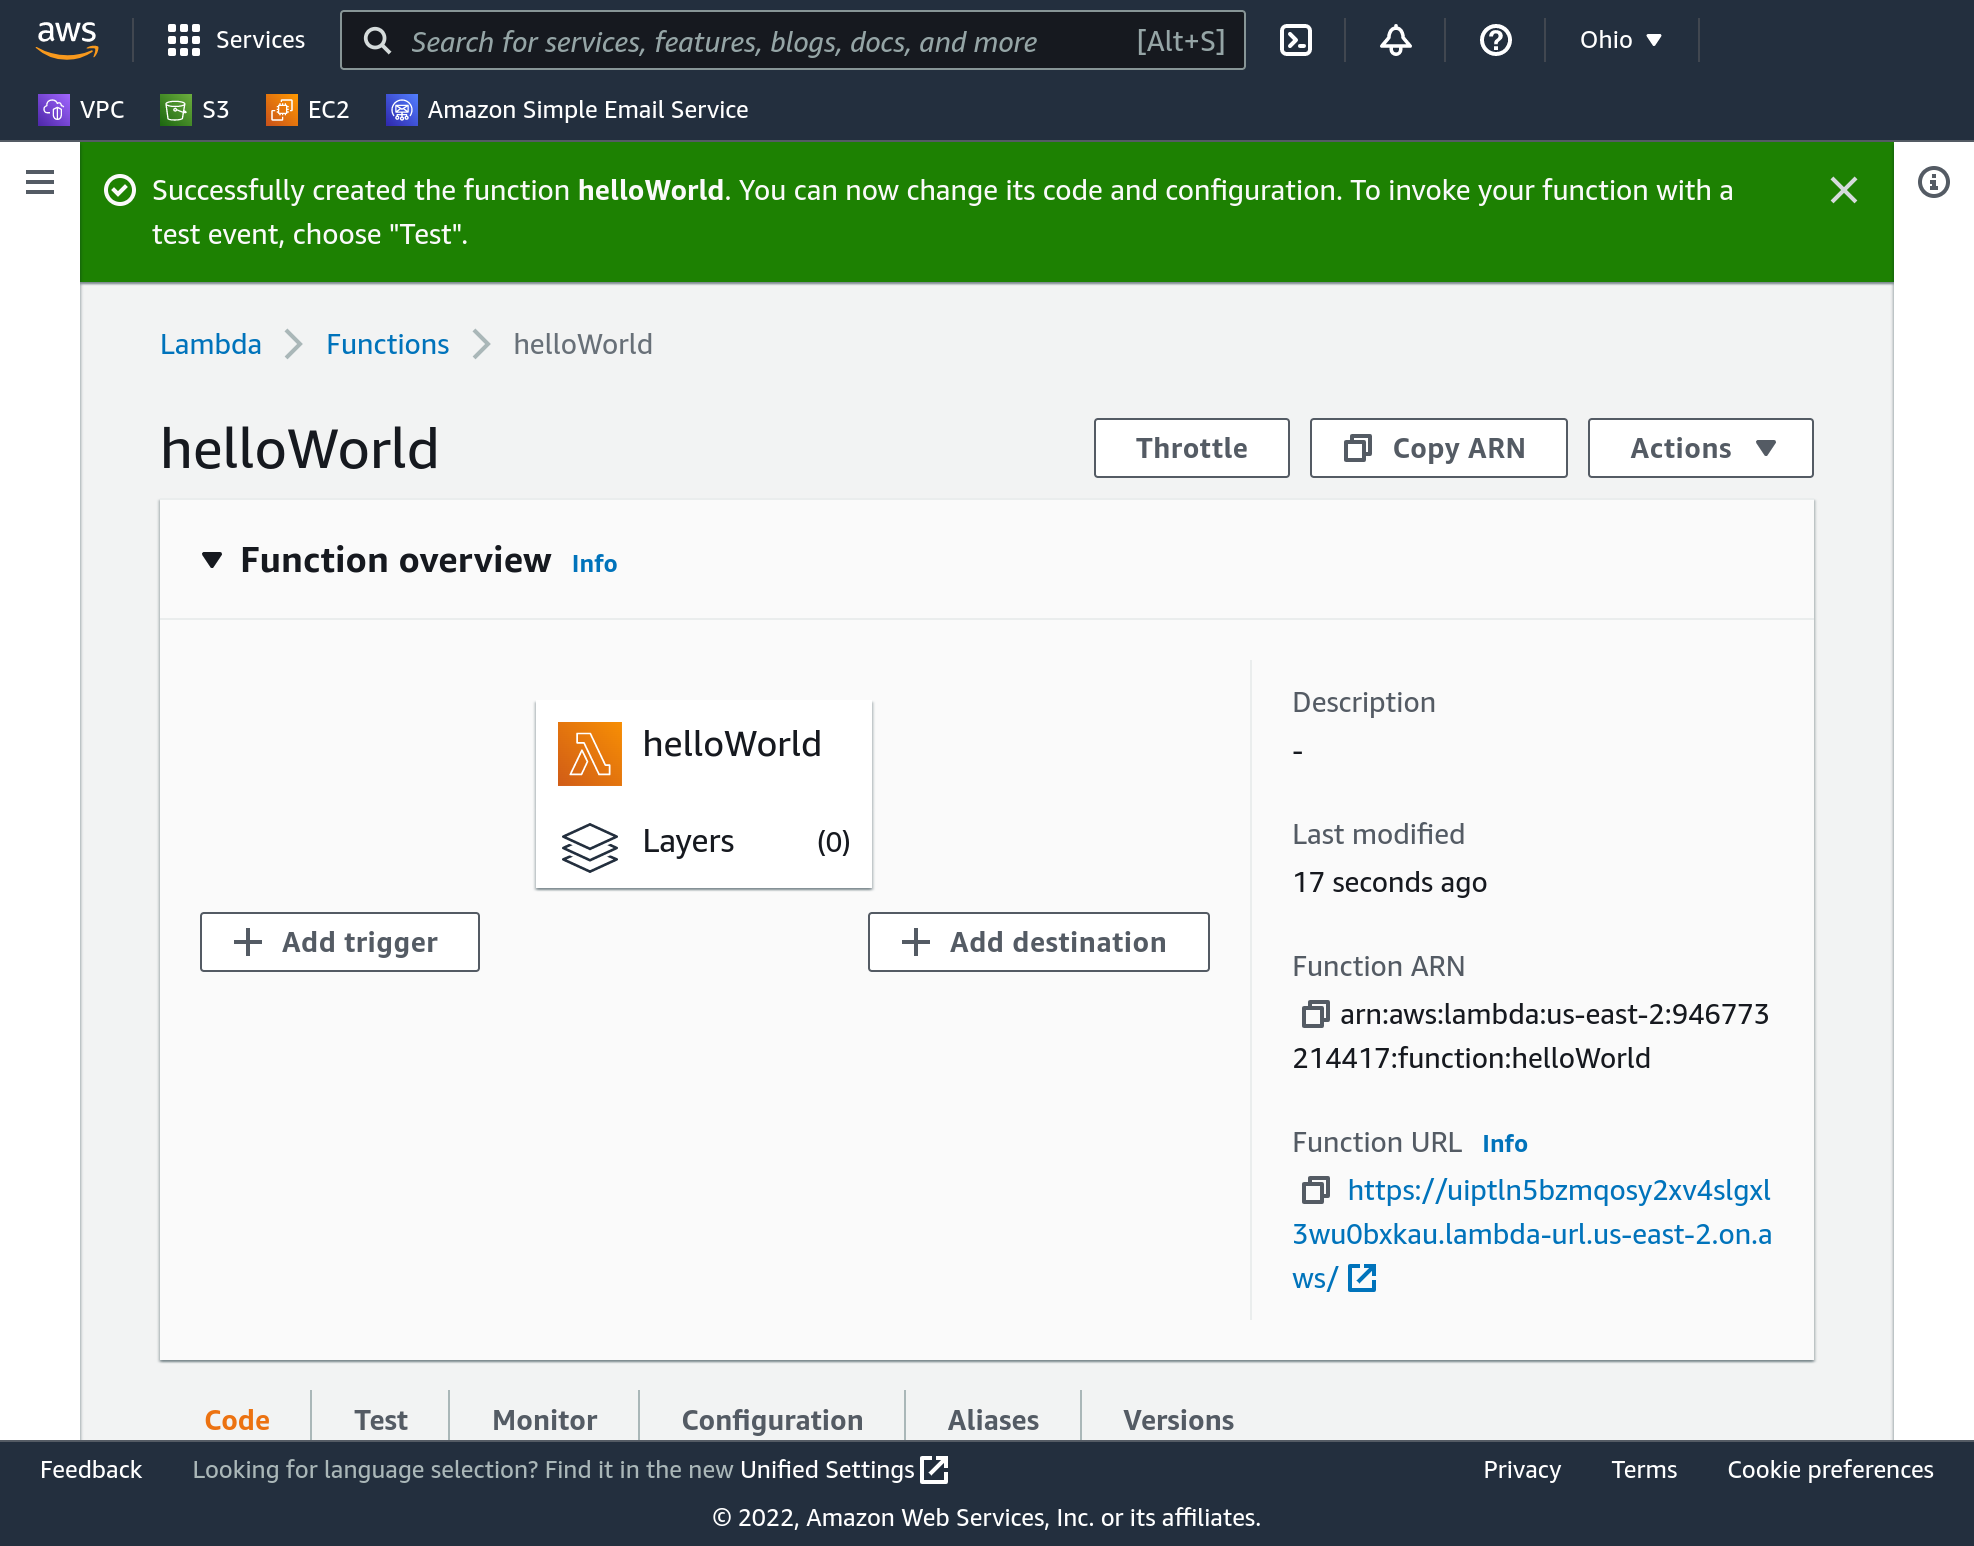
Click “Create function”.
Program your Function
At this point you have a function that will respond at a specific URL. The URL is visible in the right side of your Function overview. Open it in a new tab.
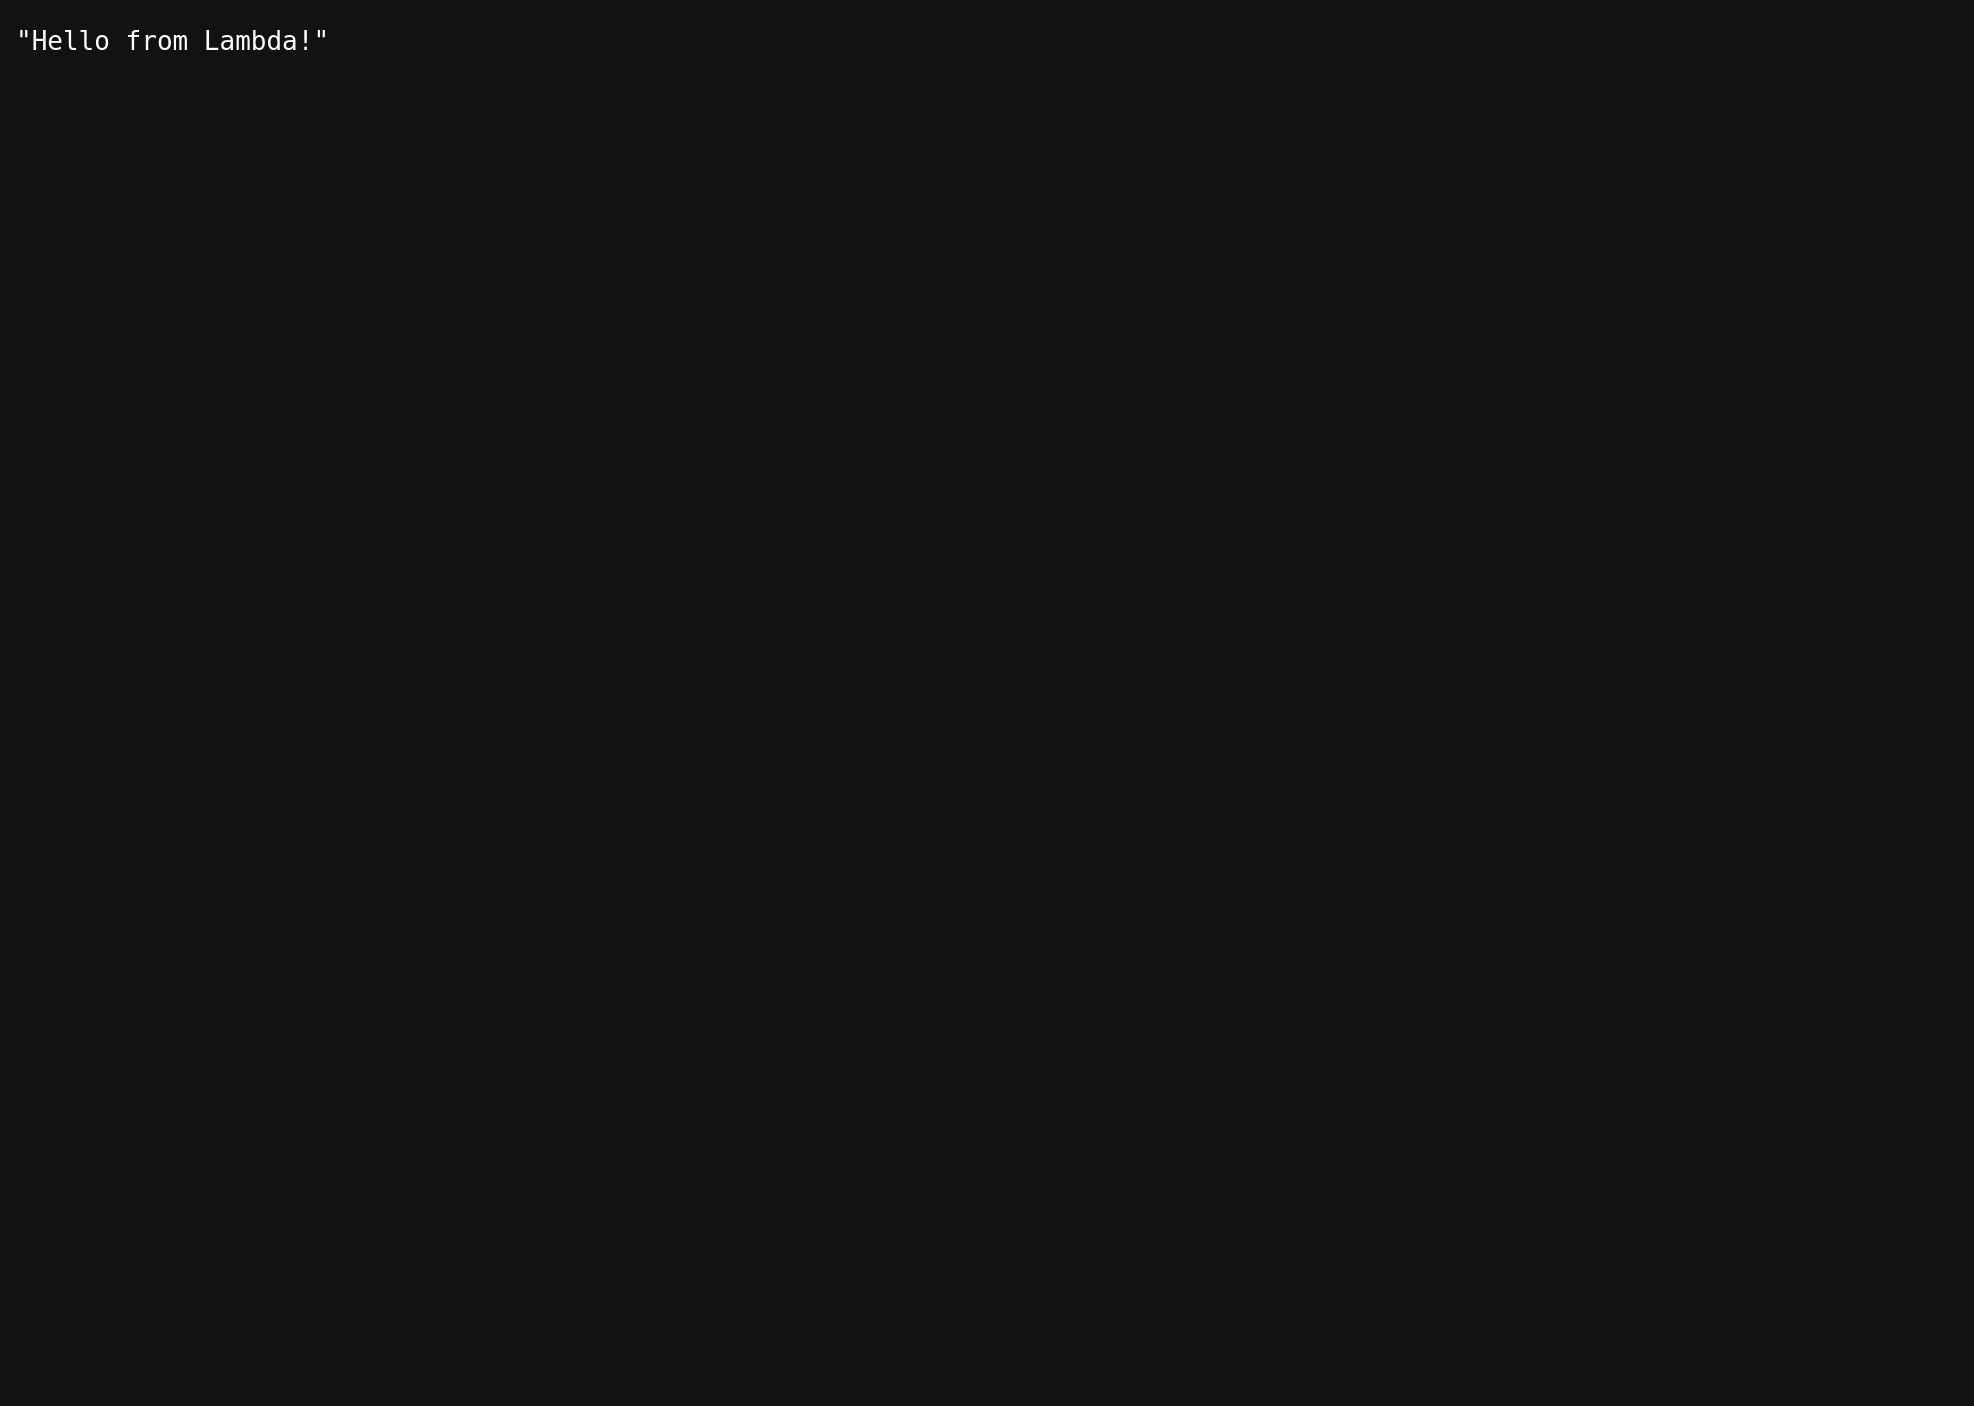
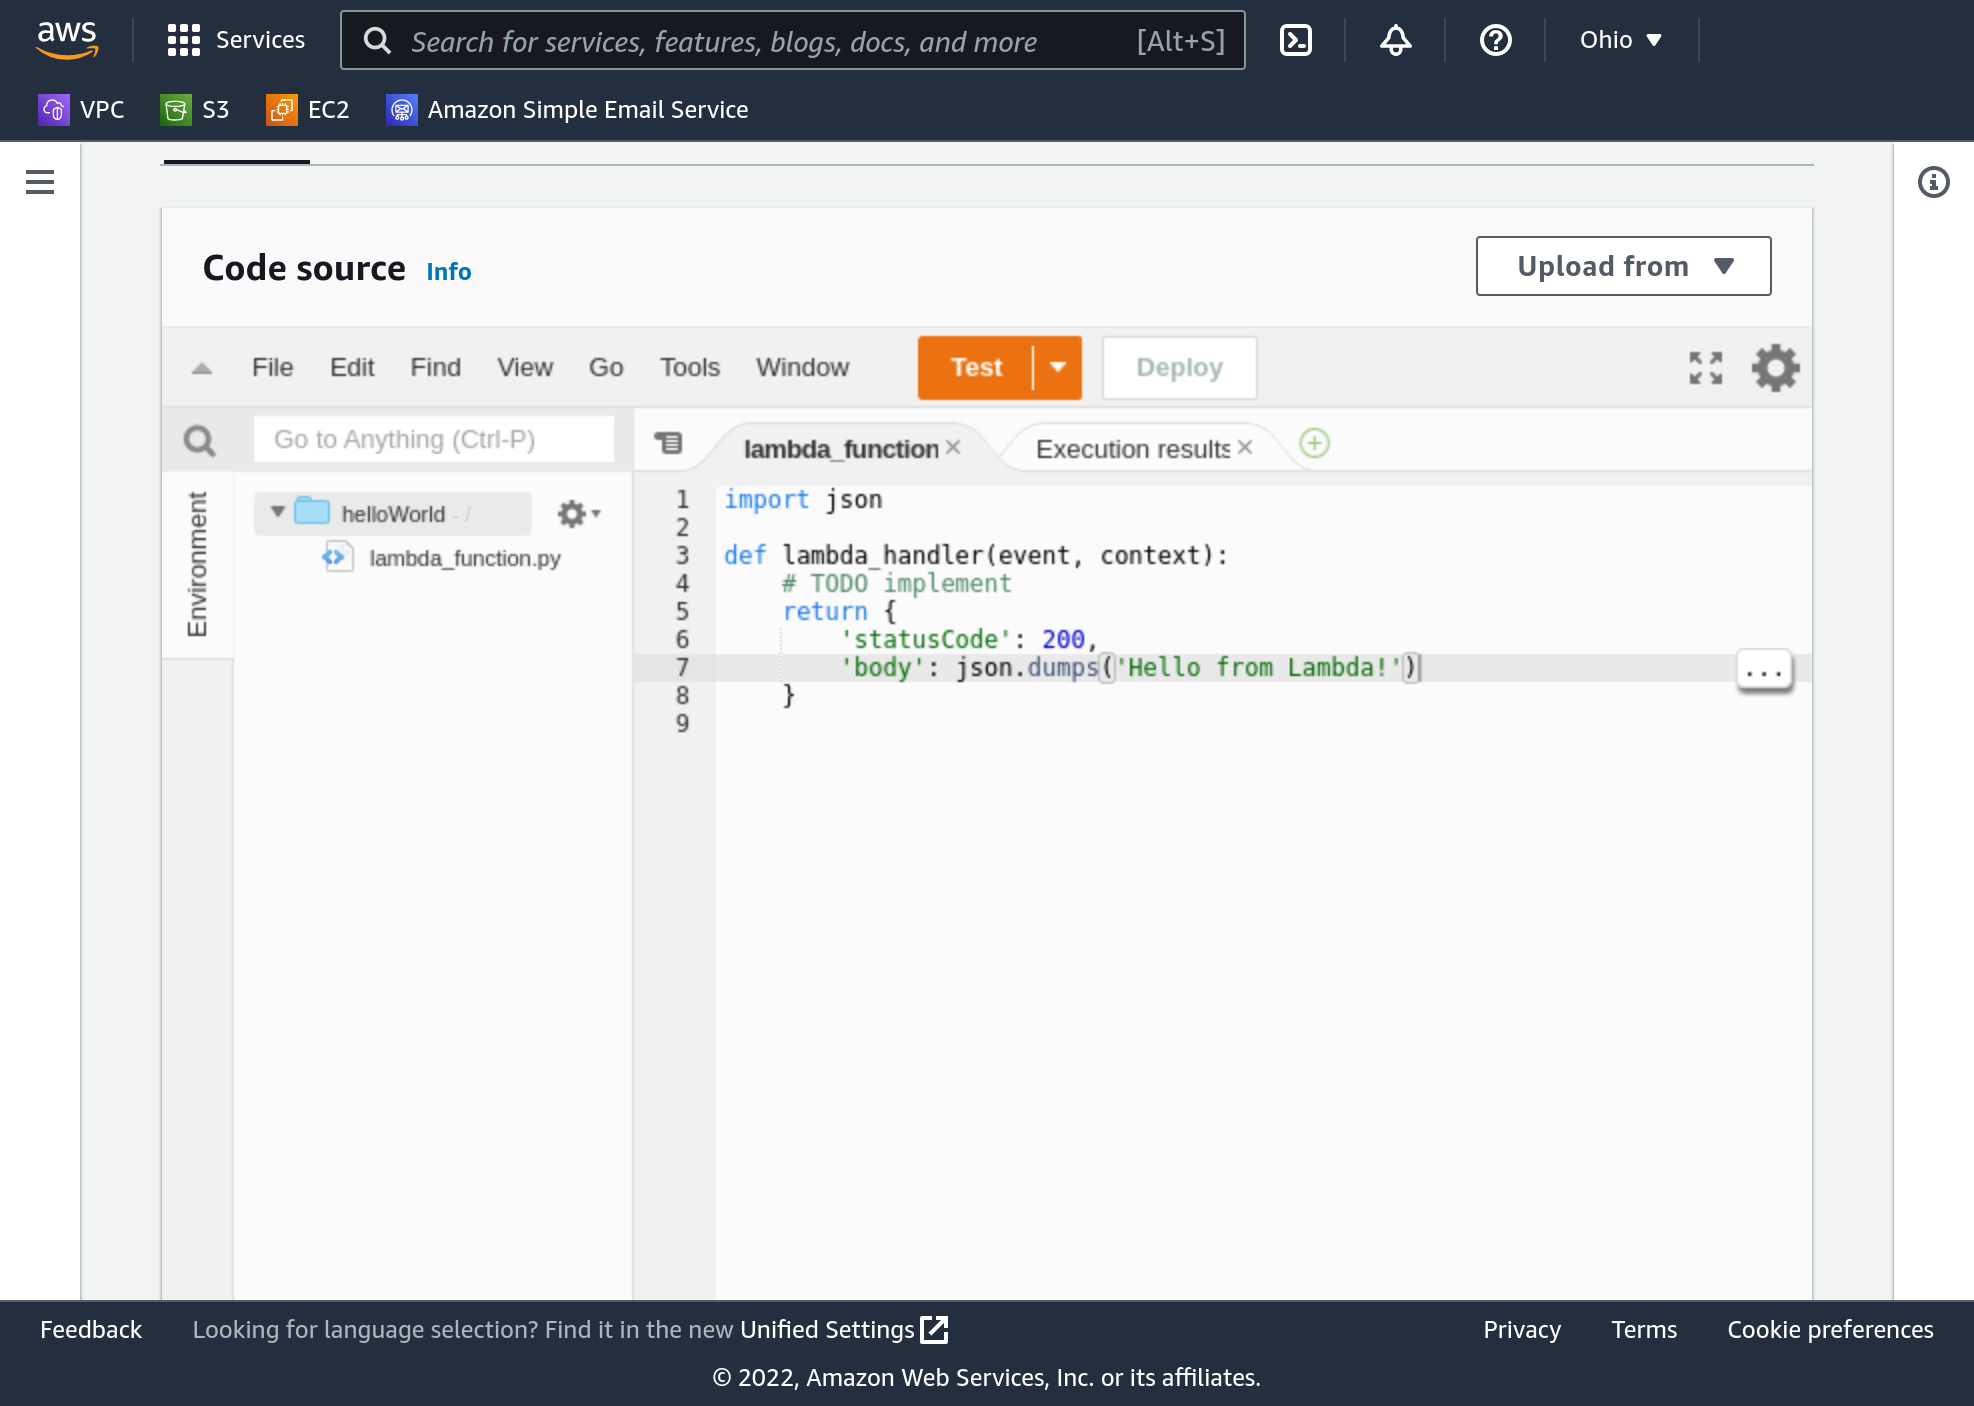
By default the function already says “hello”! This was almost too easy. Back in the Lambda function window scroll down to the code source listing. You’ll see a very simple Python function named lambda_handler that takes two parameters and returns a dictionary. The dictionary tells Lambda to respond to browsers with a status code of 200 (which corresponds to “OK”, or success) and the hello message as a JSON string. JSON is the default return type of the function because it’s very common to integrate data from web-based APIs using JSON.
Let’s return HTML though, instead of JSON. First, change the body entry in the return value dictionary to include some HTML. Do this by replacing the json.dumps() section with something like:
"<html><body>Hello, world! I'm a Lambda function!</body></html>"
Next, after the body entry add a headers entry, with a value that’s an additional dictionary. Make sure to put a comma at the end of the body line, then add this on the next line:
'headers': { 'Content-Type': 'text/html' }
It’ll be very important to get the tabs at the beginning of your lines correct. They must be consistent because this is Python.
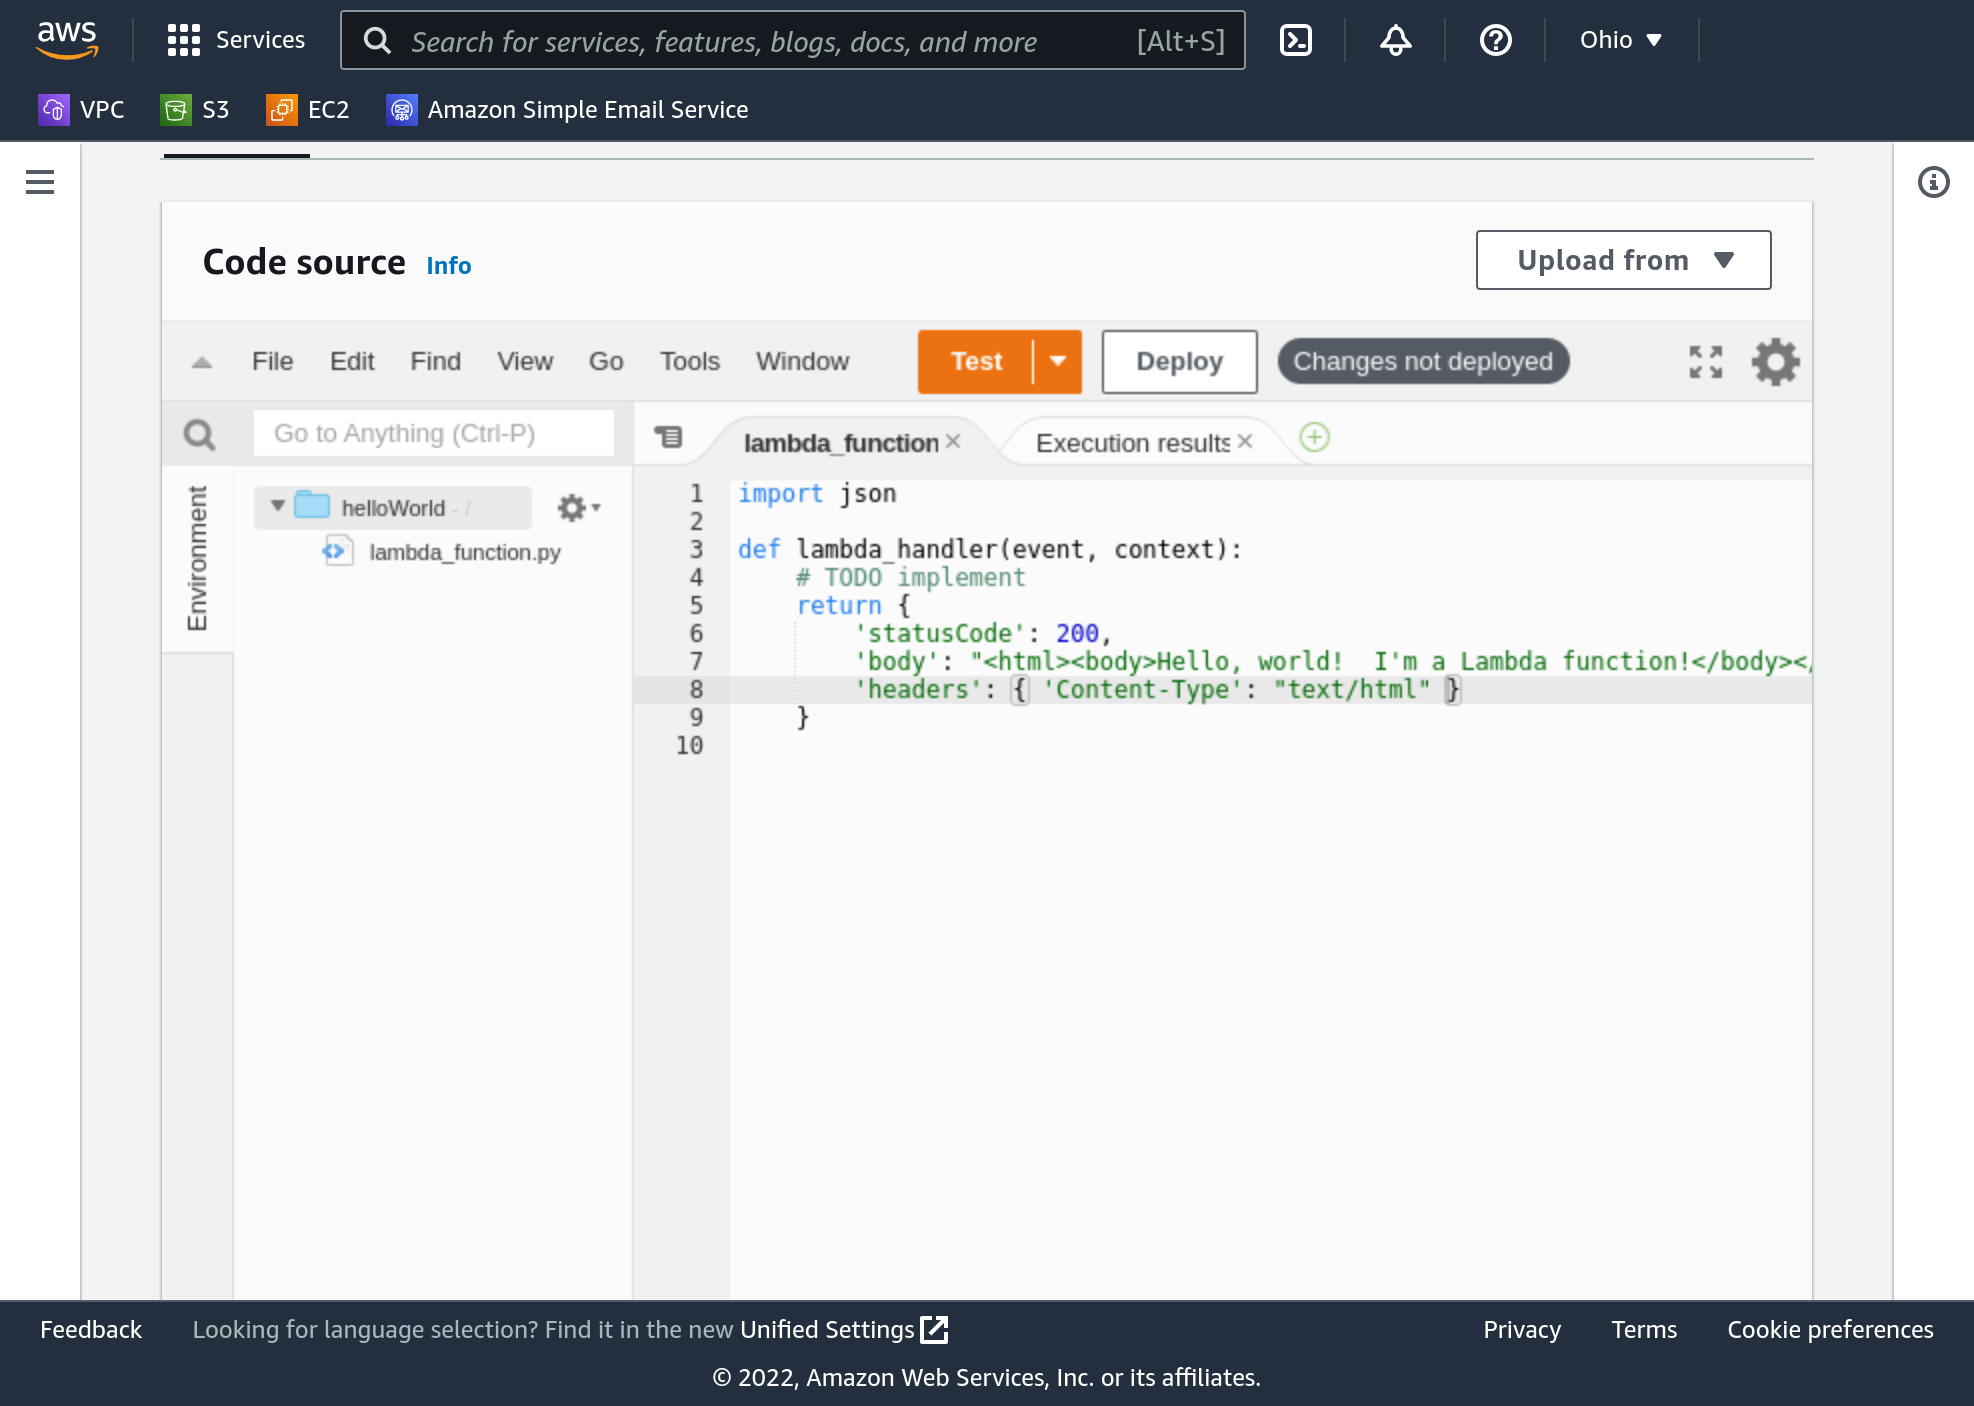
Check that the quotation marks, commas, and other punctuation and spacing match the screenshot.
Click deploy to deploy your code, then refresh your function URL window.

Your function URL should return our “Hello, world” message, and your browser should not be displaying the raw HTML (you should see no <html> or <body>, for instance). If you get an error, or see the HTML, verify that your code and its formatting matches the screenshot.
You’ve got the basics now! Let’s step it up a little.
Iterate on your Function’s Code
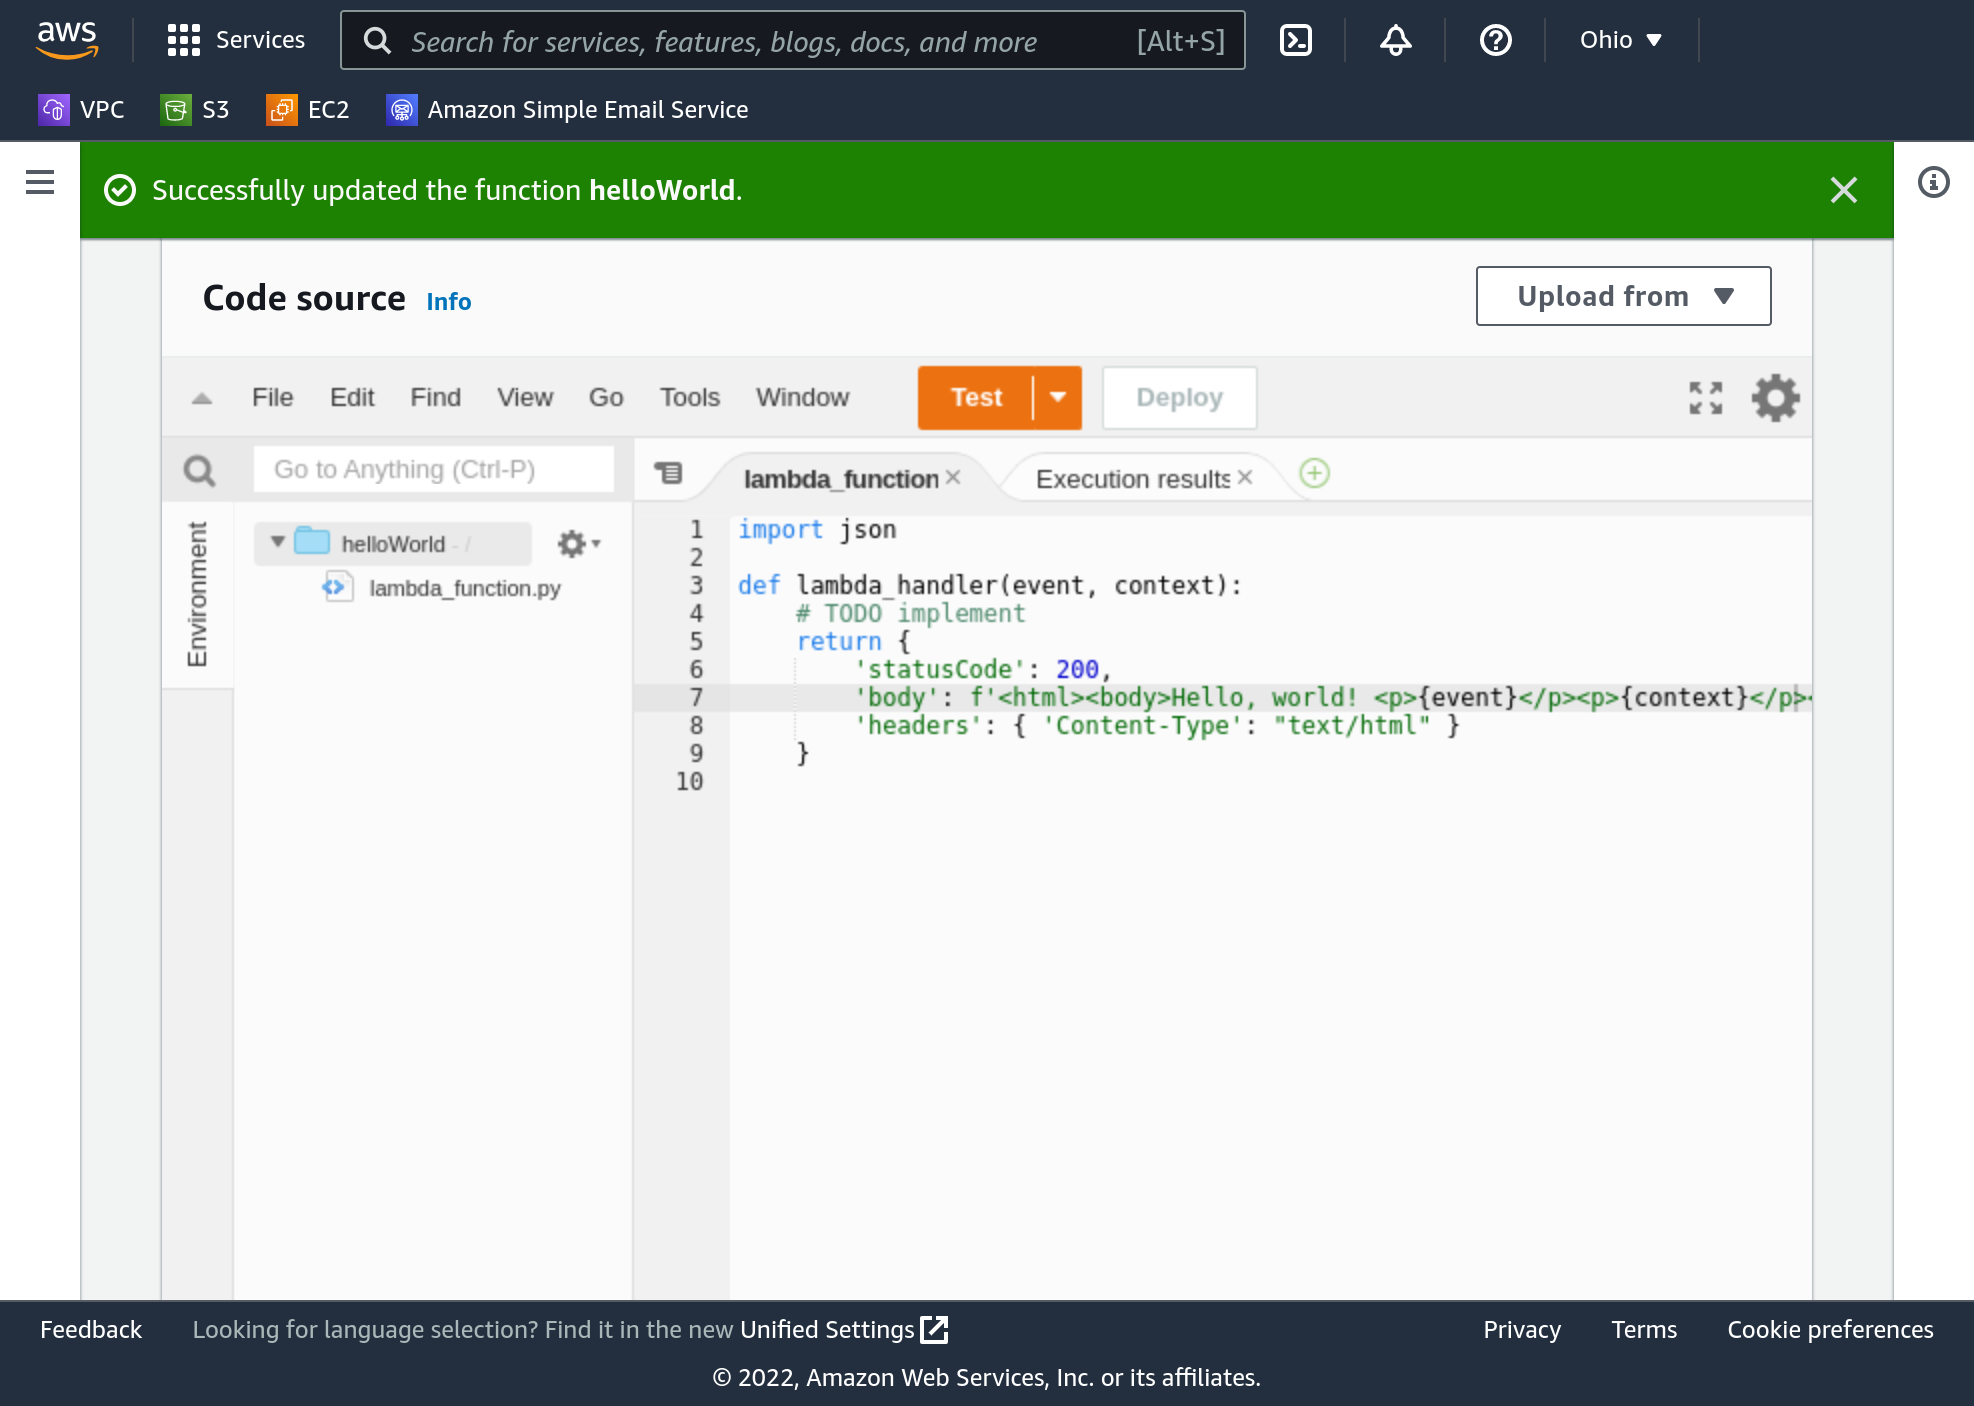
What are these function parameters: event, context? We have a way to output these values using our function URL, so let’s put that to use. Change your body content to this:
'body': f'<html><body>Hello, world! <p>{event}</p><p>{context}</p></body></html>',
Please note the f right before the body string quotation mark. That tells Python that this is a “format string” instead of a regular one. That permits us to reference variables inside the string by putting braces around them - like we did with event and context. This will embed the content of those variables in our output. Now deploy your function.
Refresh your function URL, and you’ll see the content of event and context in the output. The event parameter provides information about the specific API request the user made when they clicked the URL, and the context parameter provides information about the broader AWS context your function is executing within.
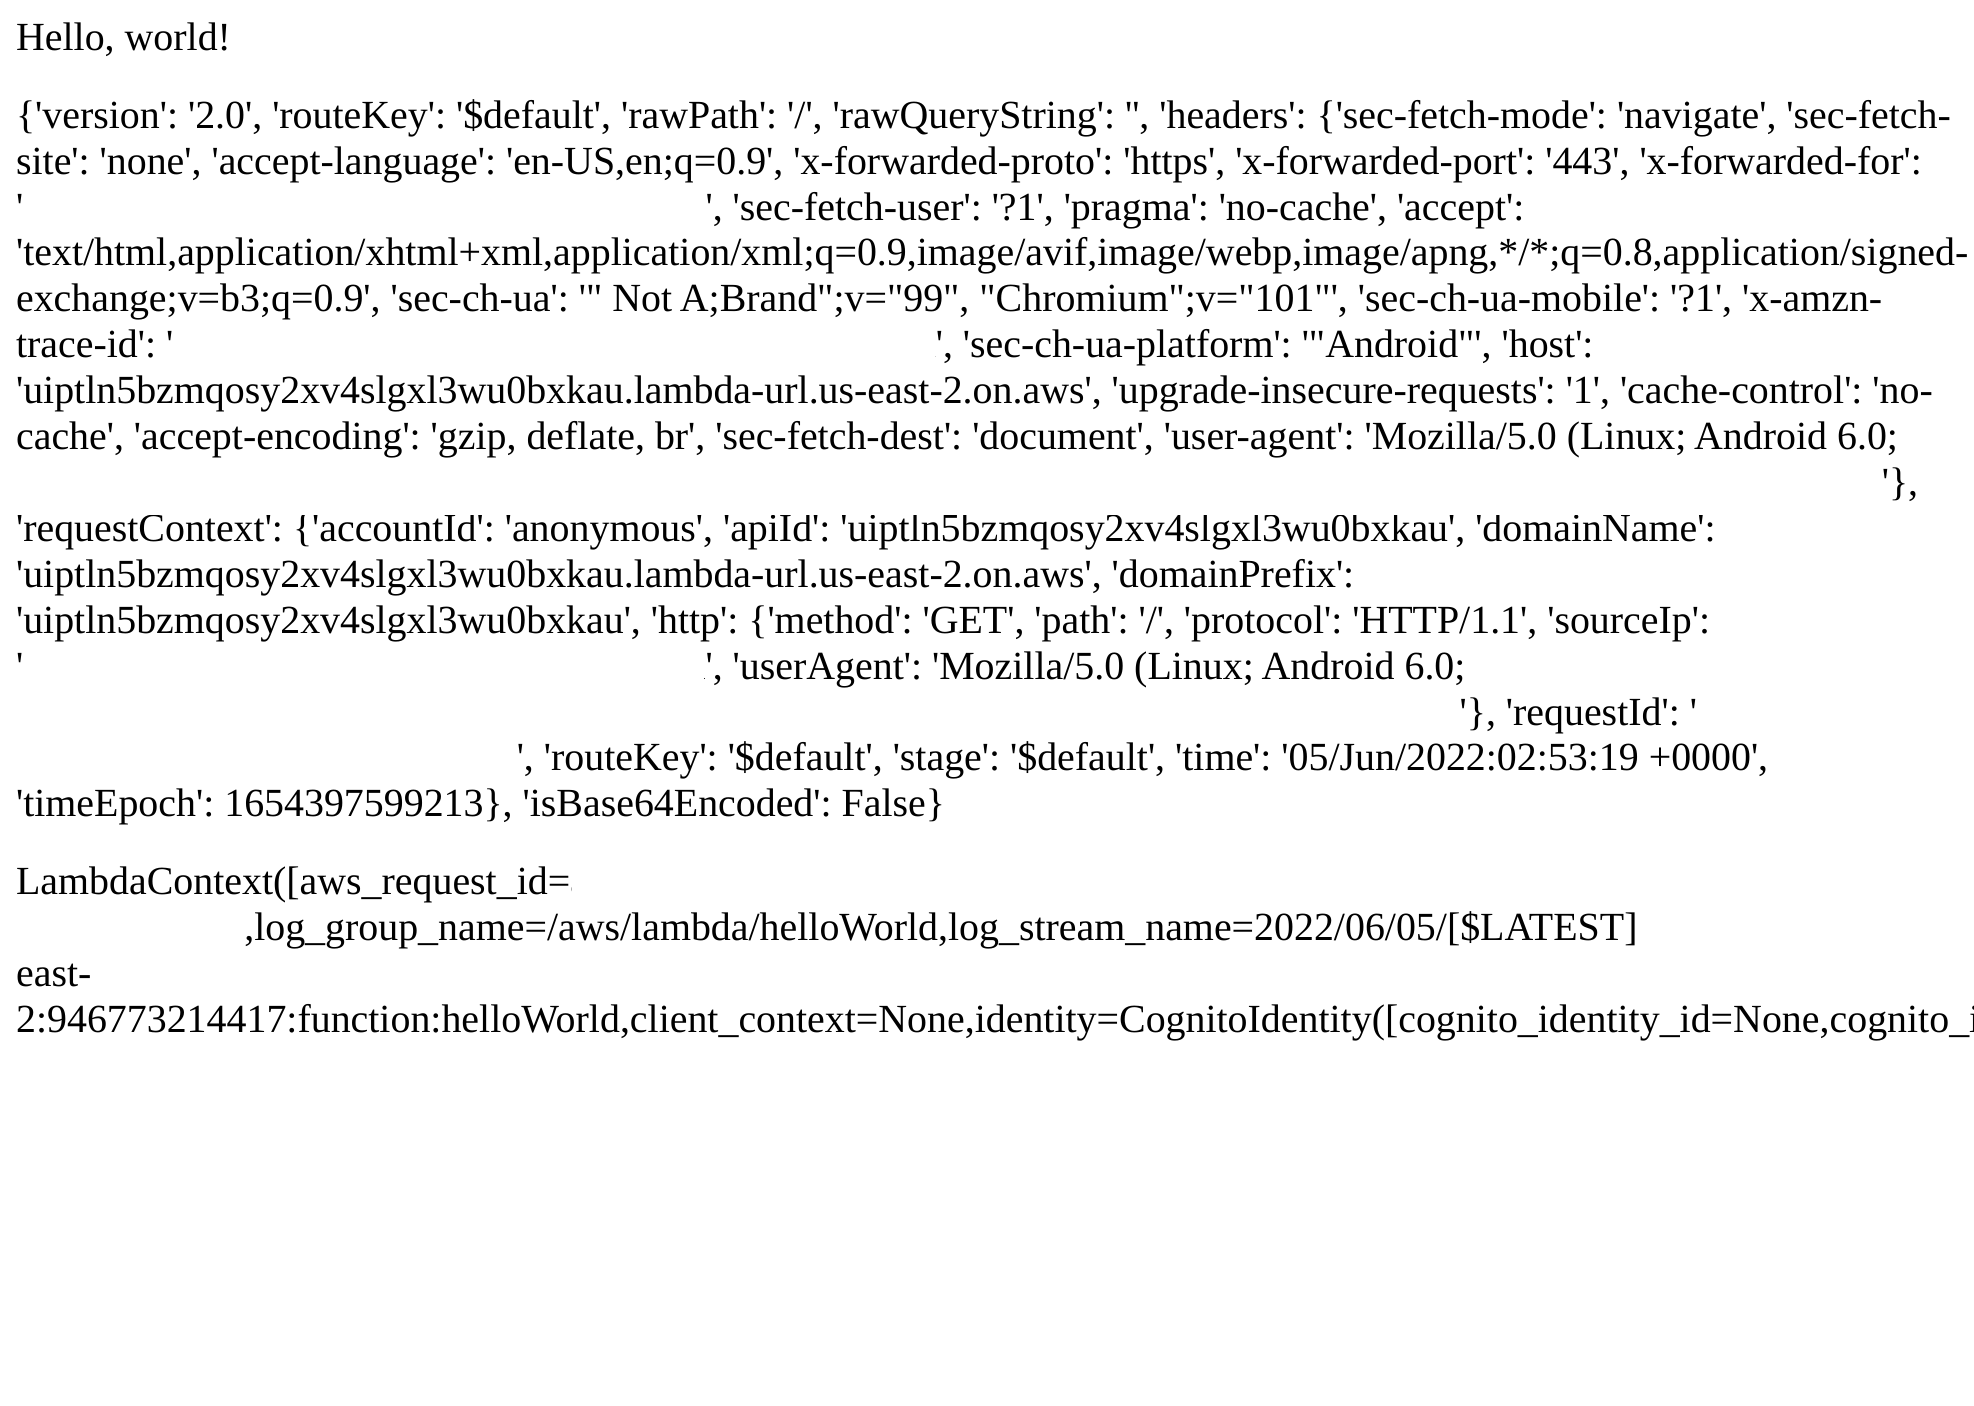
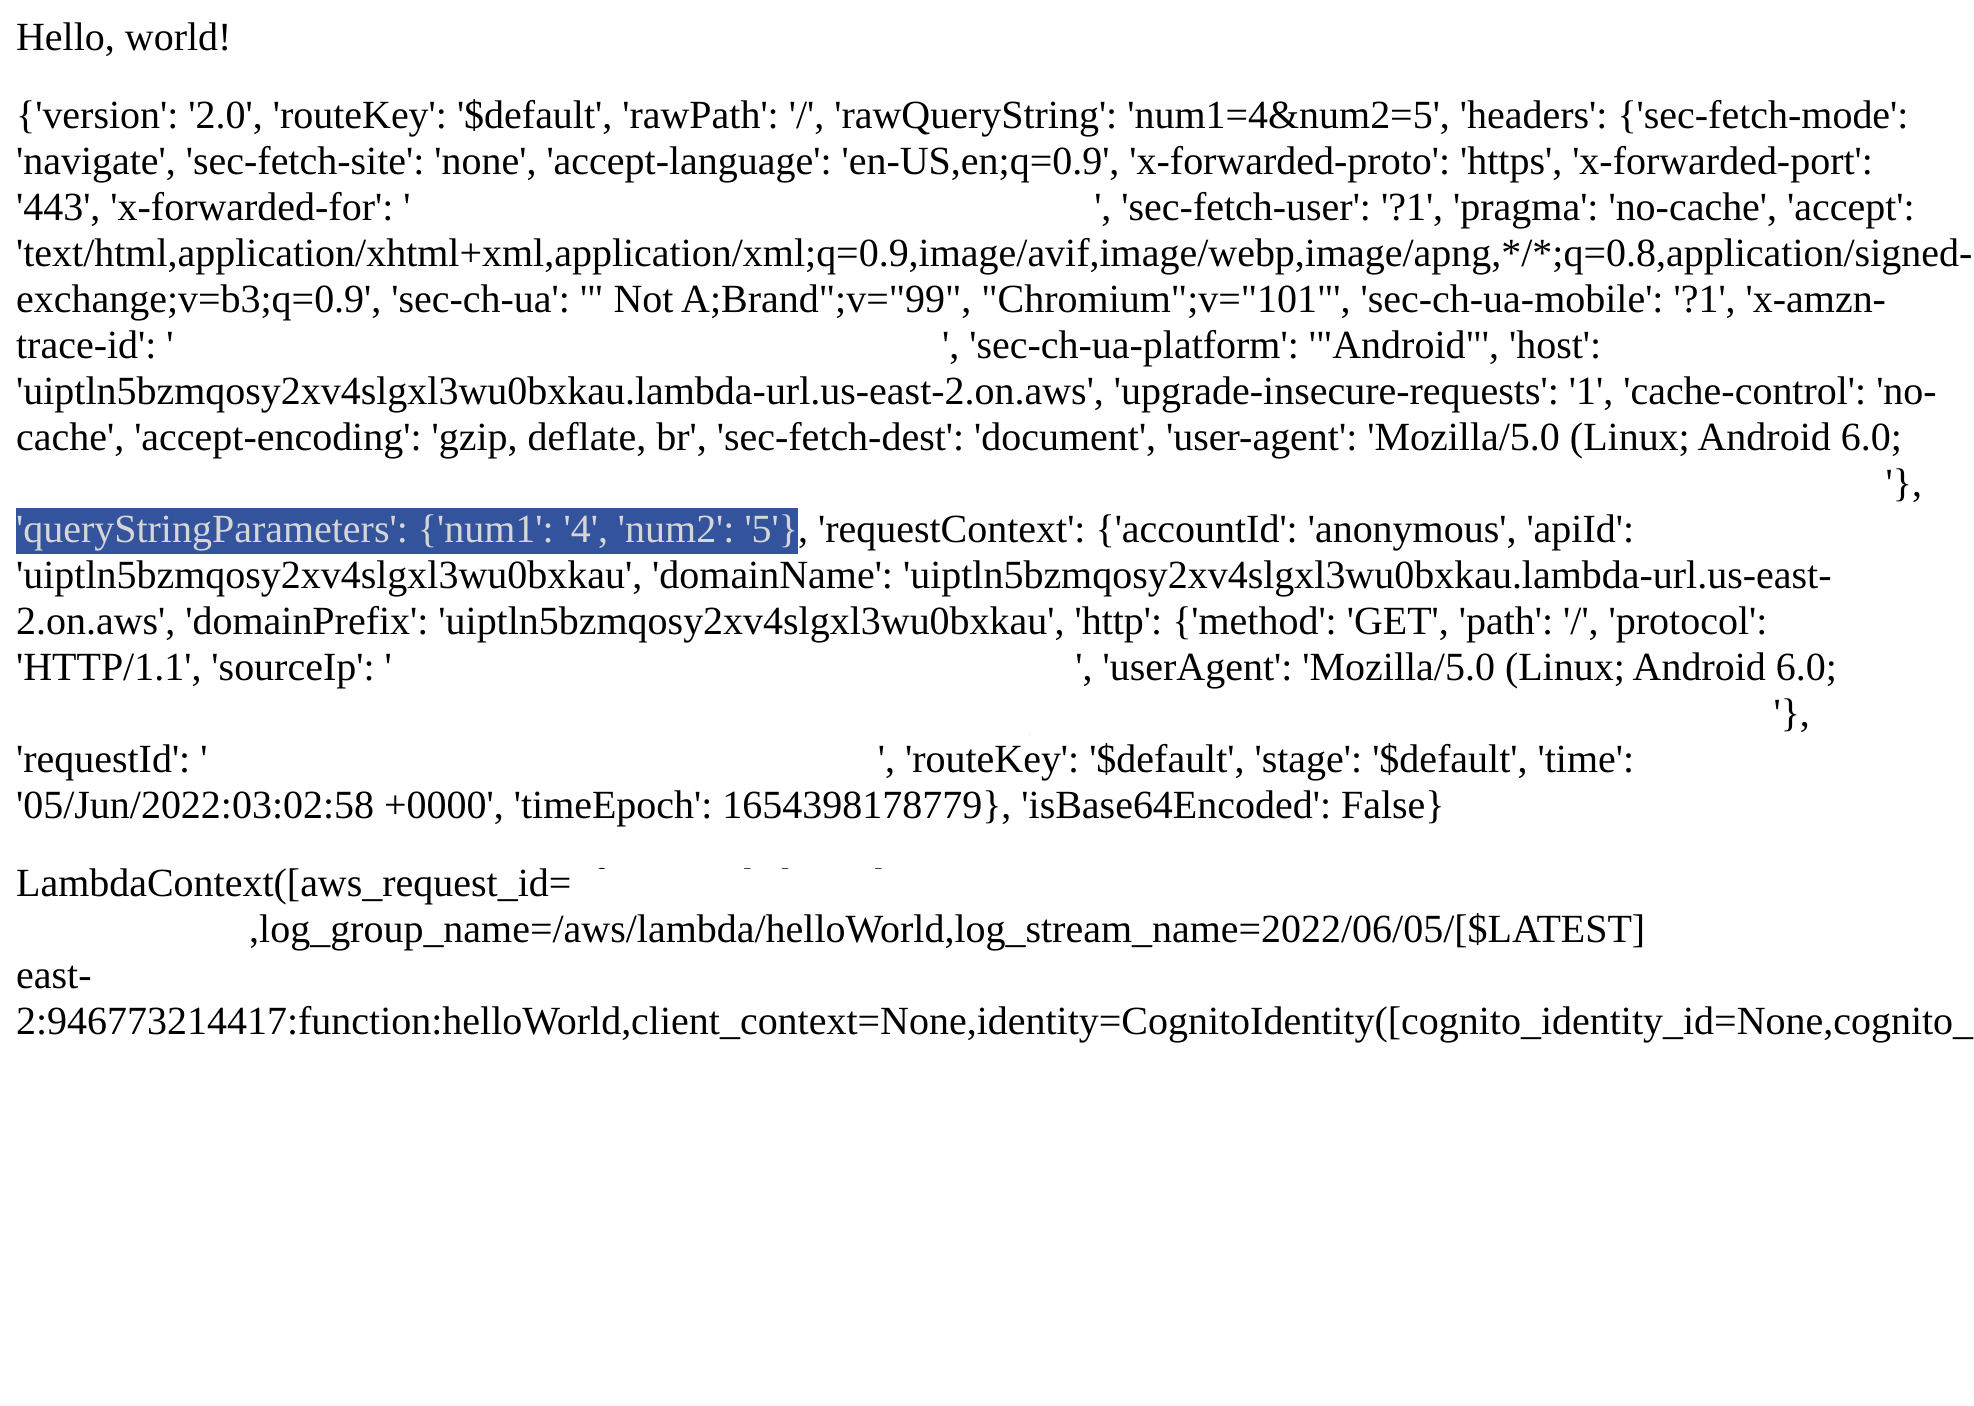
The event parameter is a dictionary and contains several very useful entries. One of which is queryStringParameters. It’s not visible by default because you haven’t sent a query string… Now send one. Your function URL will look something like:
https://<random characters>.lambda-url.us-east-1.on.aws
Add a query string to the end by changing it to this:
https://<random characters>.lambda-url.us-east-1.on.aws/?num1=4&num2=5
Then hit enter to load that URL. Your function will return event lines that include the text queryStringParameters, and you’ll see your “num1” and “num2” separated out in there.
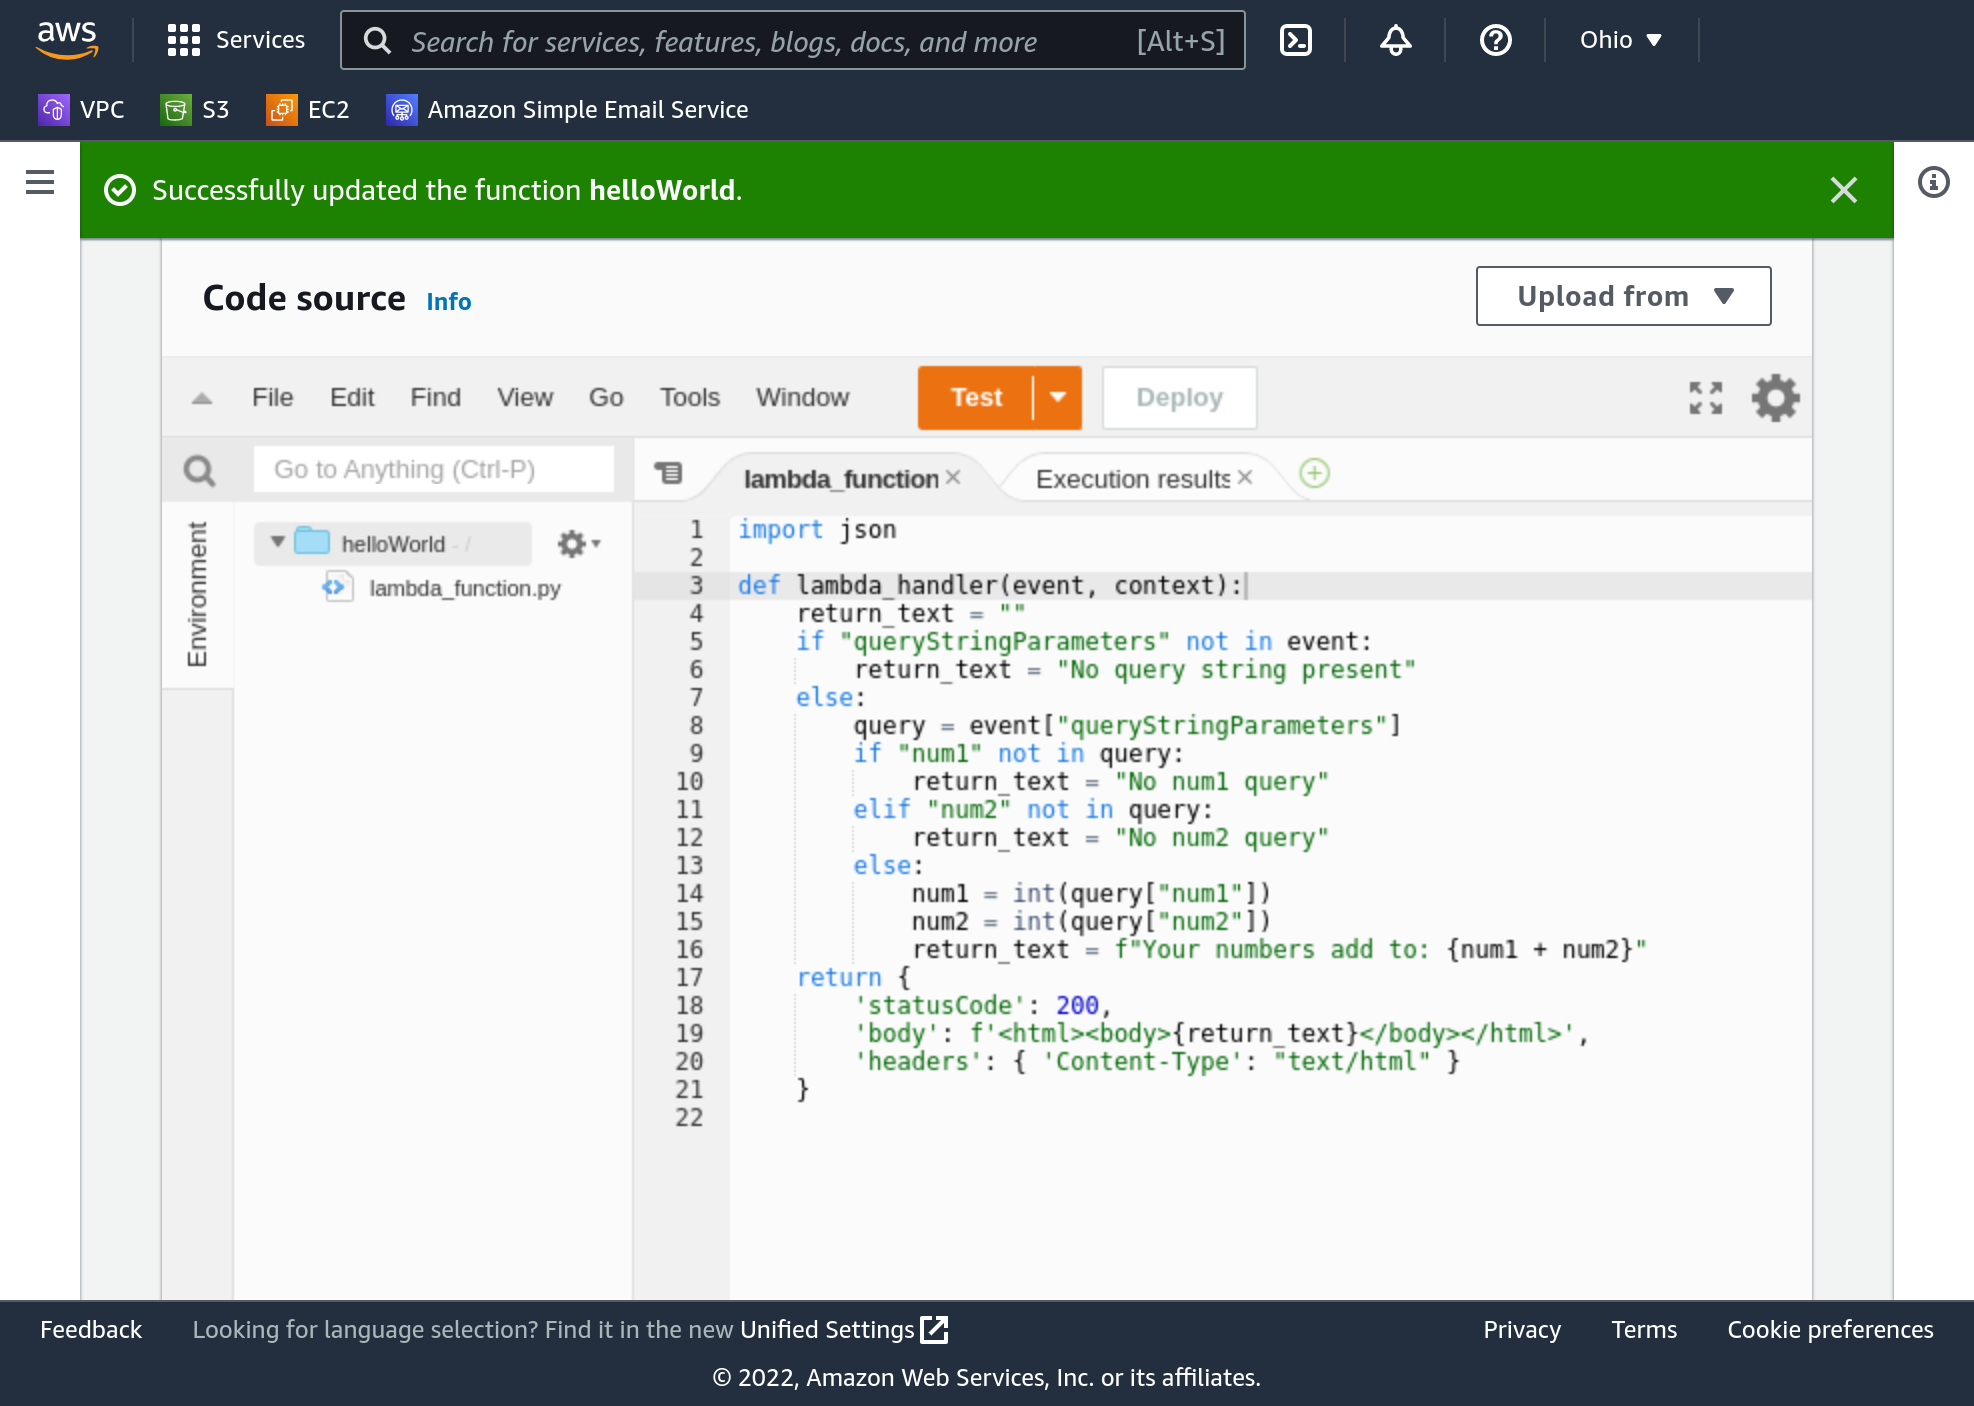
Back in our Python code we can pull those numbers out of the event, add them together, and return them nicely. Let’s change our Python function to the following:
def lambda_handler(event, context):
    return_text = ""
    if "queryStringParameters" not in event:
        return_text = "No query string present"
    else:
        query = event["queryStringParameters"]
        if "num1" not in query:
            return_text = "No num1 query"
        elif "num2" not in query:
            return_text = "No num2 query"
        else:
            num1 = int(query["num1"])
            num2 = int(query["num2"])
            return_text = f"Your numbers add to: {num1 + num2}"
    return {
        'statusCode': 200,
        'body': f'<html><body>{return_text}</body></html>',
        'headers': { 'Content-Type': "text/html" }
    }
Again, be careful with the tabs at the beginning of the lines. The code must be lined up like it’s shown here. This code checks for queryStringParameters, then num1 and num2, and returns nice messages if they’re not present. If they are, it interprets them as “integers” (whole numbers) then adds them together and makes a nice message with the result.
Refresh your function URL tab, making sure your query string is still on there, and you should see the parameters added together.

Feel free to experiment now. Try to modify the query string. We handled several error cases - where the parameters aren’t specified, for instance. There are some we did not handle though. Try to find and alert nicely on those. There’s a hint for the most obvious unhandled error case down at the bottom of this page.
Delete your Lambda Function
You should delete this experimental function as soon as you’re done playing with it.
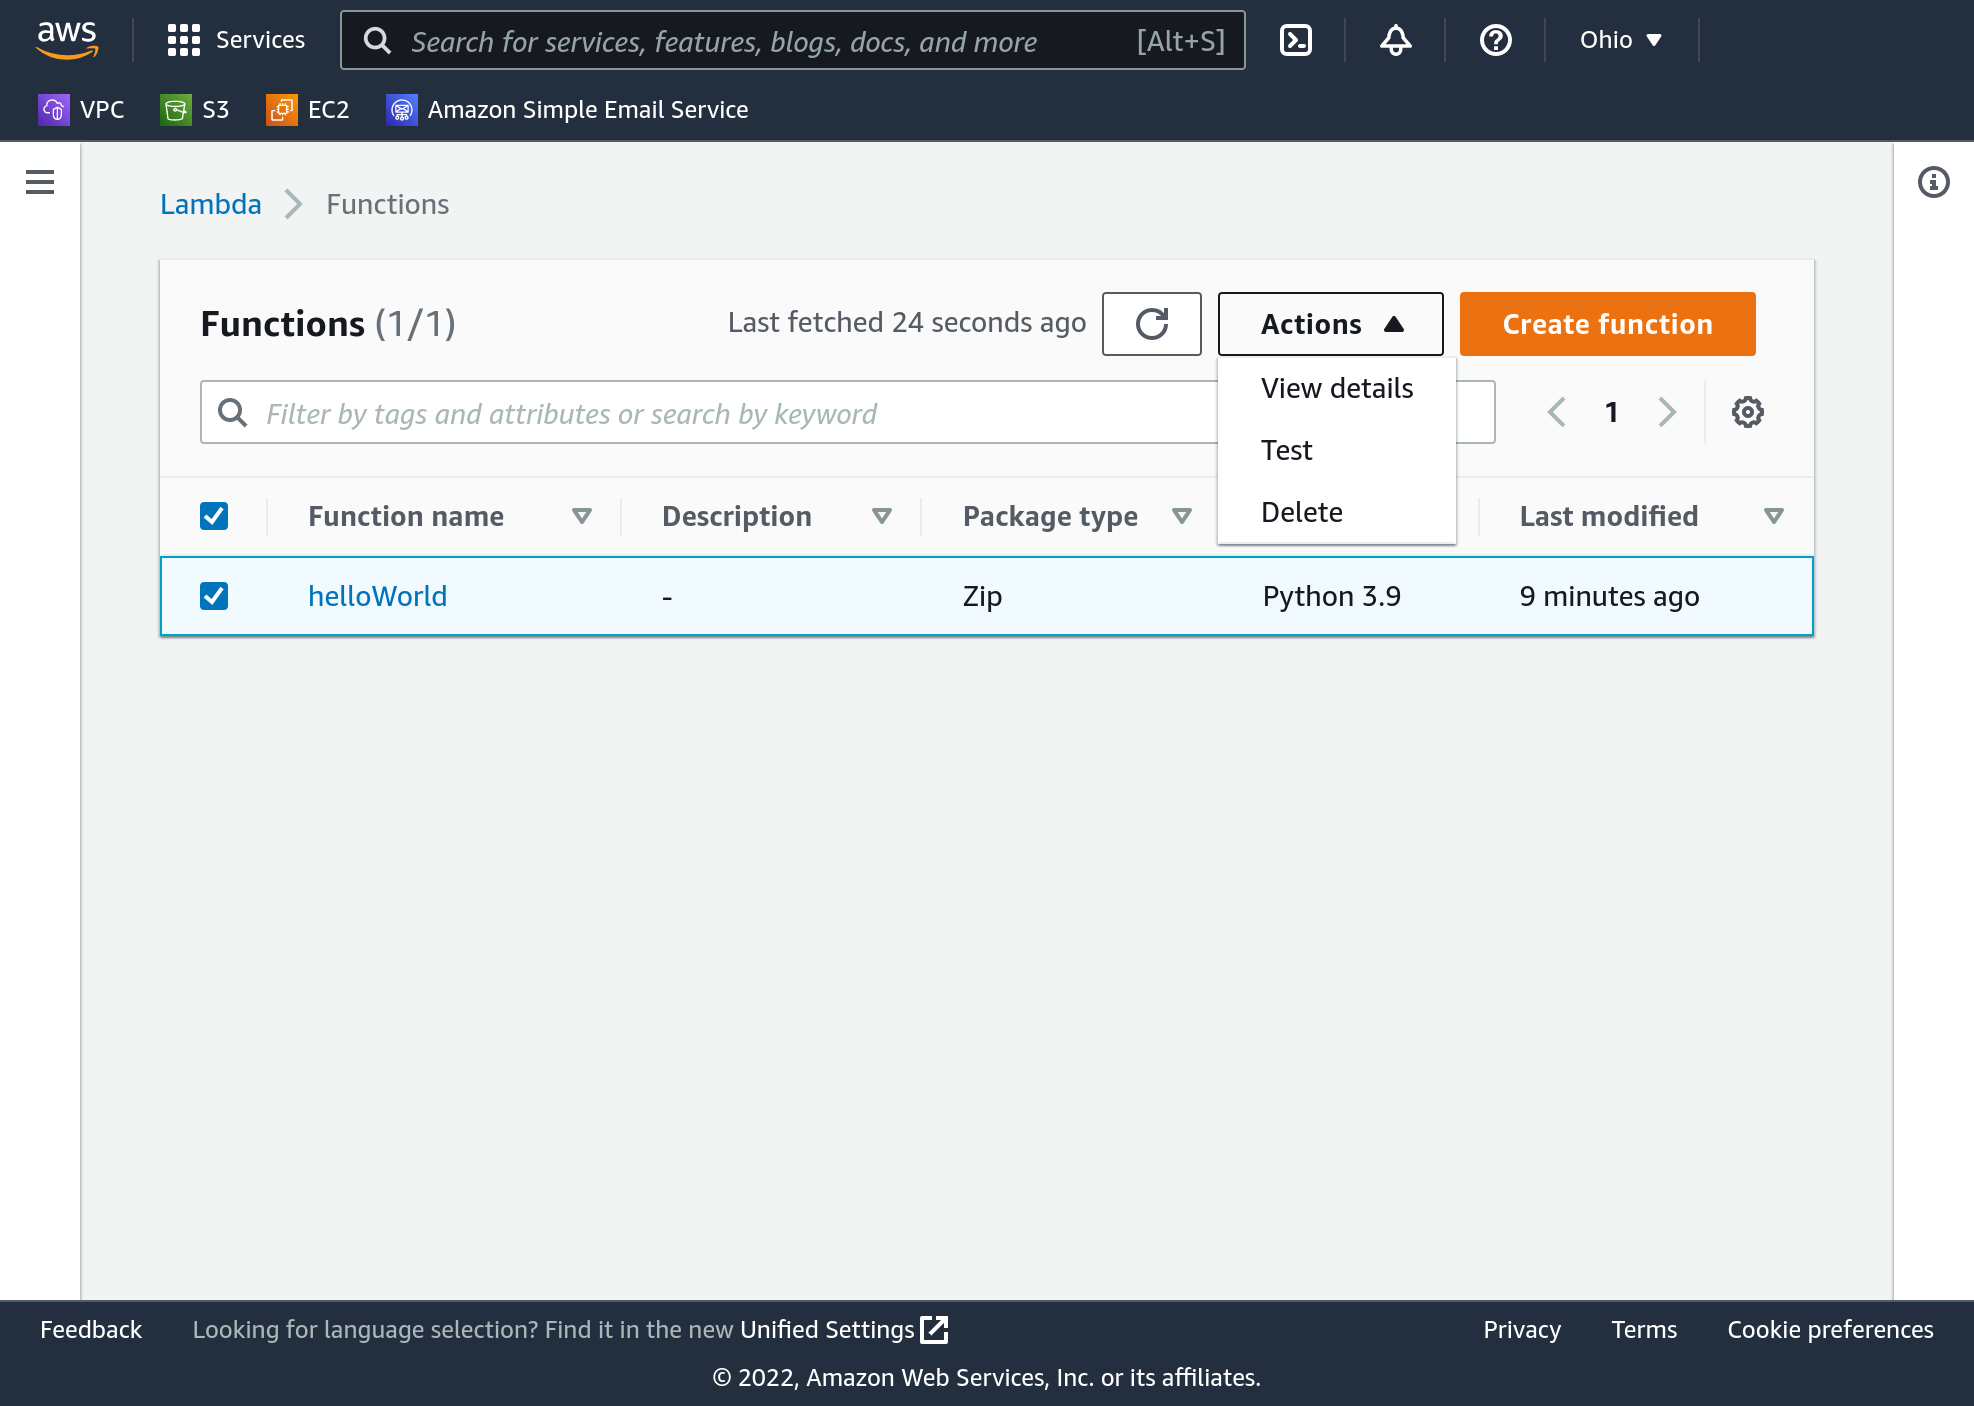
Back on the Lambda Functions screen select your helloWorld function, then click “Actions”, “Delete”.
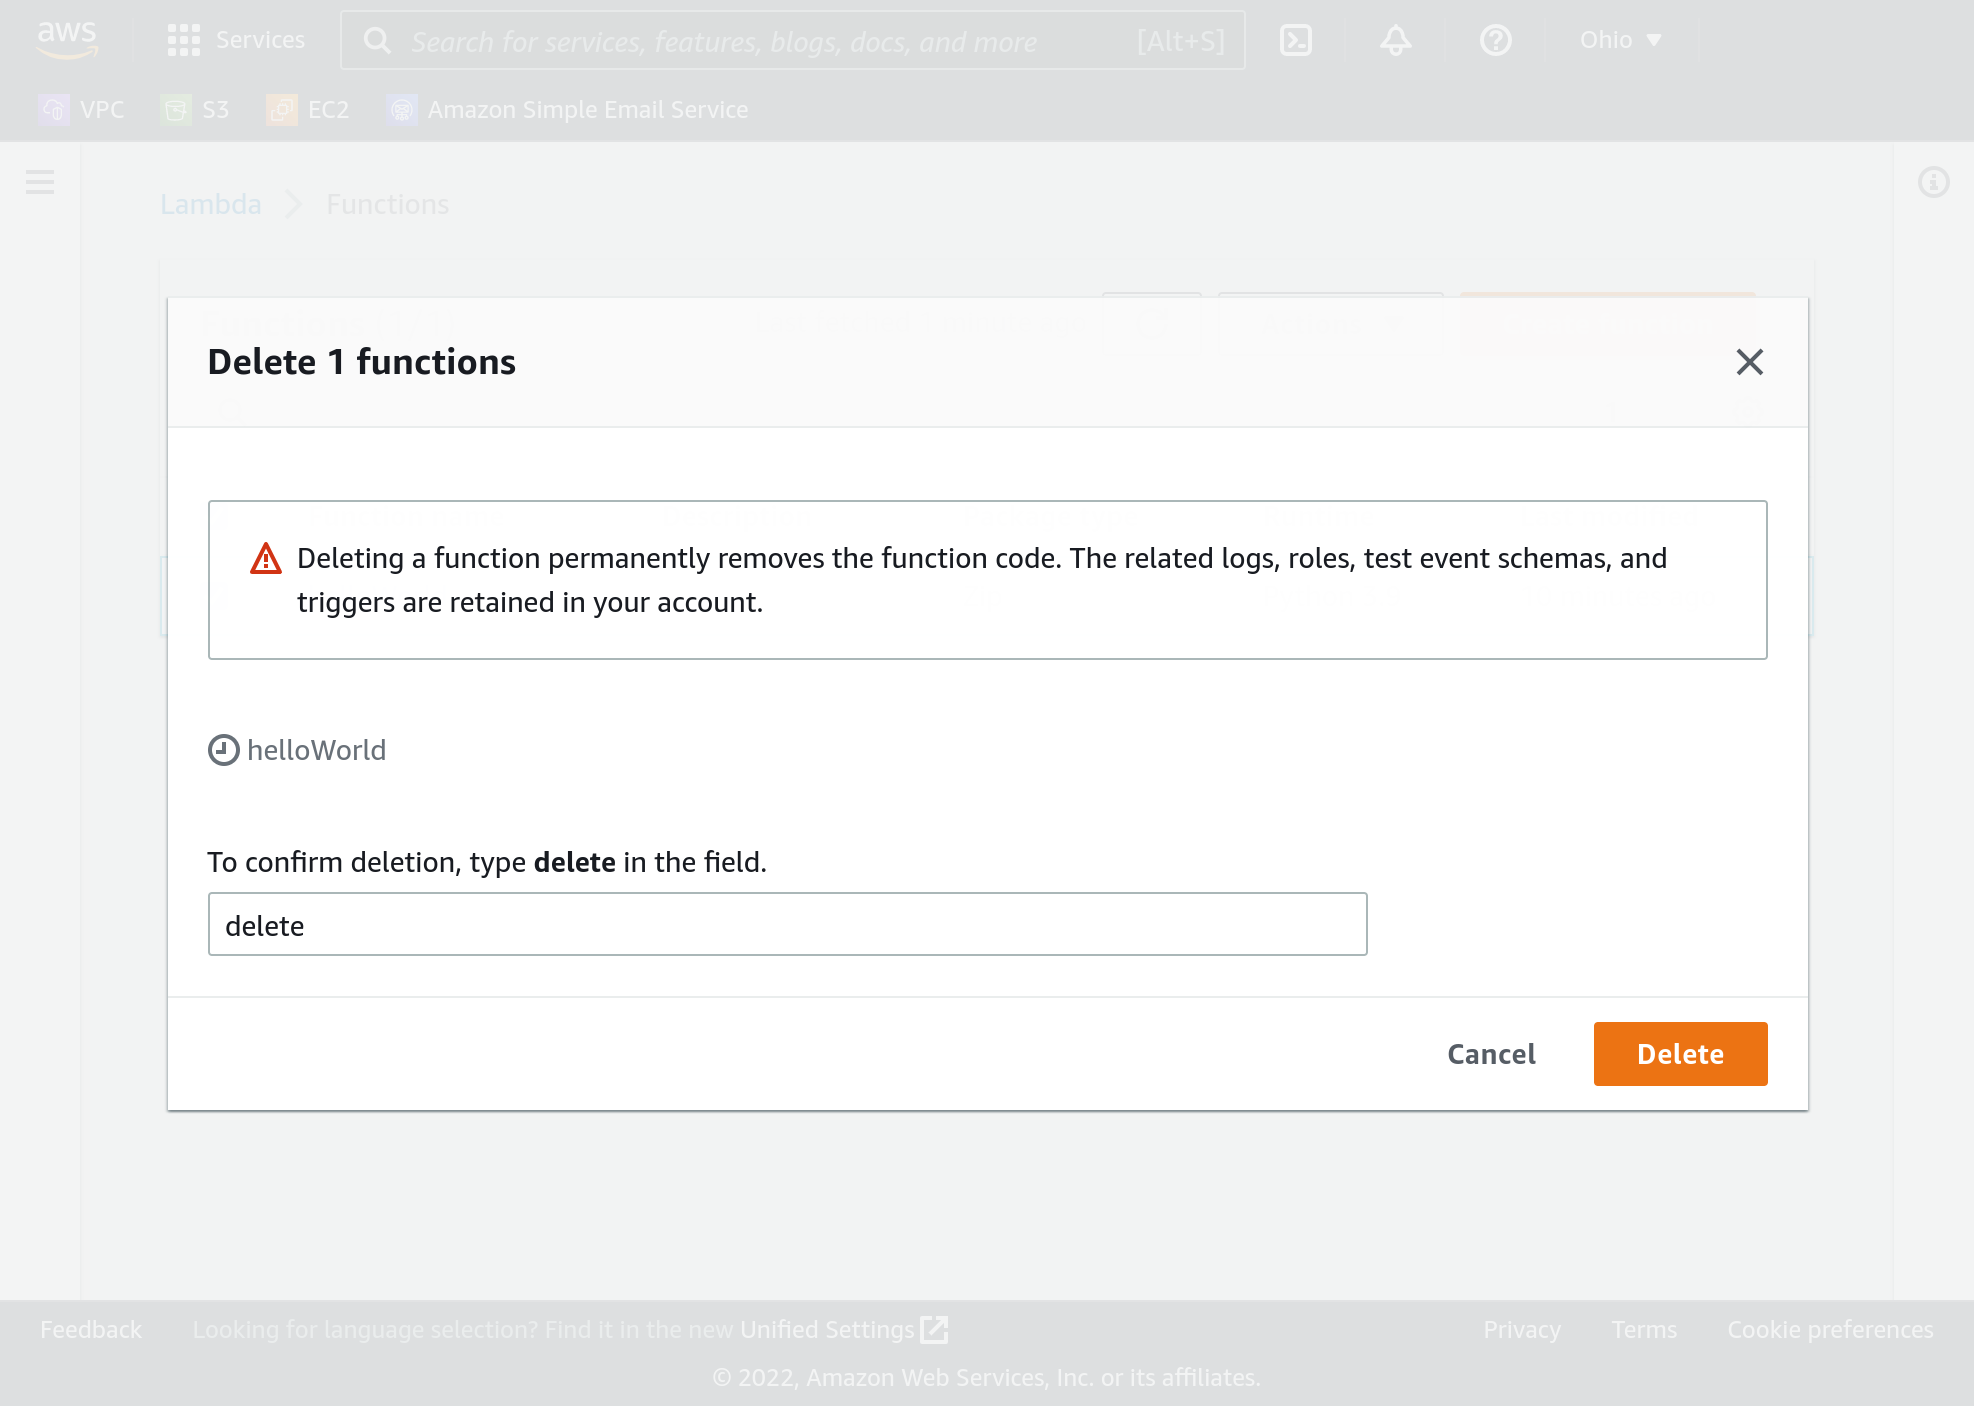
AWS wants to make sure you’re deleting the right function, as there’s no way to bring it back. Type delete in the box and click “Delete”.
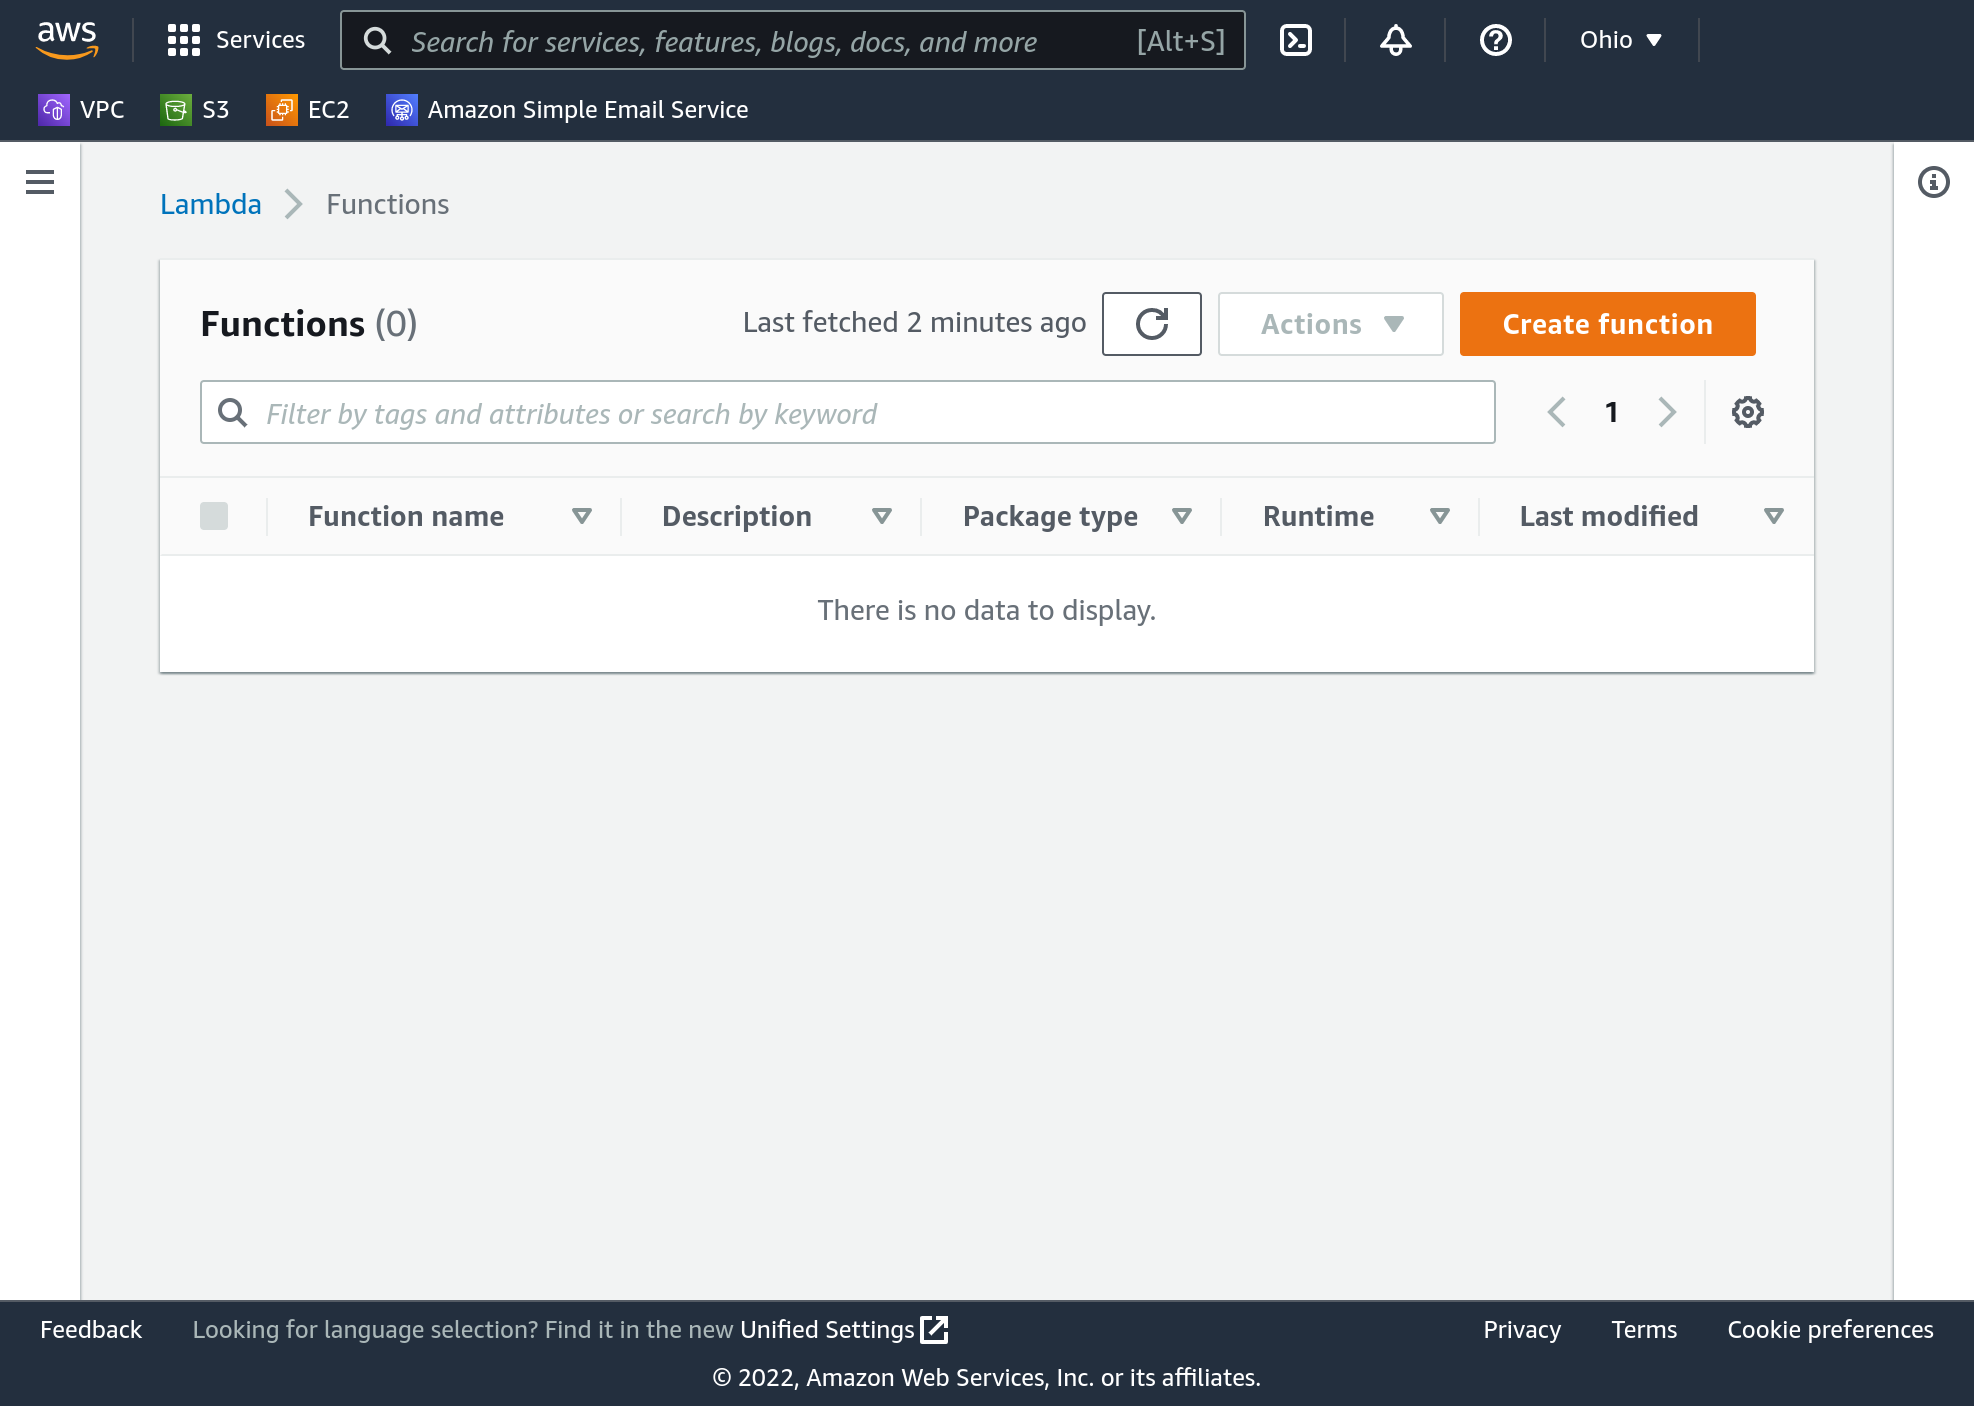
The function is now deleted, and should be gone from your list. But wait! We still need to delete the automatically-added IAM role.
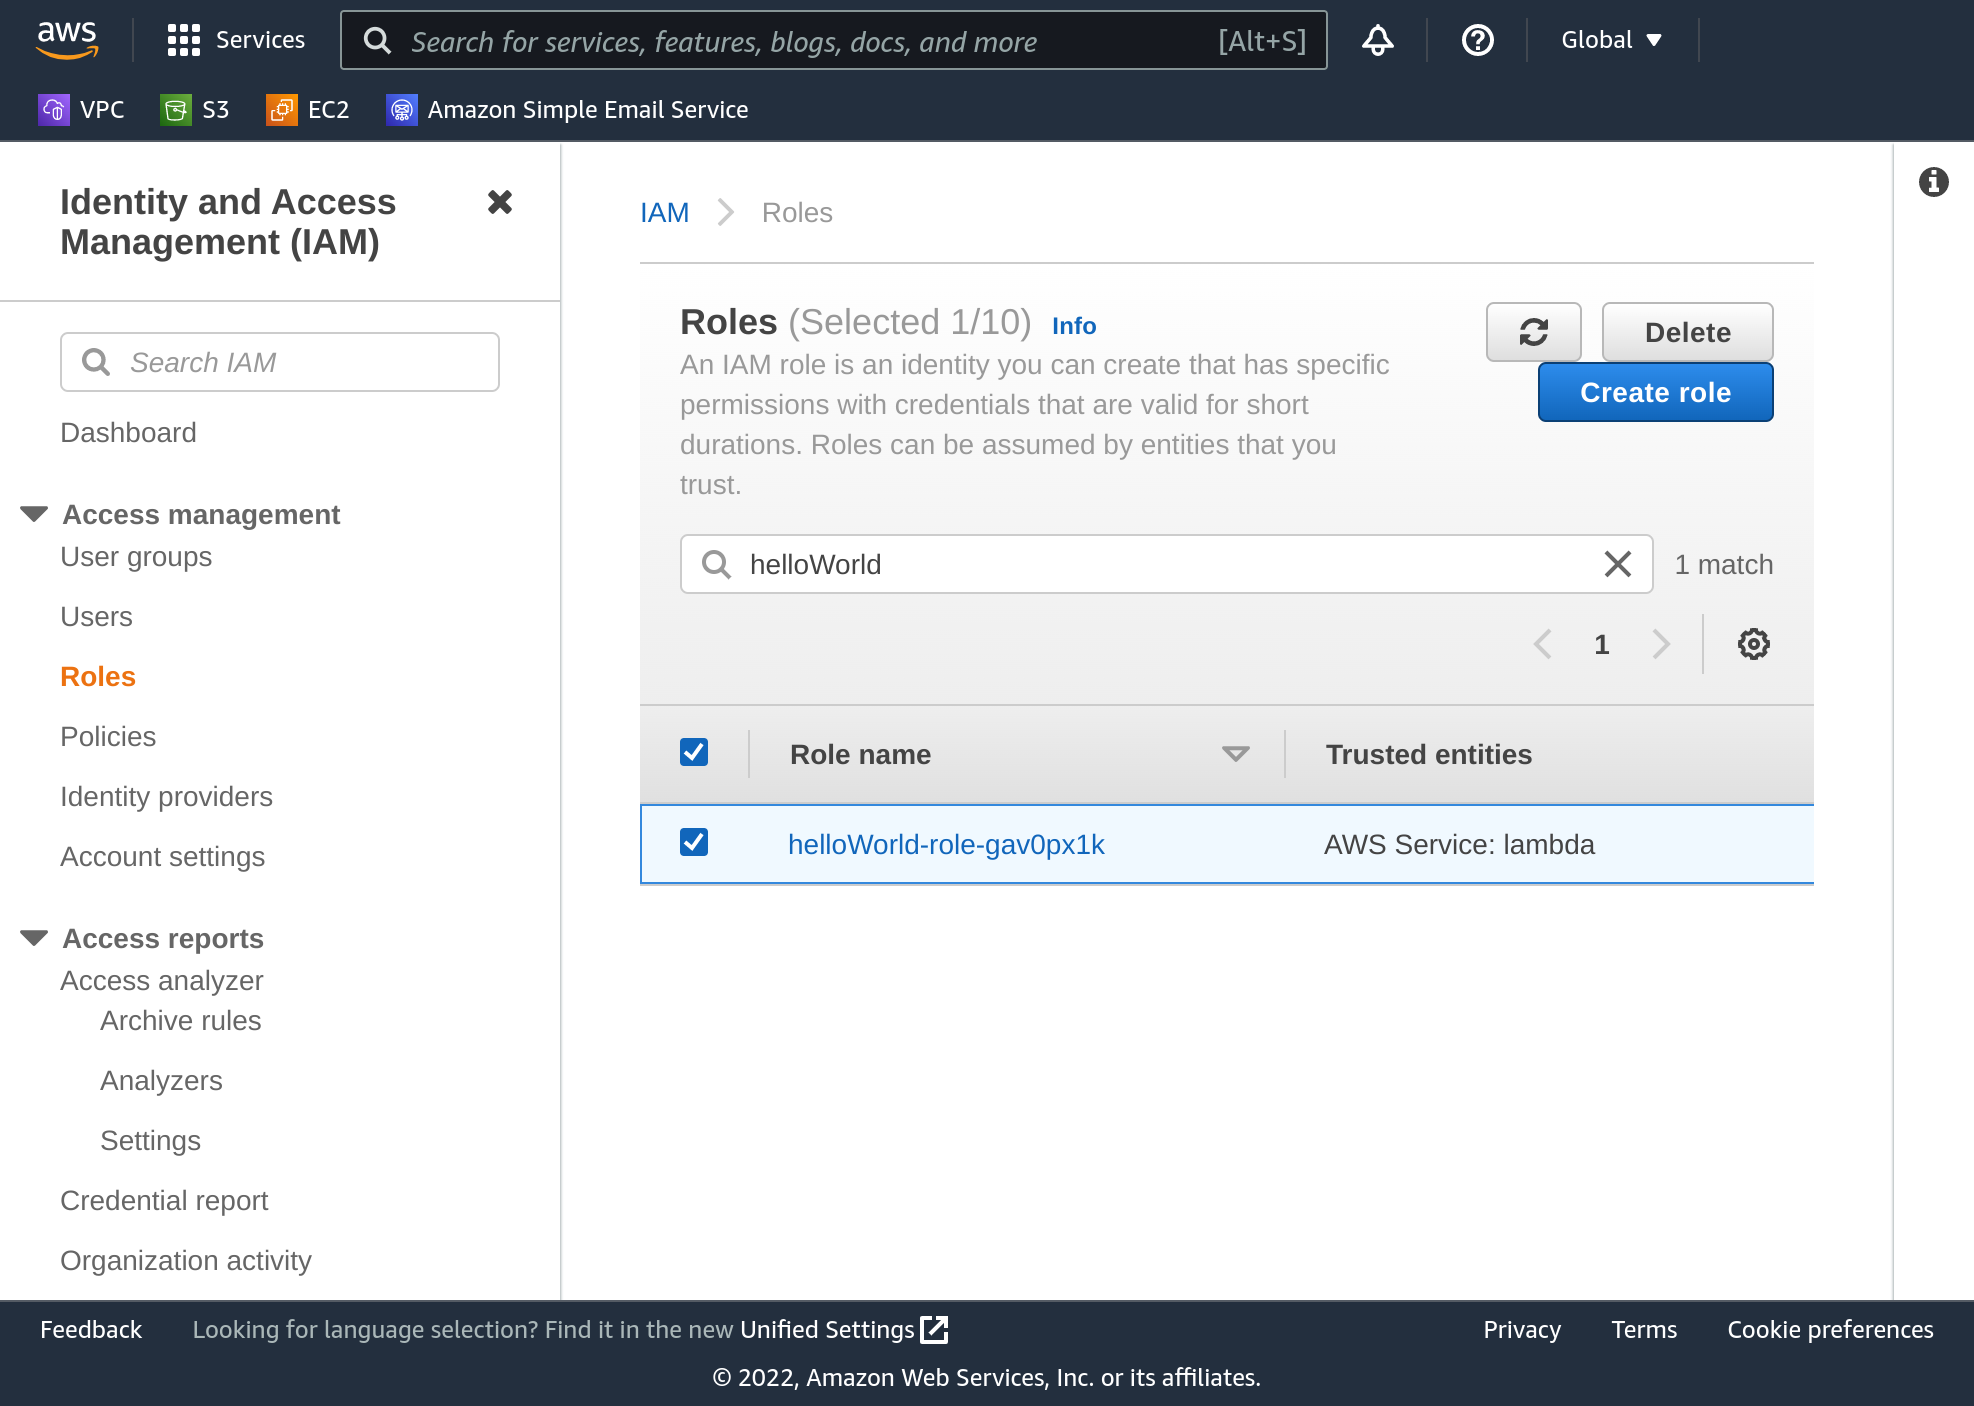
Go into the IAM service dashboard. On the left side navigation list select “Roles” under “Access Management”. In the roles search bar enter “helloWorld”, then select the role. Click delete.
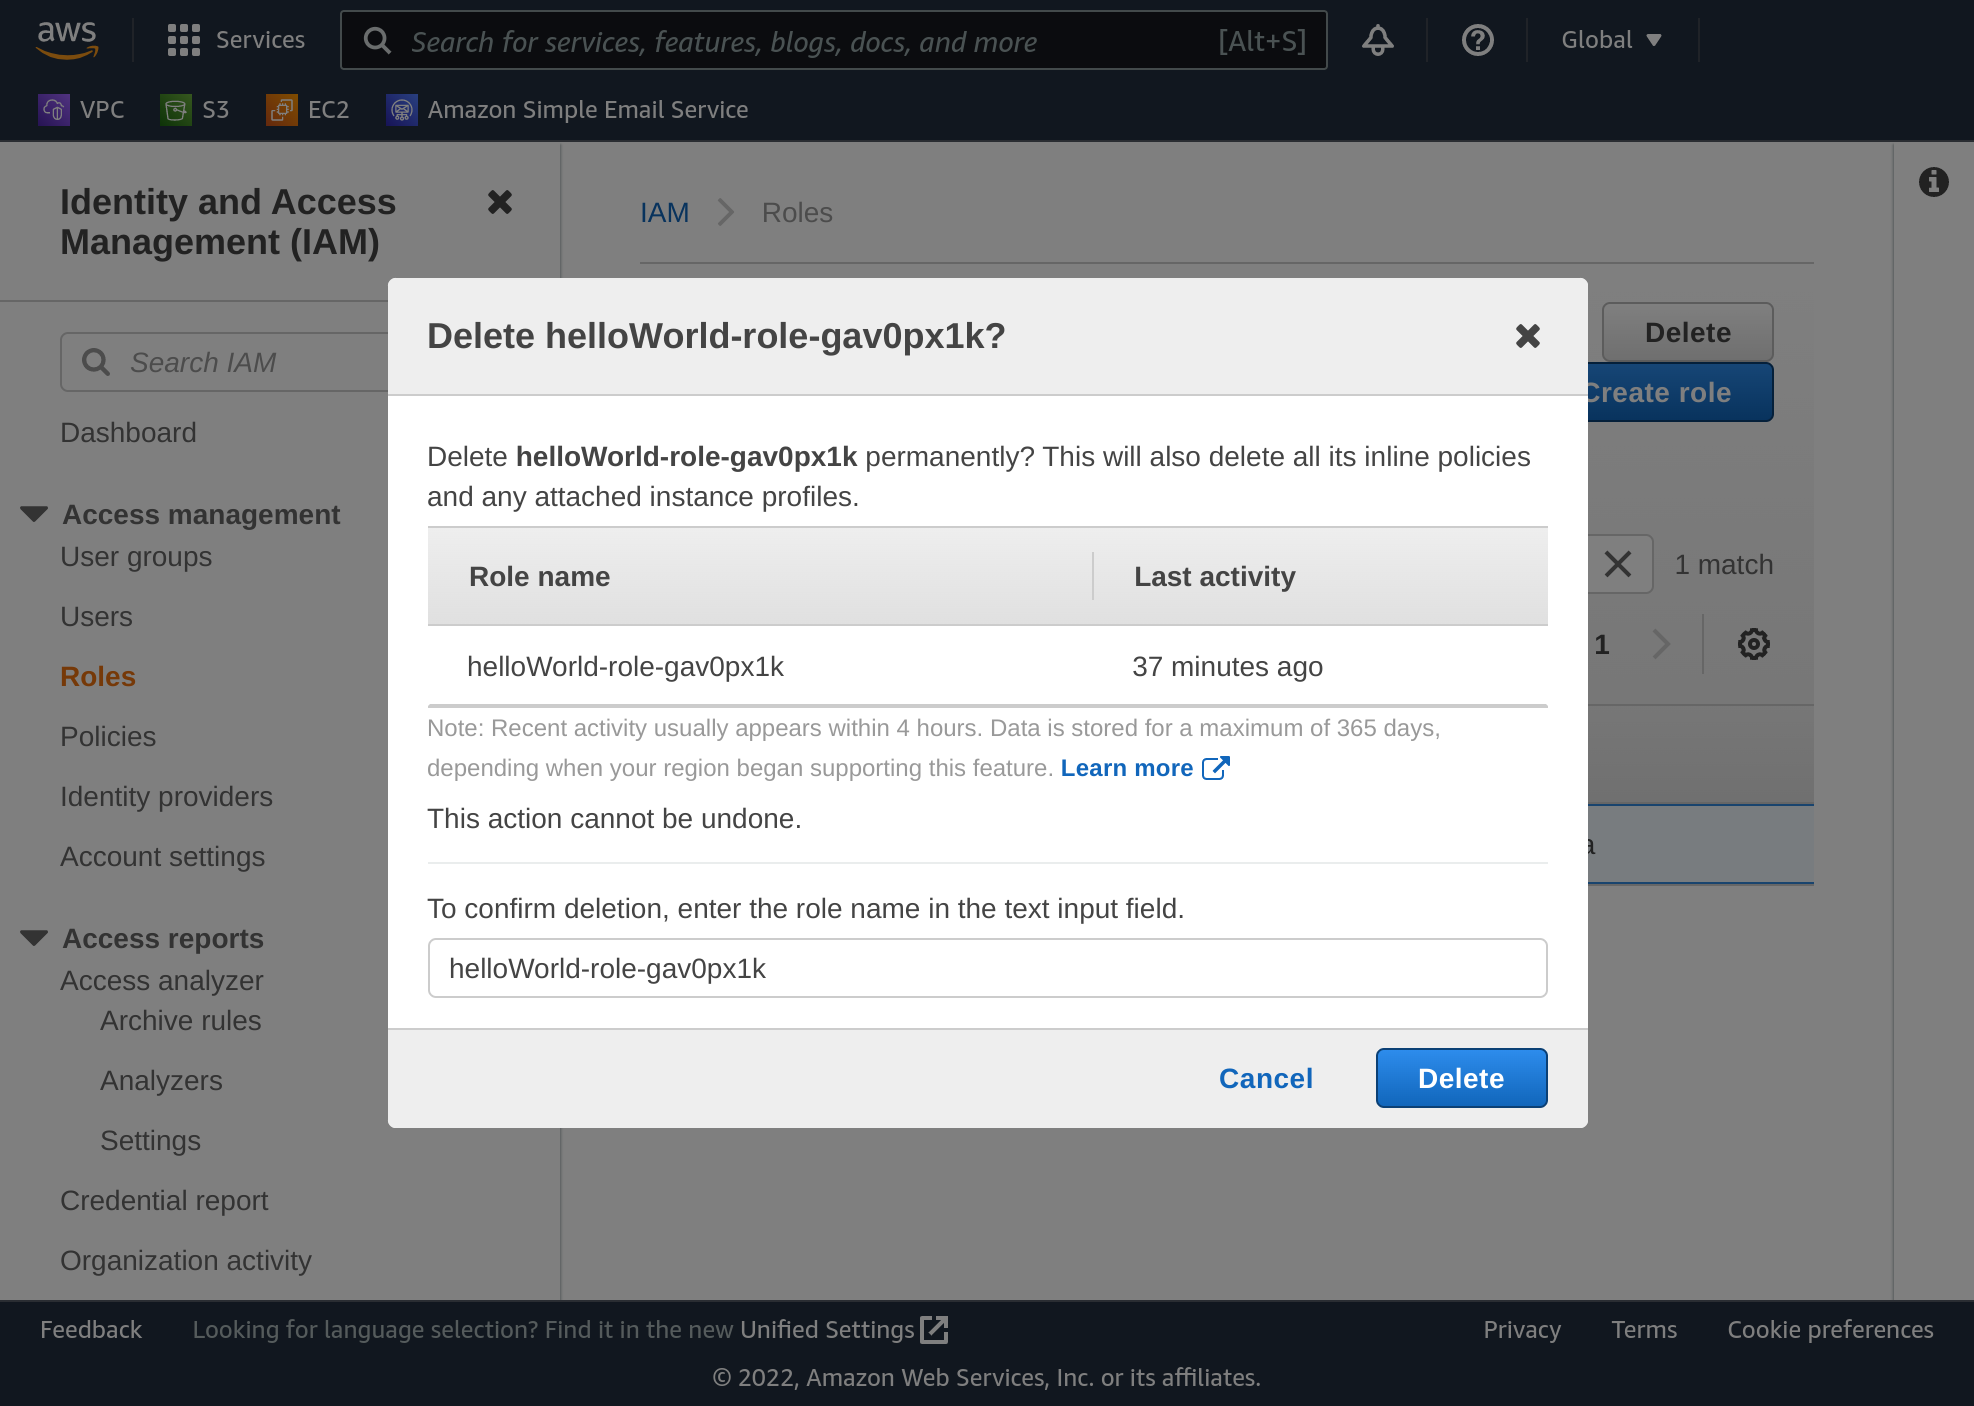
Again, AWS wants to make sure you’re deleting the correct role. Enter the role name in the box and click delete.
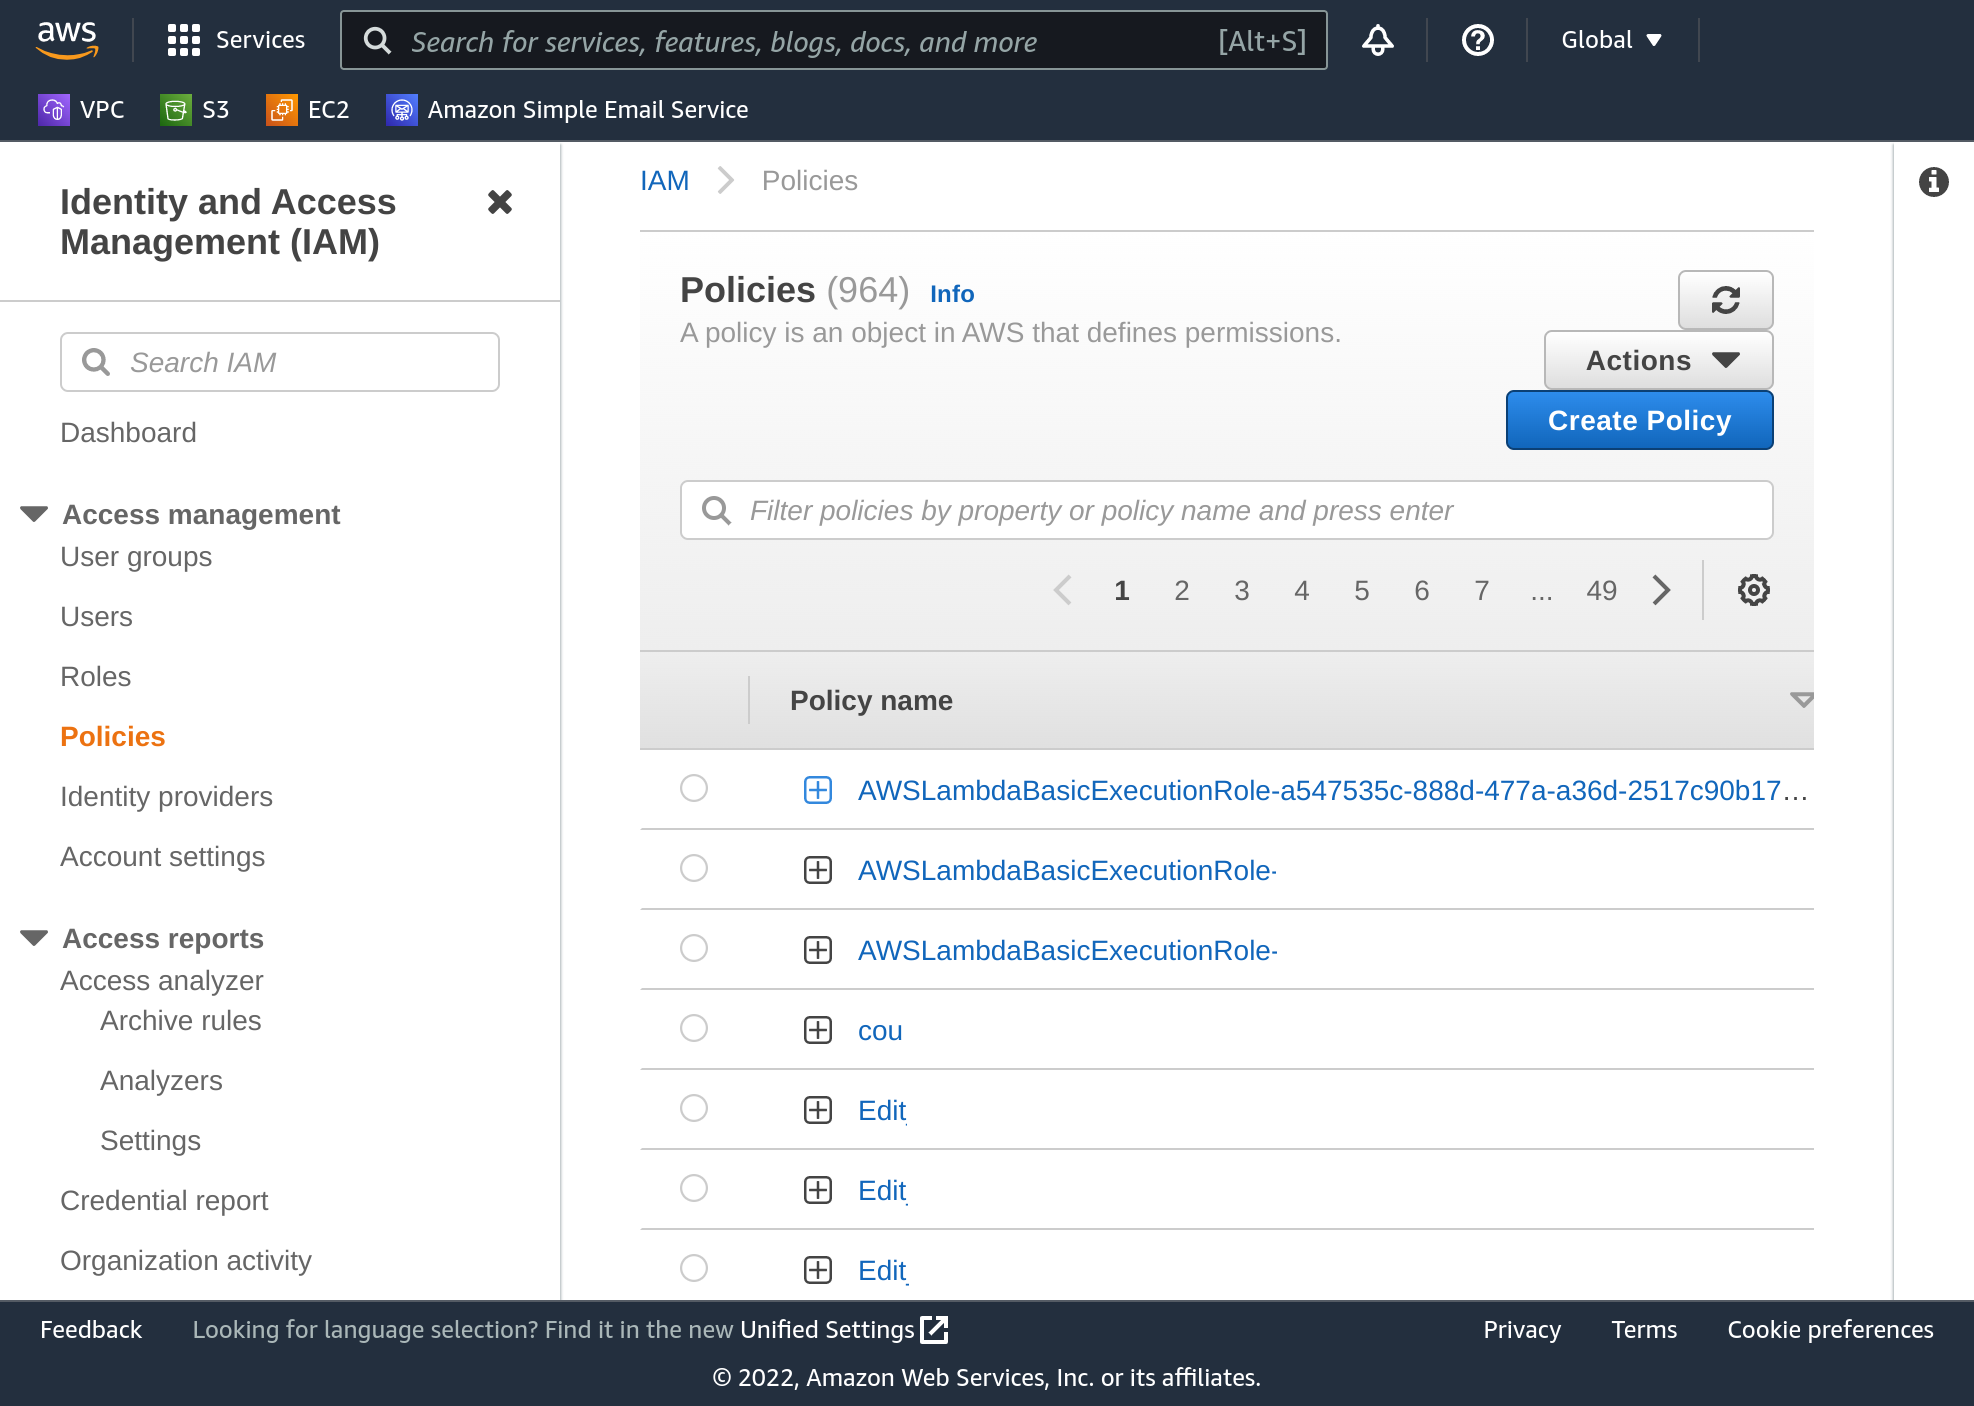
There’s actually still an IAM policy you need to delete… It was associated with that role. You can find it under “Policies” under “Access Management”. It will be named something like, AWSLambdaBasicExecutionRole.... You can see I have several… If you haven’t used Lambda before you’ll only have one though.
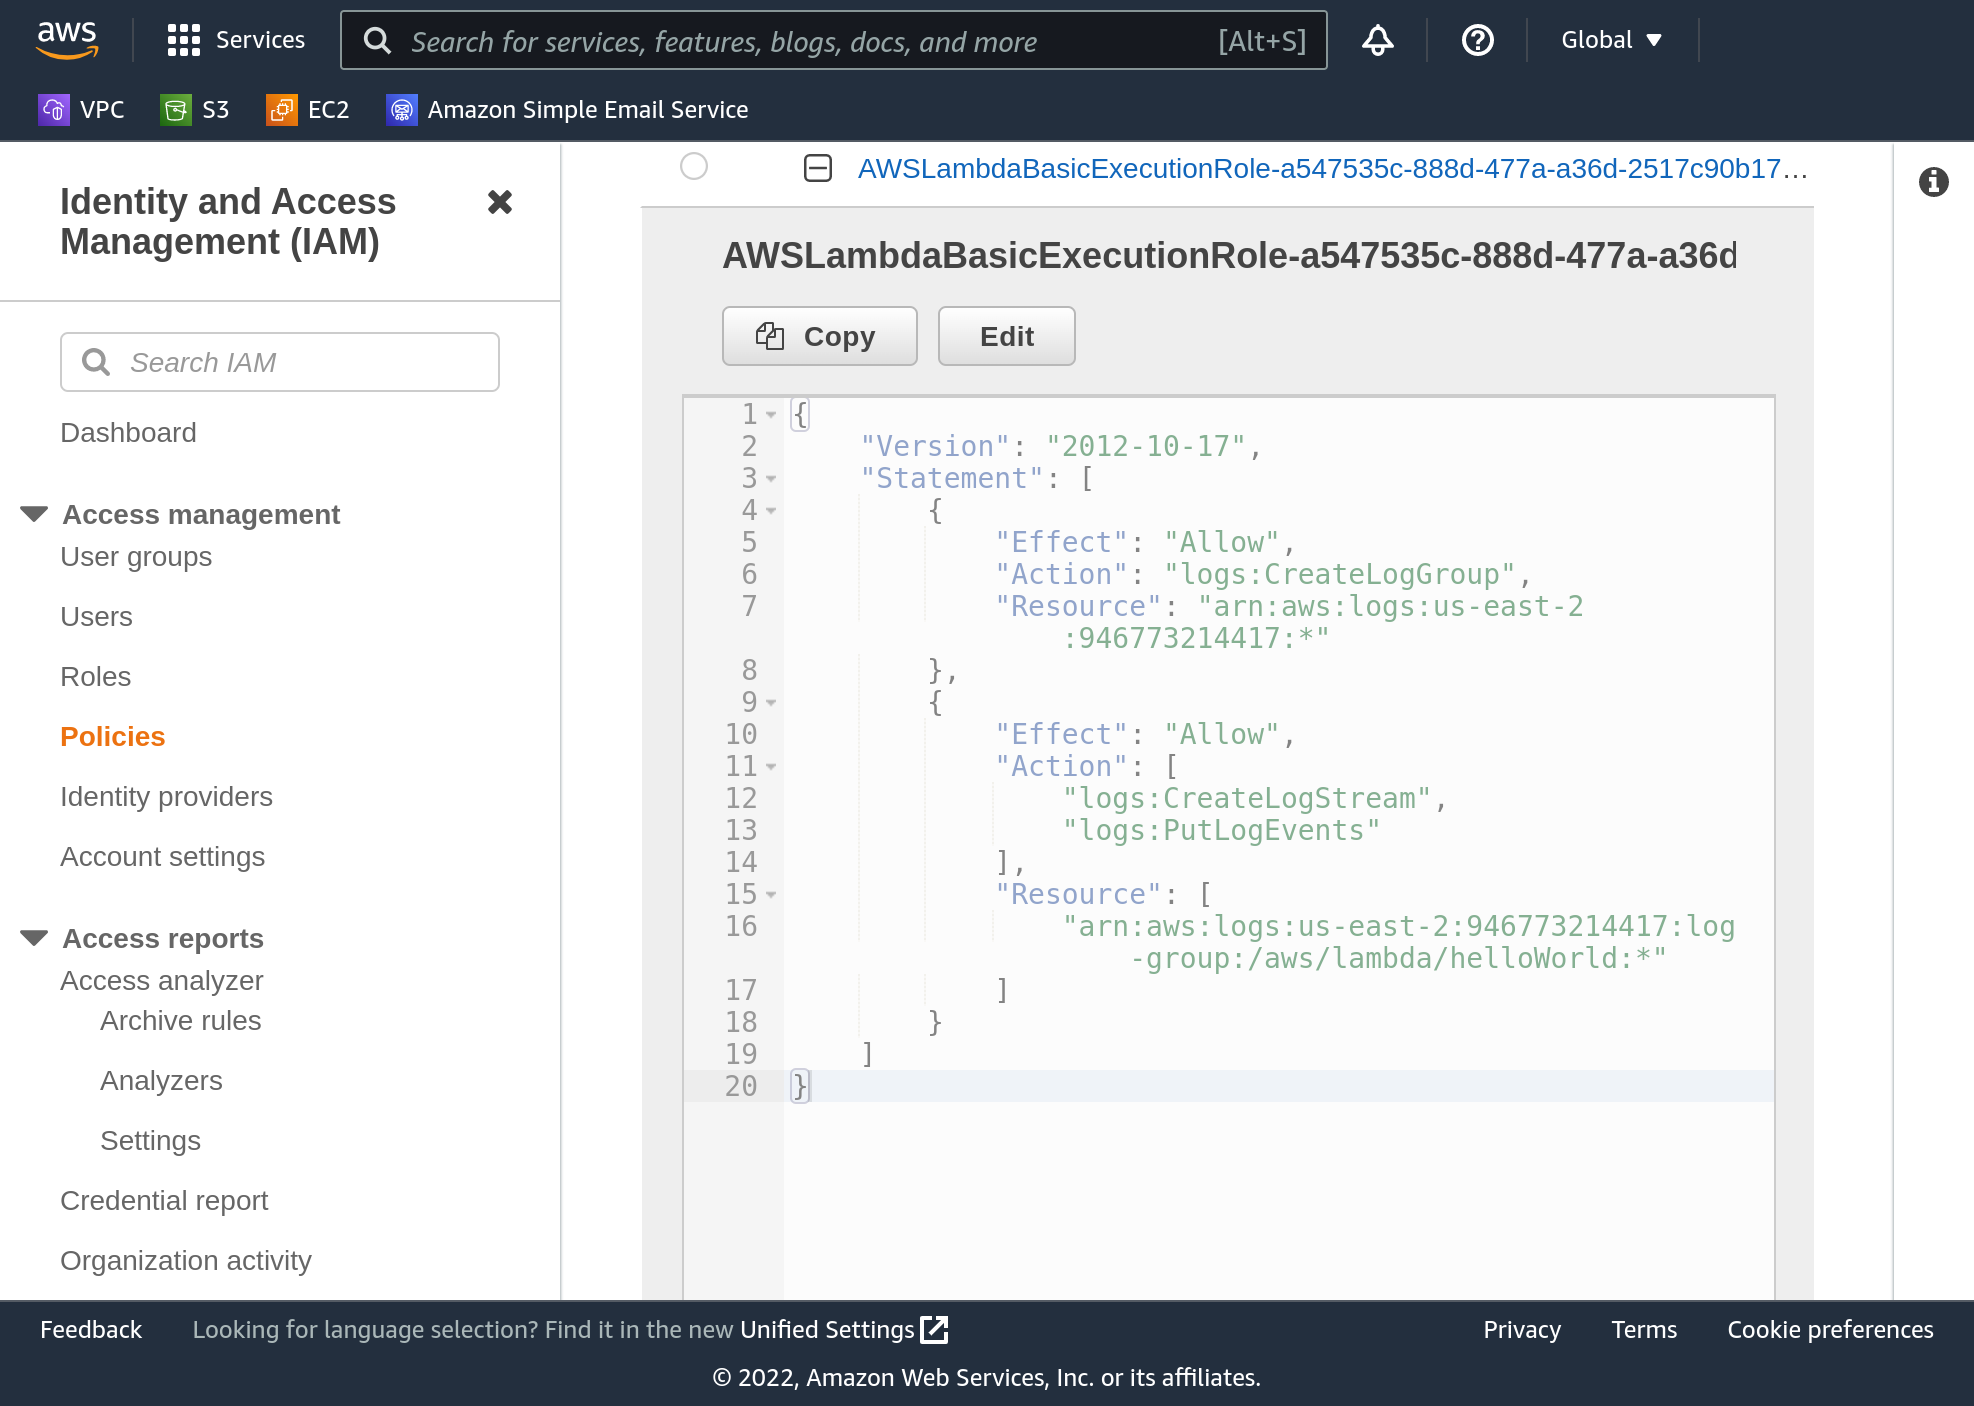
If you expand the policy by clicking the plus next to it you’ll see some complex configuration… Towards the bottom though there’s a “Resource”, and that will contain the name of your function, “helloWorld”. If you see your function name, this is right policy to delete.
Select your policy and click “actions”, “delete”.
Please take note if AWS tells you it will also detach the policy from an entity… This policy was previously attached to a role, which you deleted. AWS should not have any entity to detach the policy from! If you get this “detach” message, make sure you’ve selected the correct policy to delete.
AWS will make you re-enter the policy name to delete it. Feel free to copy and paste that policy name in there - it’s quite long.
Conclusion
You successfully created a Lambda function with a function URL, written in the Python programming language, modified it to do a simple calculation, then deleted it and the resources associated with it. All of this experimentation falls under AWS’s free tier usage so it shouldn’t have cost you one cent.
Now you’re ready to save the world!
Hint - what if the parameters num1 and num2 aren't numbers?